

Managing Vault Items
Adding Items to the Vault
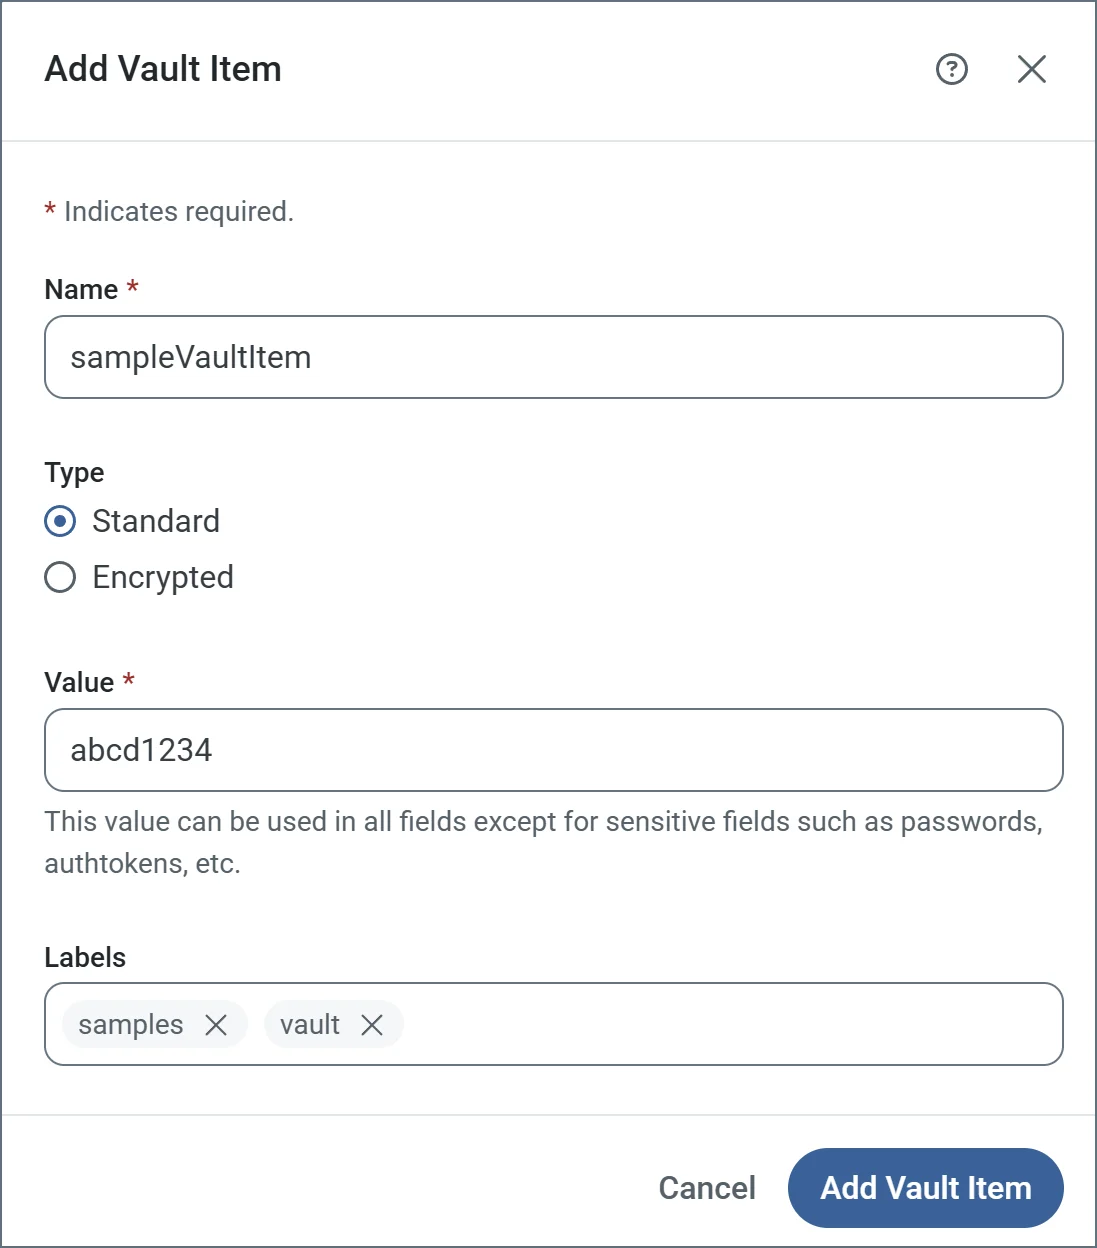
There are two ways to add an item to the vault:- Click Add Vault Item at the top of the vault table.
-
Enter a value in a field elsewhere in , click the key symbol, and select Add to Vault.

- Name: The name of the vault item as it appears when you use it.
-
Type: The classification for the vault item.
- Standard items can be used in all non-sensitive fields. Examples of standard items include URLs, usernames, and ports.
- Encrypted items can only be used in sensitive fields. Examples of encrypted items include passwords and authtokens.
- Value: The actual value that the vault item contains. For example, the URL, username, or password that you want to use when this vault item is selected.
-
Labels: (Optional) Labels for the vault item that make it easier to manage and search through large vaults. Separate each label with a comma or new-line character.
Editing Vault Items
To edit a vault item, click its name or hover over it, then click the ellipses and choose Edit. The Edit Vault Item pane opens and allows you to edit the name, value, and labels for the item. Note that item Ids and types (standard or encrypted) cannot be edited after creation. To delete multiple vault items, check the box next to each item and click Remove.Using Vault Items
When an item is added to the vault, it can be used in fields that match the item type (standard or encrypted) and display a key symbol in the UI:
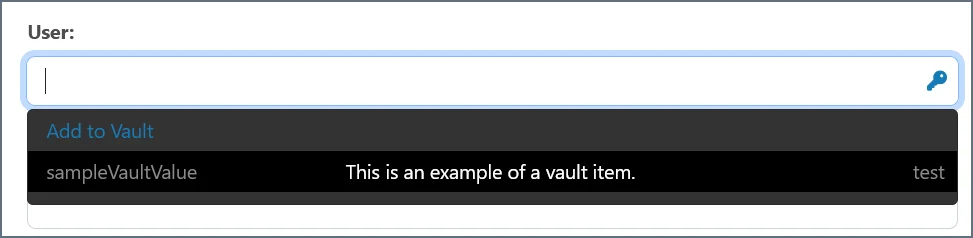
If you already have a value in the field, you can click Add to Vault to open the Add Vault Item page as outlined above.
Scripting
Vault items can be used in ArcScript contexts. For more information, please see Functions.Use caution when referring to encrypted vault items in scripting contexts to ensure that sensitive information is not included in the logs.