

Key Capabilities
- Custom business logic implementation using Script or Python
- Access to full message context including message headers and file content
- Integration with external libraries and system commands (Python)
- Support for complex data transformations and business rule processing
Overview
Script connectors use the powerful Script scripting language to accomplish a wide range of custom behavior. The script configured in the connector is run each time a document is placed in the Transactions tab for the connector. The input document can be read and modified in the script, or the input document can simply trigger an external function configured in the connector. Script connectors can also be configured to run on a schedule via Receive automation on the Automation tab. These are a few of the tasks you can configure a Script connector to do:- Replace values in the input document with data returned from custom SQL queries
- Call a custom Web service to invoke a specialized workflow
- Run an external script or executable via the sysExecute operation
Connector Configuration
This section contains all of the configurable connector properties.Script Tab
Options related to writing and testing the script.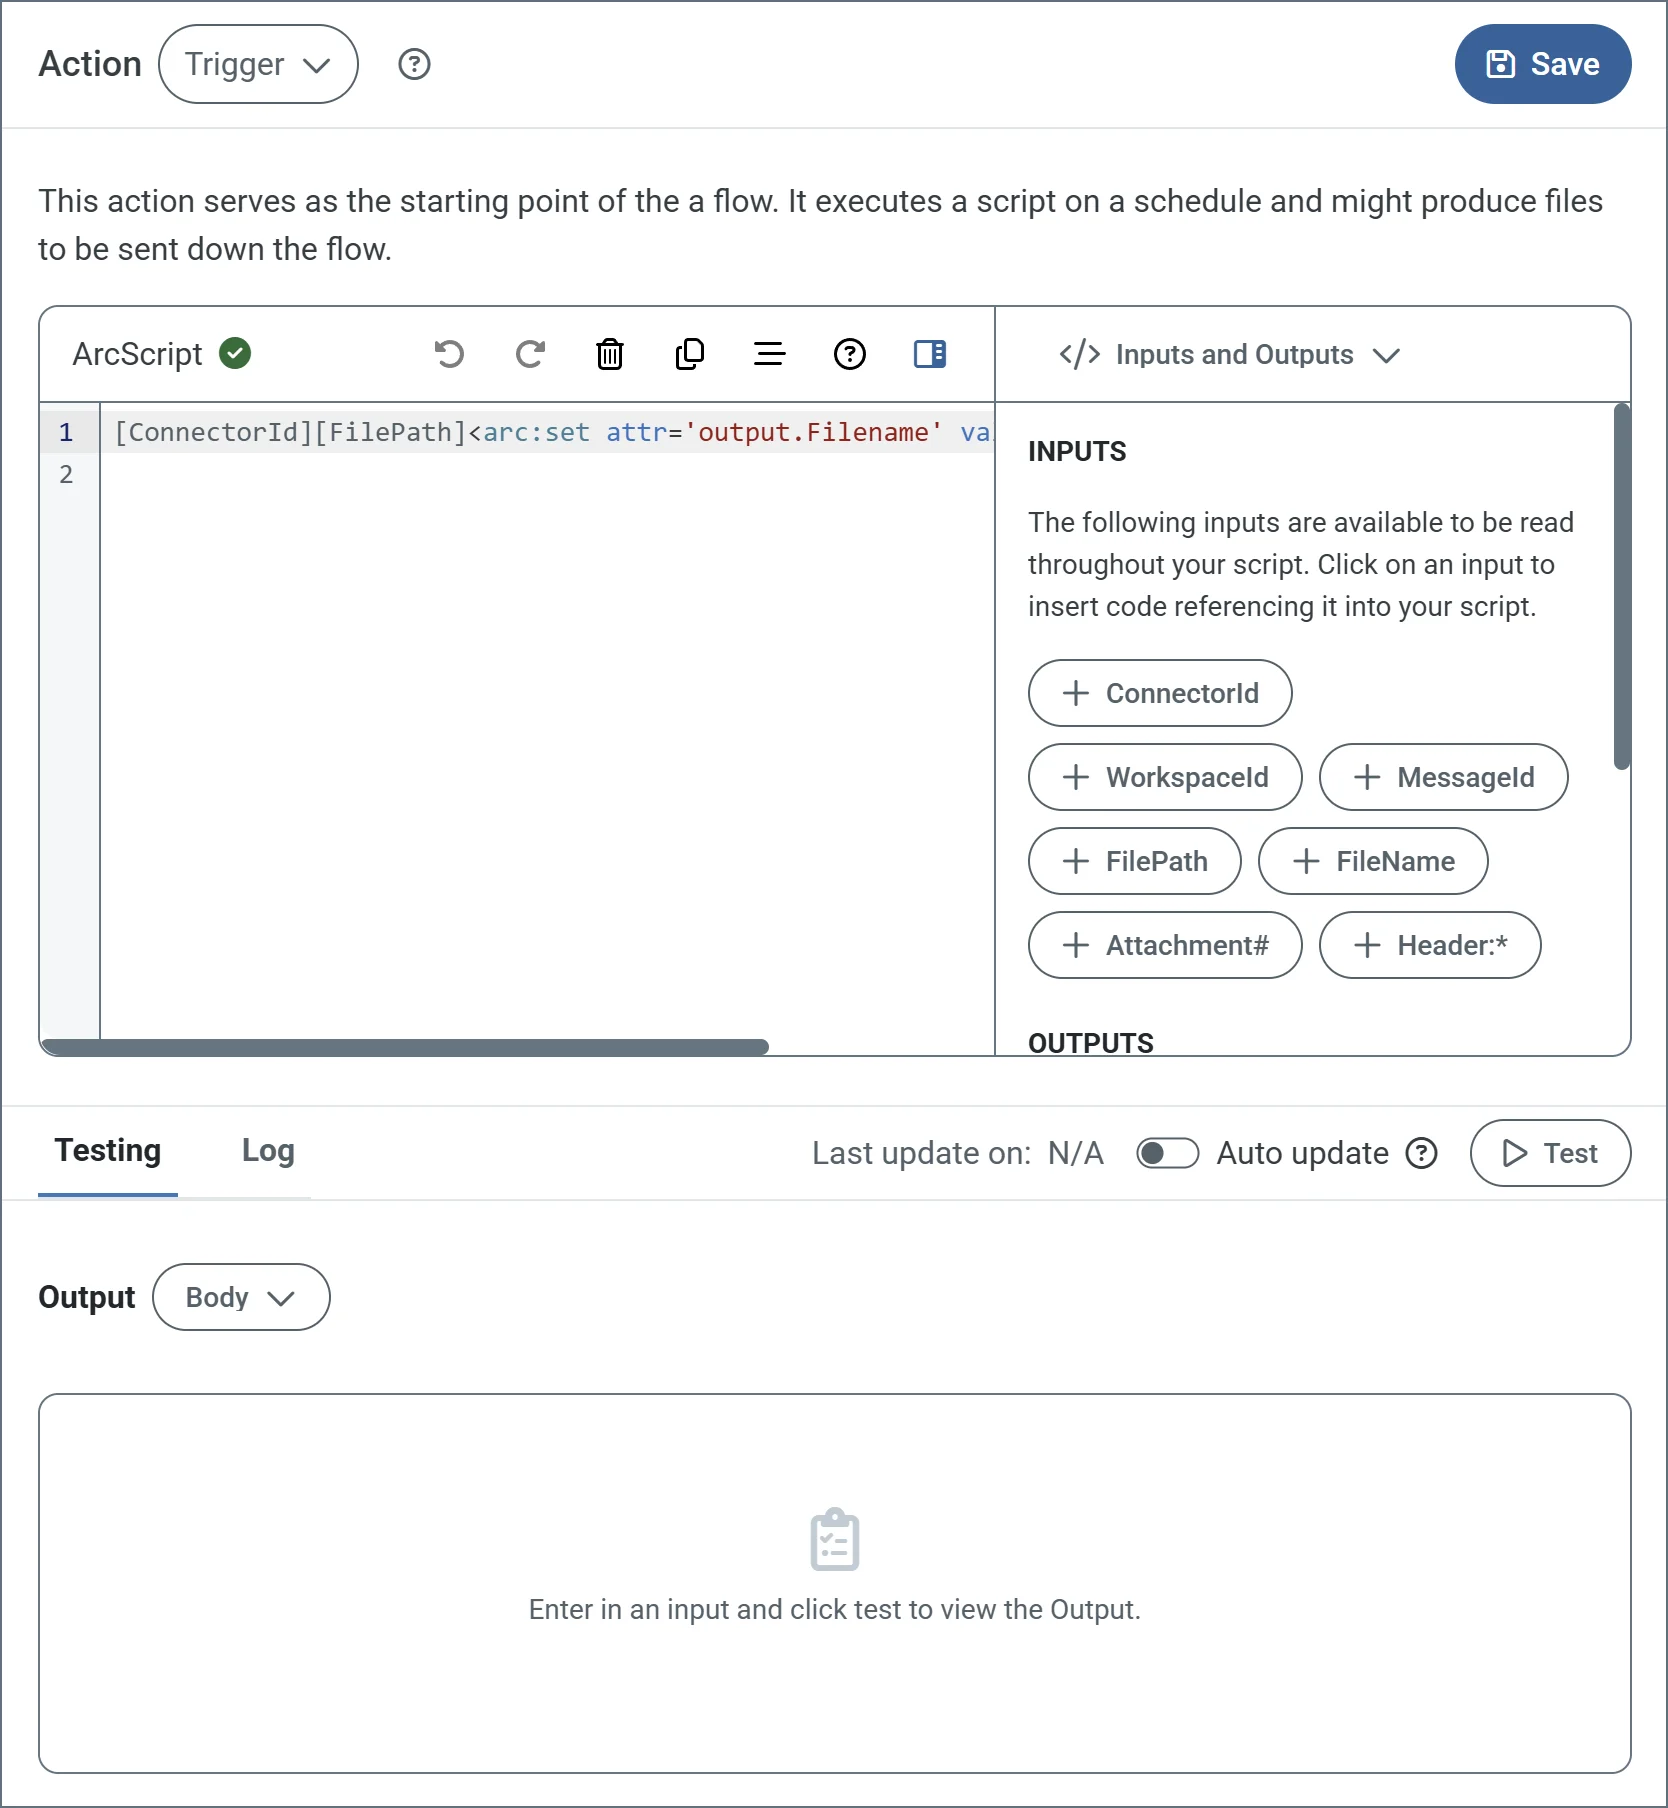
| Setting | Description |
|---|---|
| Action dropdown | Choose the connector’s action. (See Actions for details on the three options.) |
| Script editor | Use the editor to write your script. The toolbar contains standard editing options such as undo, redo, delete, copy, and format. It also includes an option to hide the Insert Options in the right pane. |
| Insert Options | The panel in the right pane makes it easy to insert code into your script with one click. The dropdown includes Inputs and Outputs (such as ConnectorId or Encoding—the available options depend on the configured Action), Snippets, Keywords, Operators and Formatters. Find the code you want to insert, and click to add it. |
| Testing tab | Specify whether to view the script input and/or output as the message body or headers. Options on this tab vary based on the script’s action type (for example, trigger scripts do not have inputs). Click Test to test the script. |
| Log tab | Displays the test log. |
| Last update on | Displays the datetime the script was last modified and saved. |
| Auto update | Use the toggle to automatically test the script after each modification. |
Actions
Settings Tab
Configuration
Settings related to the core operation of the connector.Advanced Settings
| Setting | Description |
|---|---|
| Local File Scheme | A scheme for assigning filenames to messages that are output by the connector. You can use macros in your filenames dynamically to include information such as identifiers and timestamps. For more information, see Macros. |
Advanced Tab
Message
Logging
Other Settings
| Setting | Description |
|---|---|
| Processing Delay | The amount of time (in seconds) by which the processing of files placed in the Transactions tab is delayed. This is a legacy setting. Best practice is to use a File connector to manage local file systems instead of this setting. |
Miscellaneous
Automation Tab
Automation Settings
Settings related to the automatic processing of files by the connector.| Setting | Description |
|---|---|
| Send | Whether messages arriving at the connector are automatically processed. |
| Retry Interval | The number of minutes that the connector waits before retrying a failed script execution. |
| Max Attempts | The number of times that the connector retries a failed script execution before raising an error. |
| Receive | Whether the connector should automatically run the script on a configured schedule. |
| Receive Execution Interval | The unit of measure to use for the receive automation schedule (such as Minutes, Hours, or Days). |
| Minutes Past the Hour | The minutes offset for an hourly schedule. Only applicable when the interval setting above is set to Hourly. |
| Time | The time of day that the attempt should occur. Only applicable when the interval setting above is set to Daily, Weekly, or Monthly. |
| Day | The day on which the attempt should occur. Only applicable when the interval setting above is set to Weekly or Monthly. |
| Minutes | The number of minutes to wait before attempting the download. Only applicable when the interval setting above is set to Minute. |
| Cron Expression | A five-position string representing a cron expression that determines when the attempt should occur. Only applicable when the interval setting above is set to Advanced. |
Performance
Alerts Tab
SLAs Tab
Transactions Tab
This tab lists all messages associated with the connector. Use the search bar to find specific messages, or click the funnel icon to apply a filter. You can filter by time, message direction, and/or status. Options on this tab vary depending on the connector’s action type:- If your connector is a Trigger, use the Receive button to start the flow.
- If your connector is a Transform or Terminal, use the Upload Files button to upload files to the flow.
Using the arc:push Keyword
The arc:push keyword is commonly used in Script connectors to pass items to the output feed of the script. In addition, when you select an Output attribute from the Insert Options menu, if anarc:push keyword is not already included in the script, auto-injects it so the script can work. Following are three common use cases.
1 Create and output a file: