

To create and manage users, navigate to the Settings page, then the Users tab. This tab includes a table of all users, and includes information about their roles, their user type and status, whether they are temporary users, their two-factor authentication (2FA) status, and more.
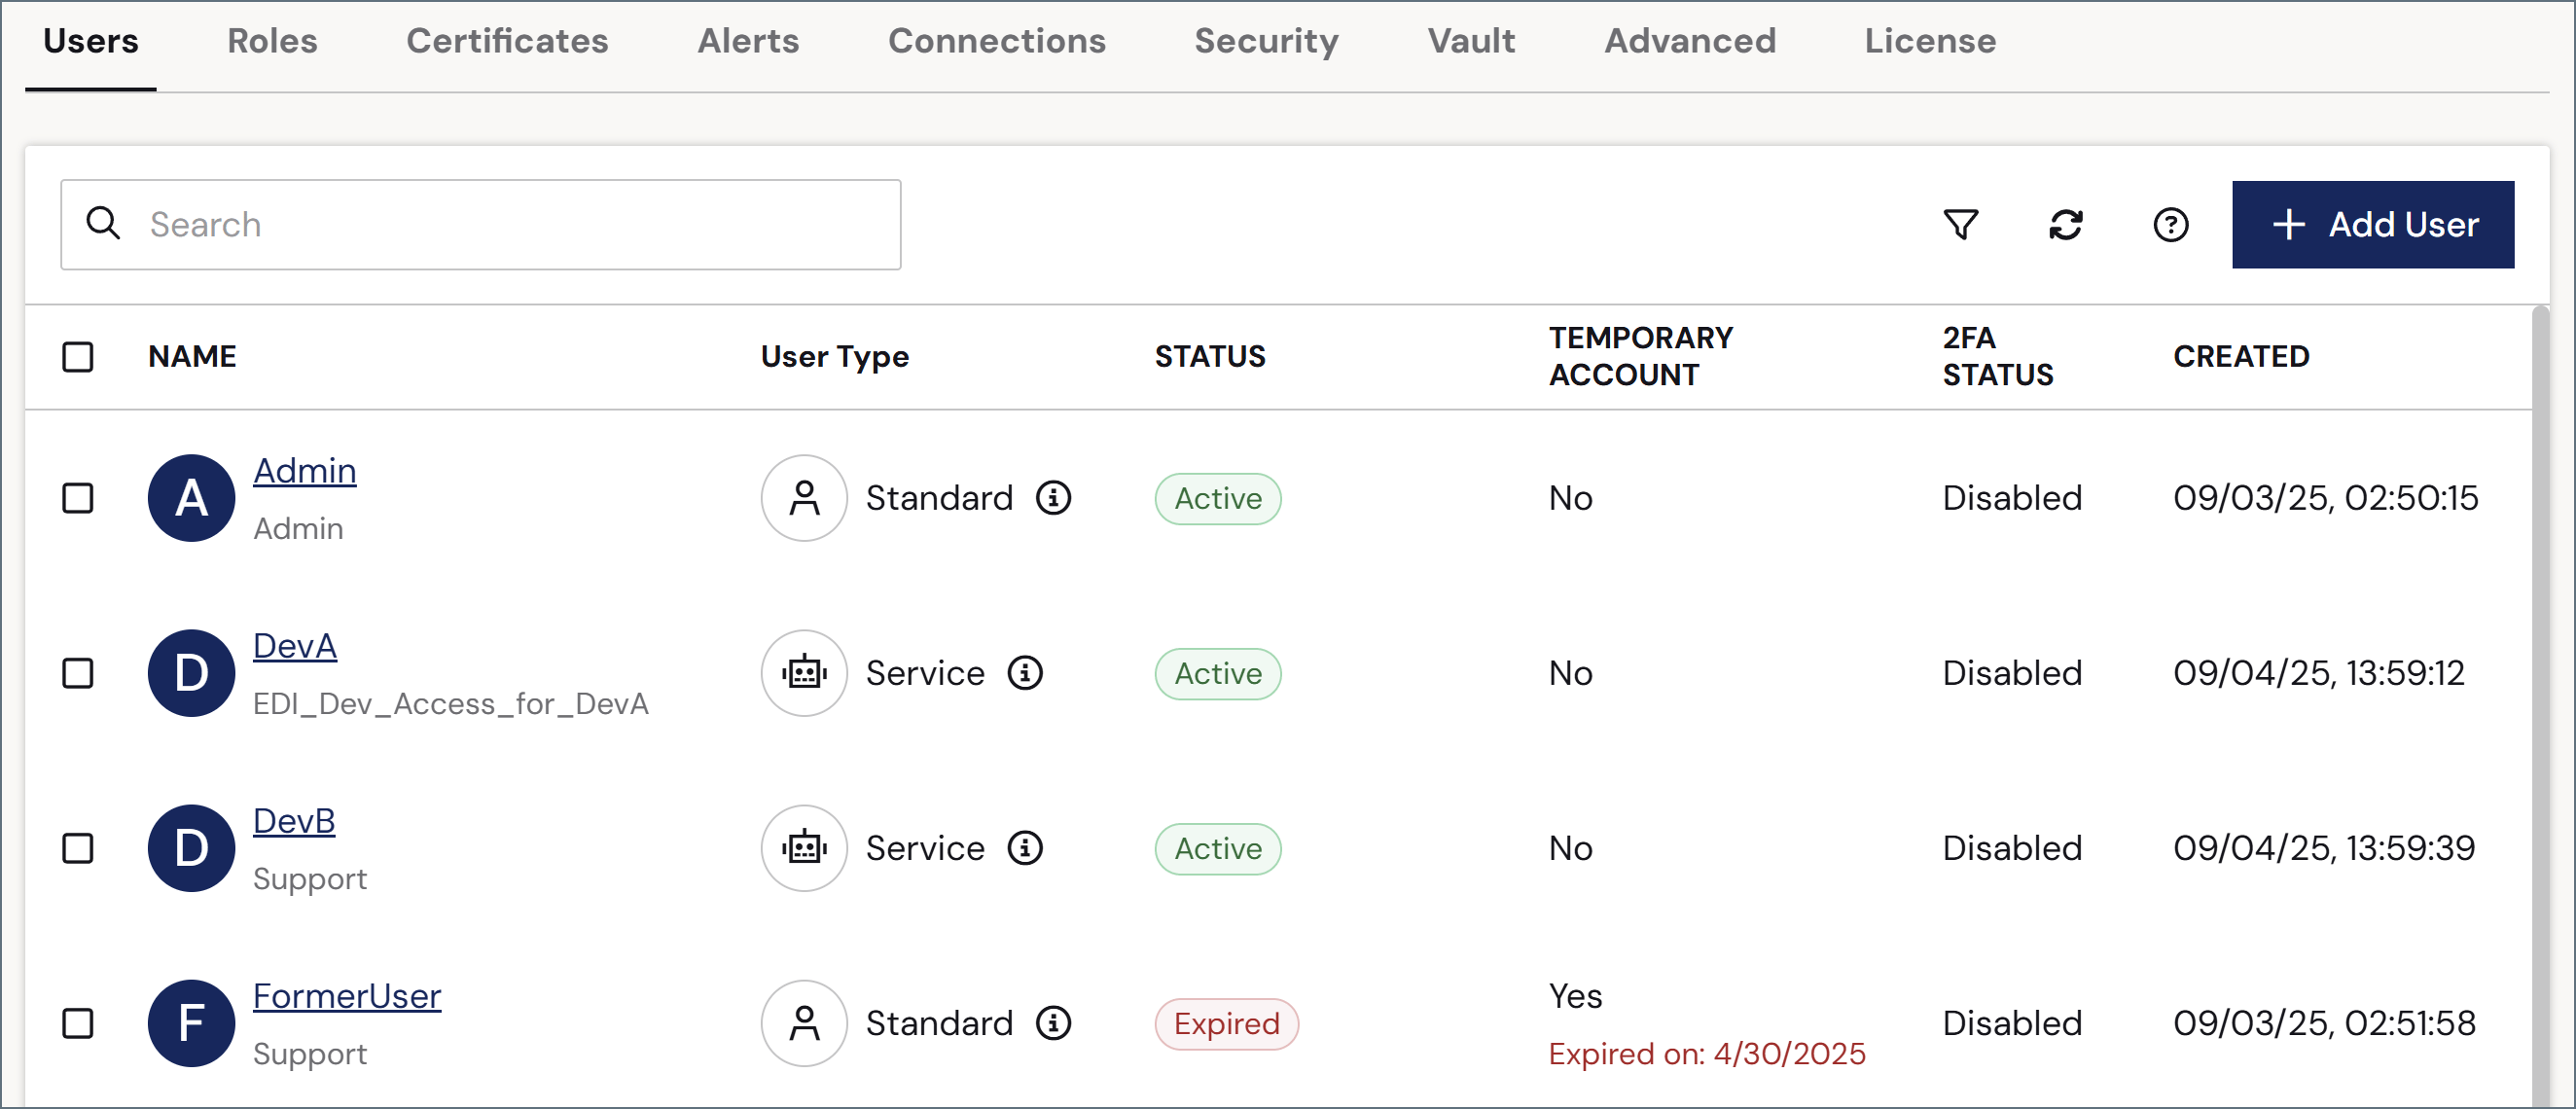
If you use AD/LDAP to manage user credentials, user names must be in the format
domain\username.Add or Edit Users
To add a user, click Add User. To edit an existing user, hover over their row in the table, click the ellipses, then choose Edit. The following image shows adding a new user to the application.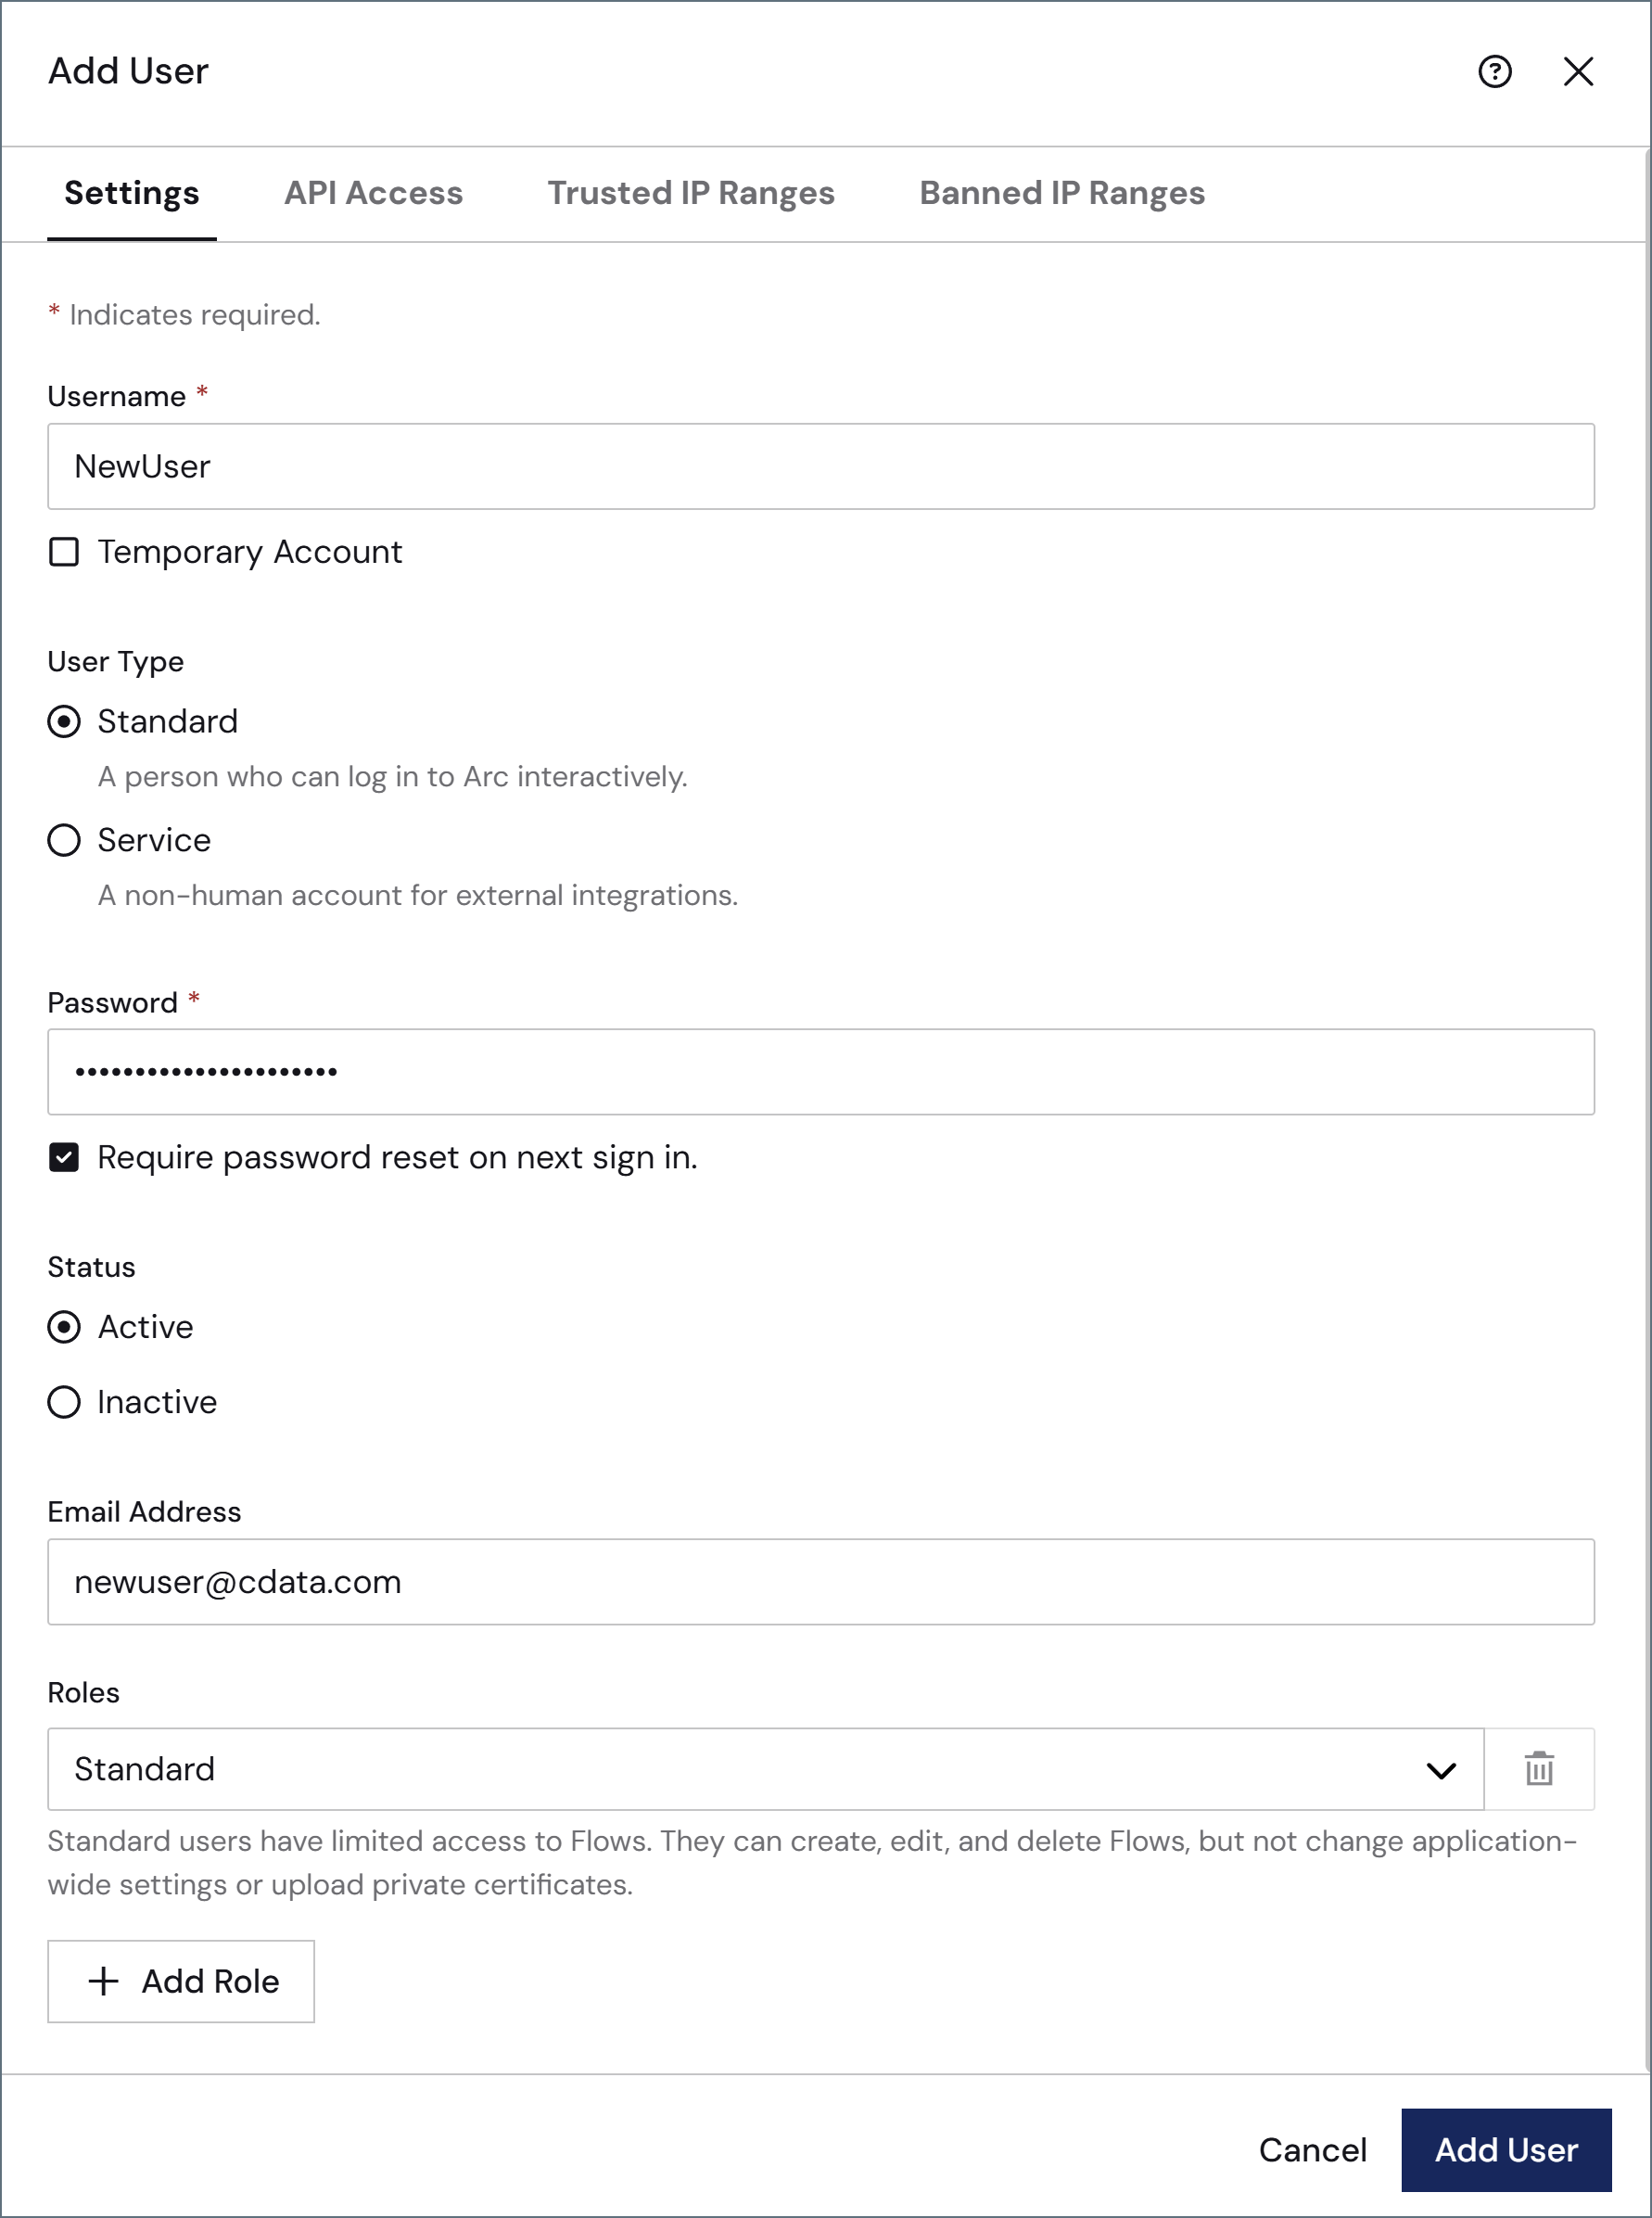
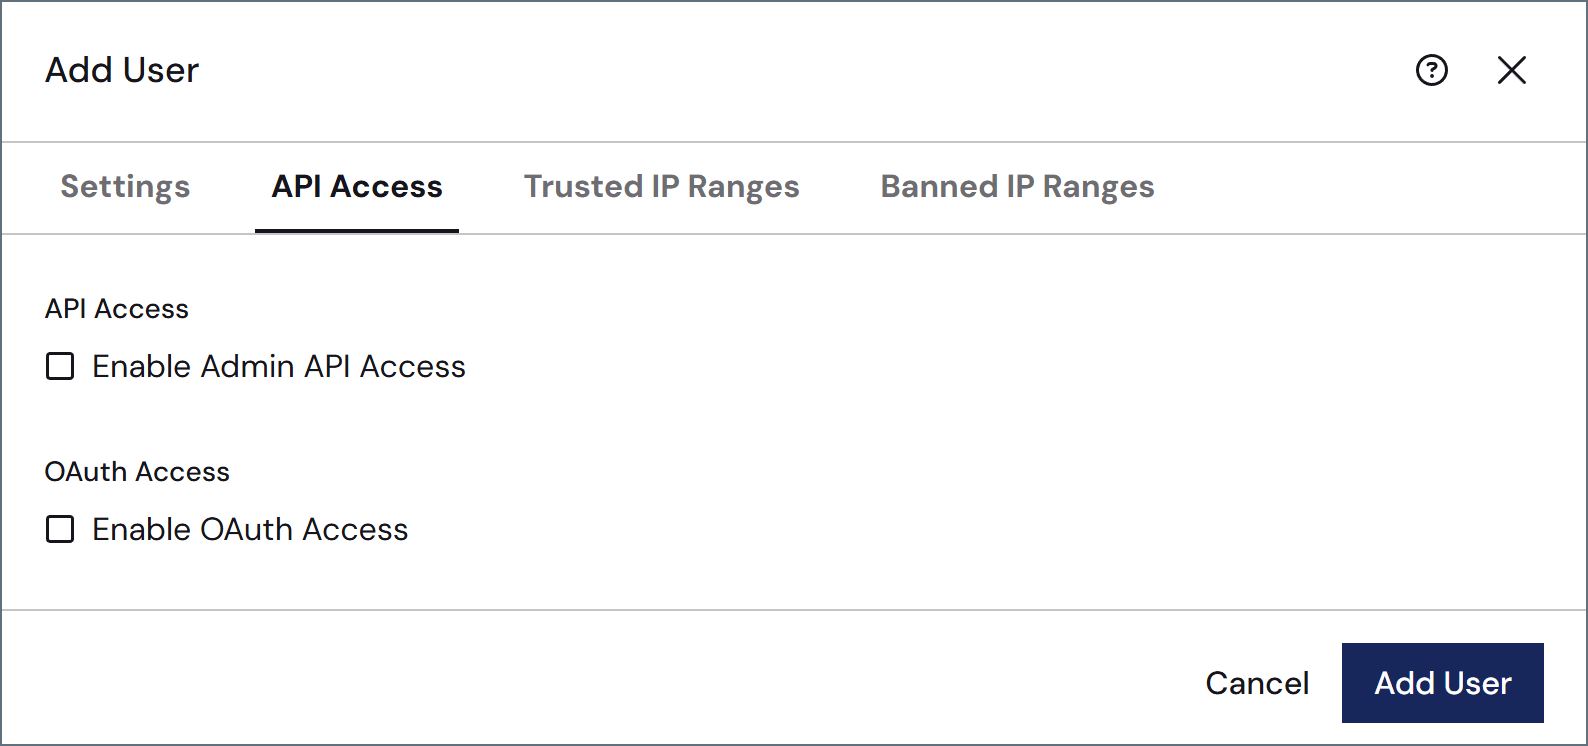
To give the new user Admin API and/or OAuth access, click the API Access tab.
To add trusted or banned IP ranges specific to this user, click the Trusted IP Ranges or Banned IP Ranges tabs to add the ranges. You can provide single IP addresses, simple ranges (such as
203.0.113.* or 203.0.113.1-255), or Classless Inter-Domain Routing (CIDR) ranges. These tabs also display the global trusted and banned ranges that have been defined on the Network Access portion of the Settings > Security page.
User Types
supports two user types:- Standard accounts are for people who sign in to the console interactively with a username and password.
- Service accounts are for automated, machine-to-machine access, such as invoking Flow API endpoints or calling the Admin API. Service accounts do not sign in interactively, so the Password field is hidden; instead, they authenticate only with an authtoken or OAuth client credentials configured on the API Access tab. For example, you might pair a service account with a role that grants only the Flow API Invoke permission to let it call specific endpoints without any access to, or visibility into, the UI.