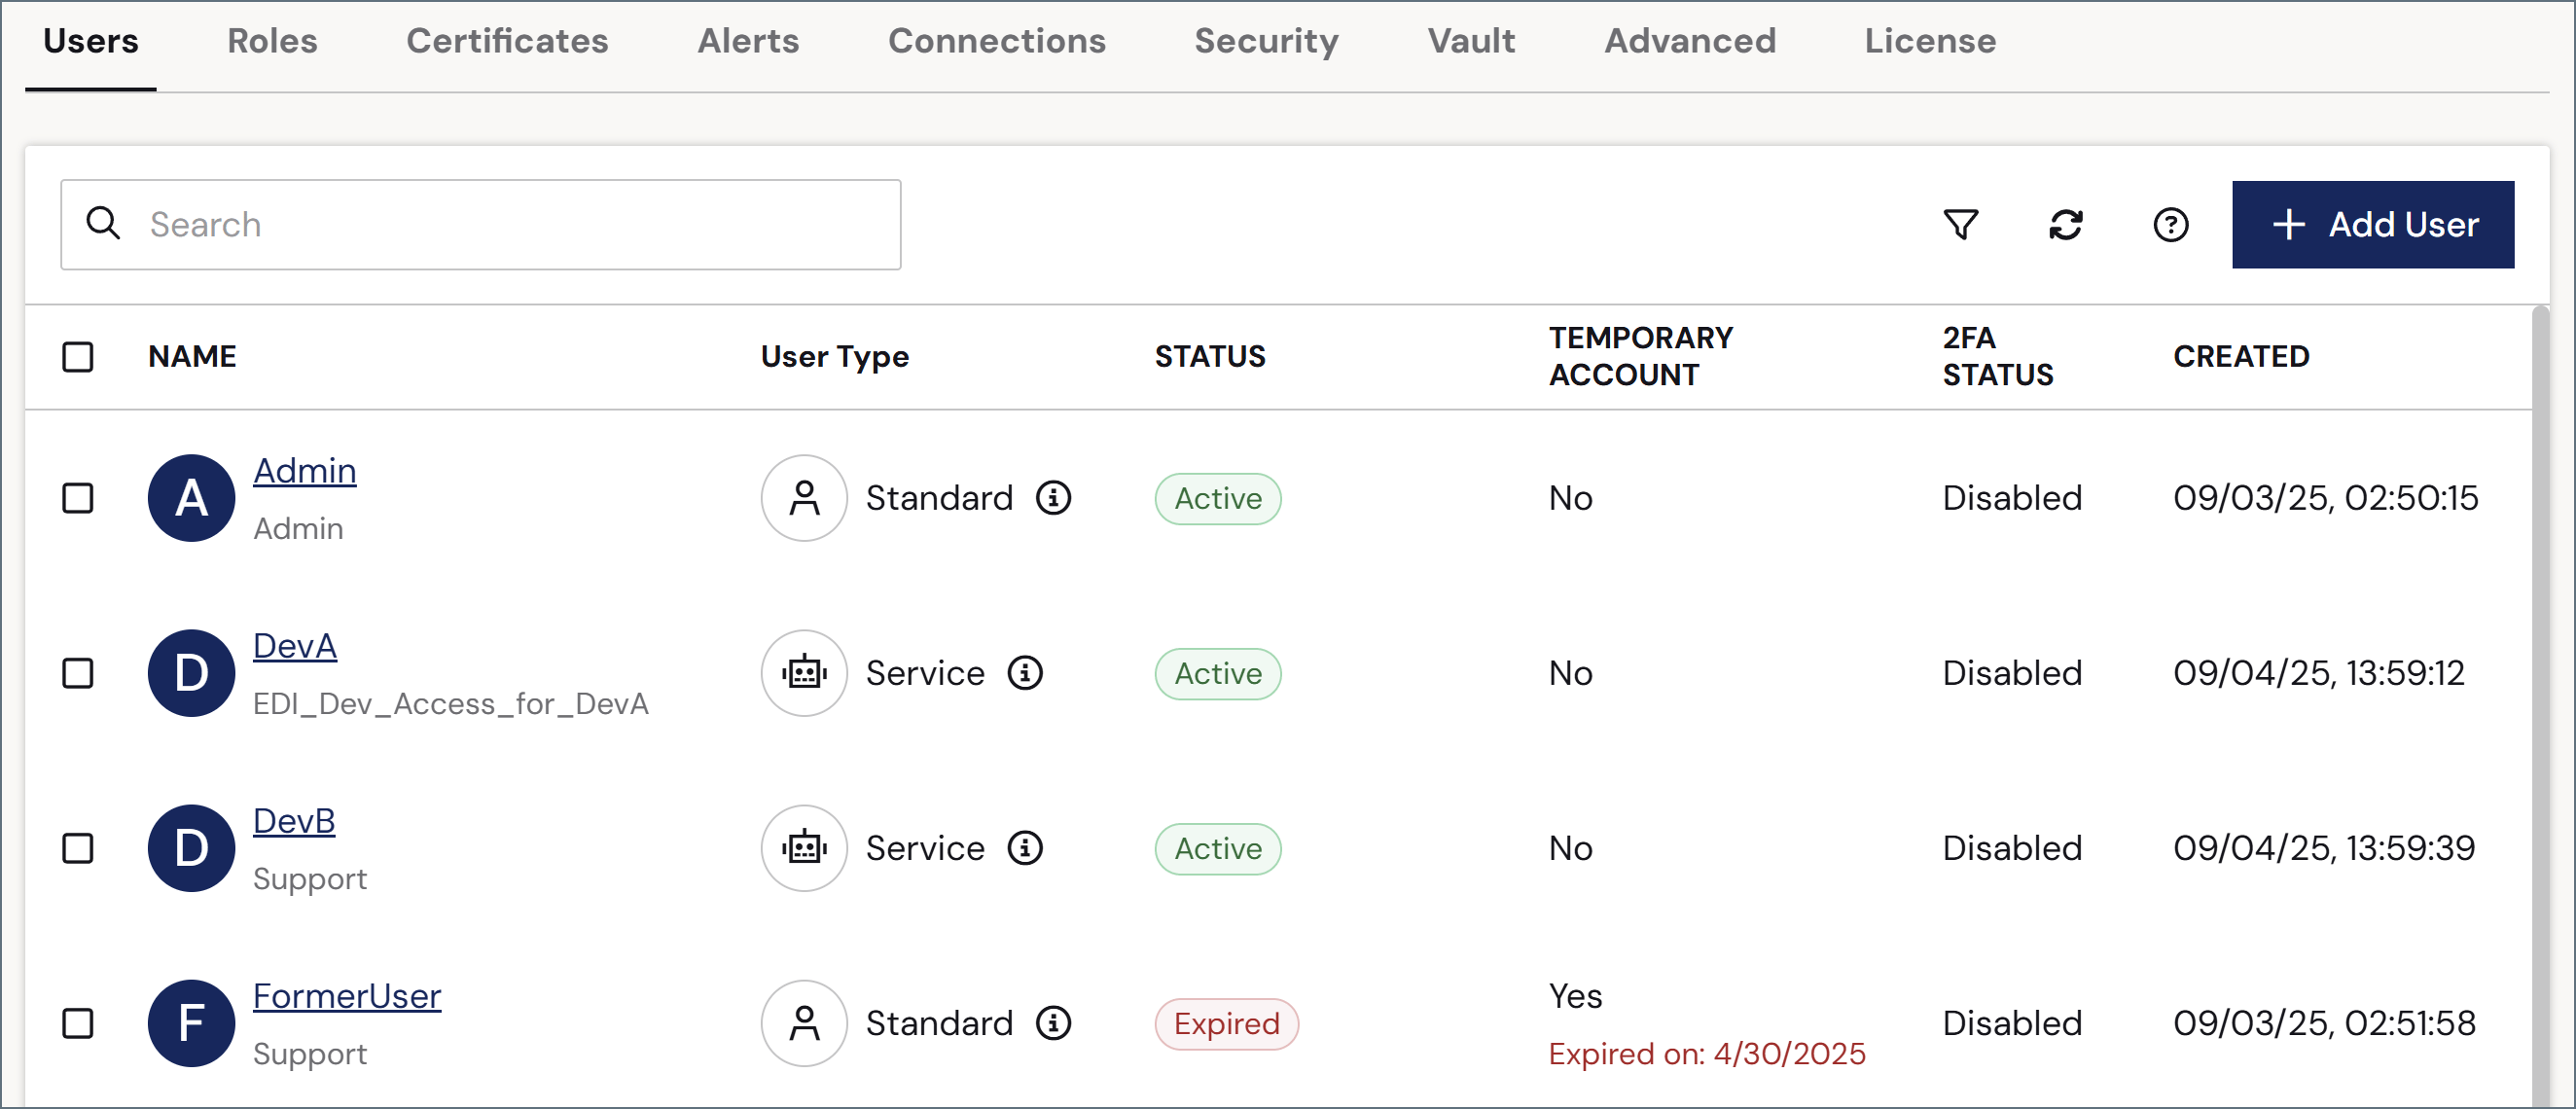
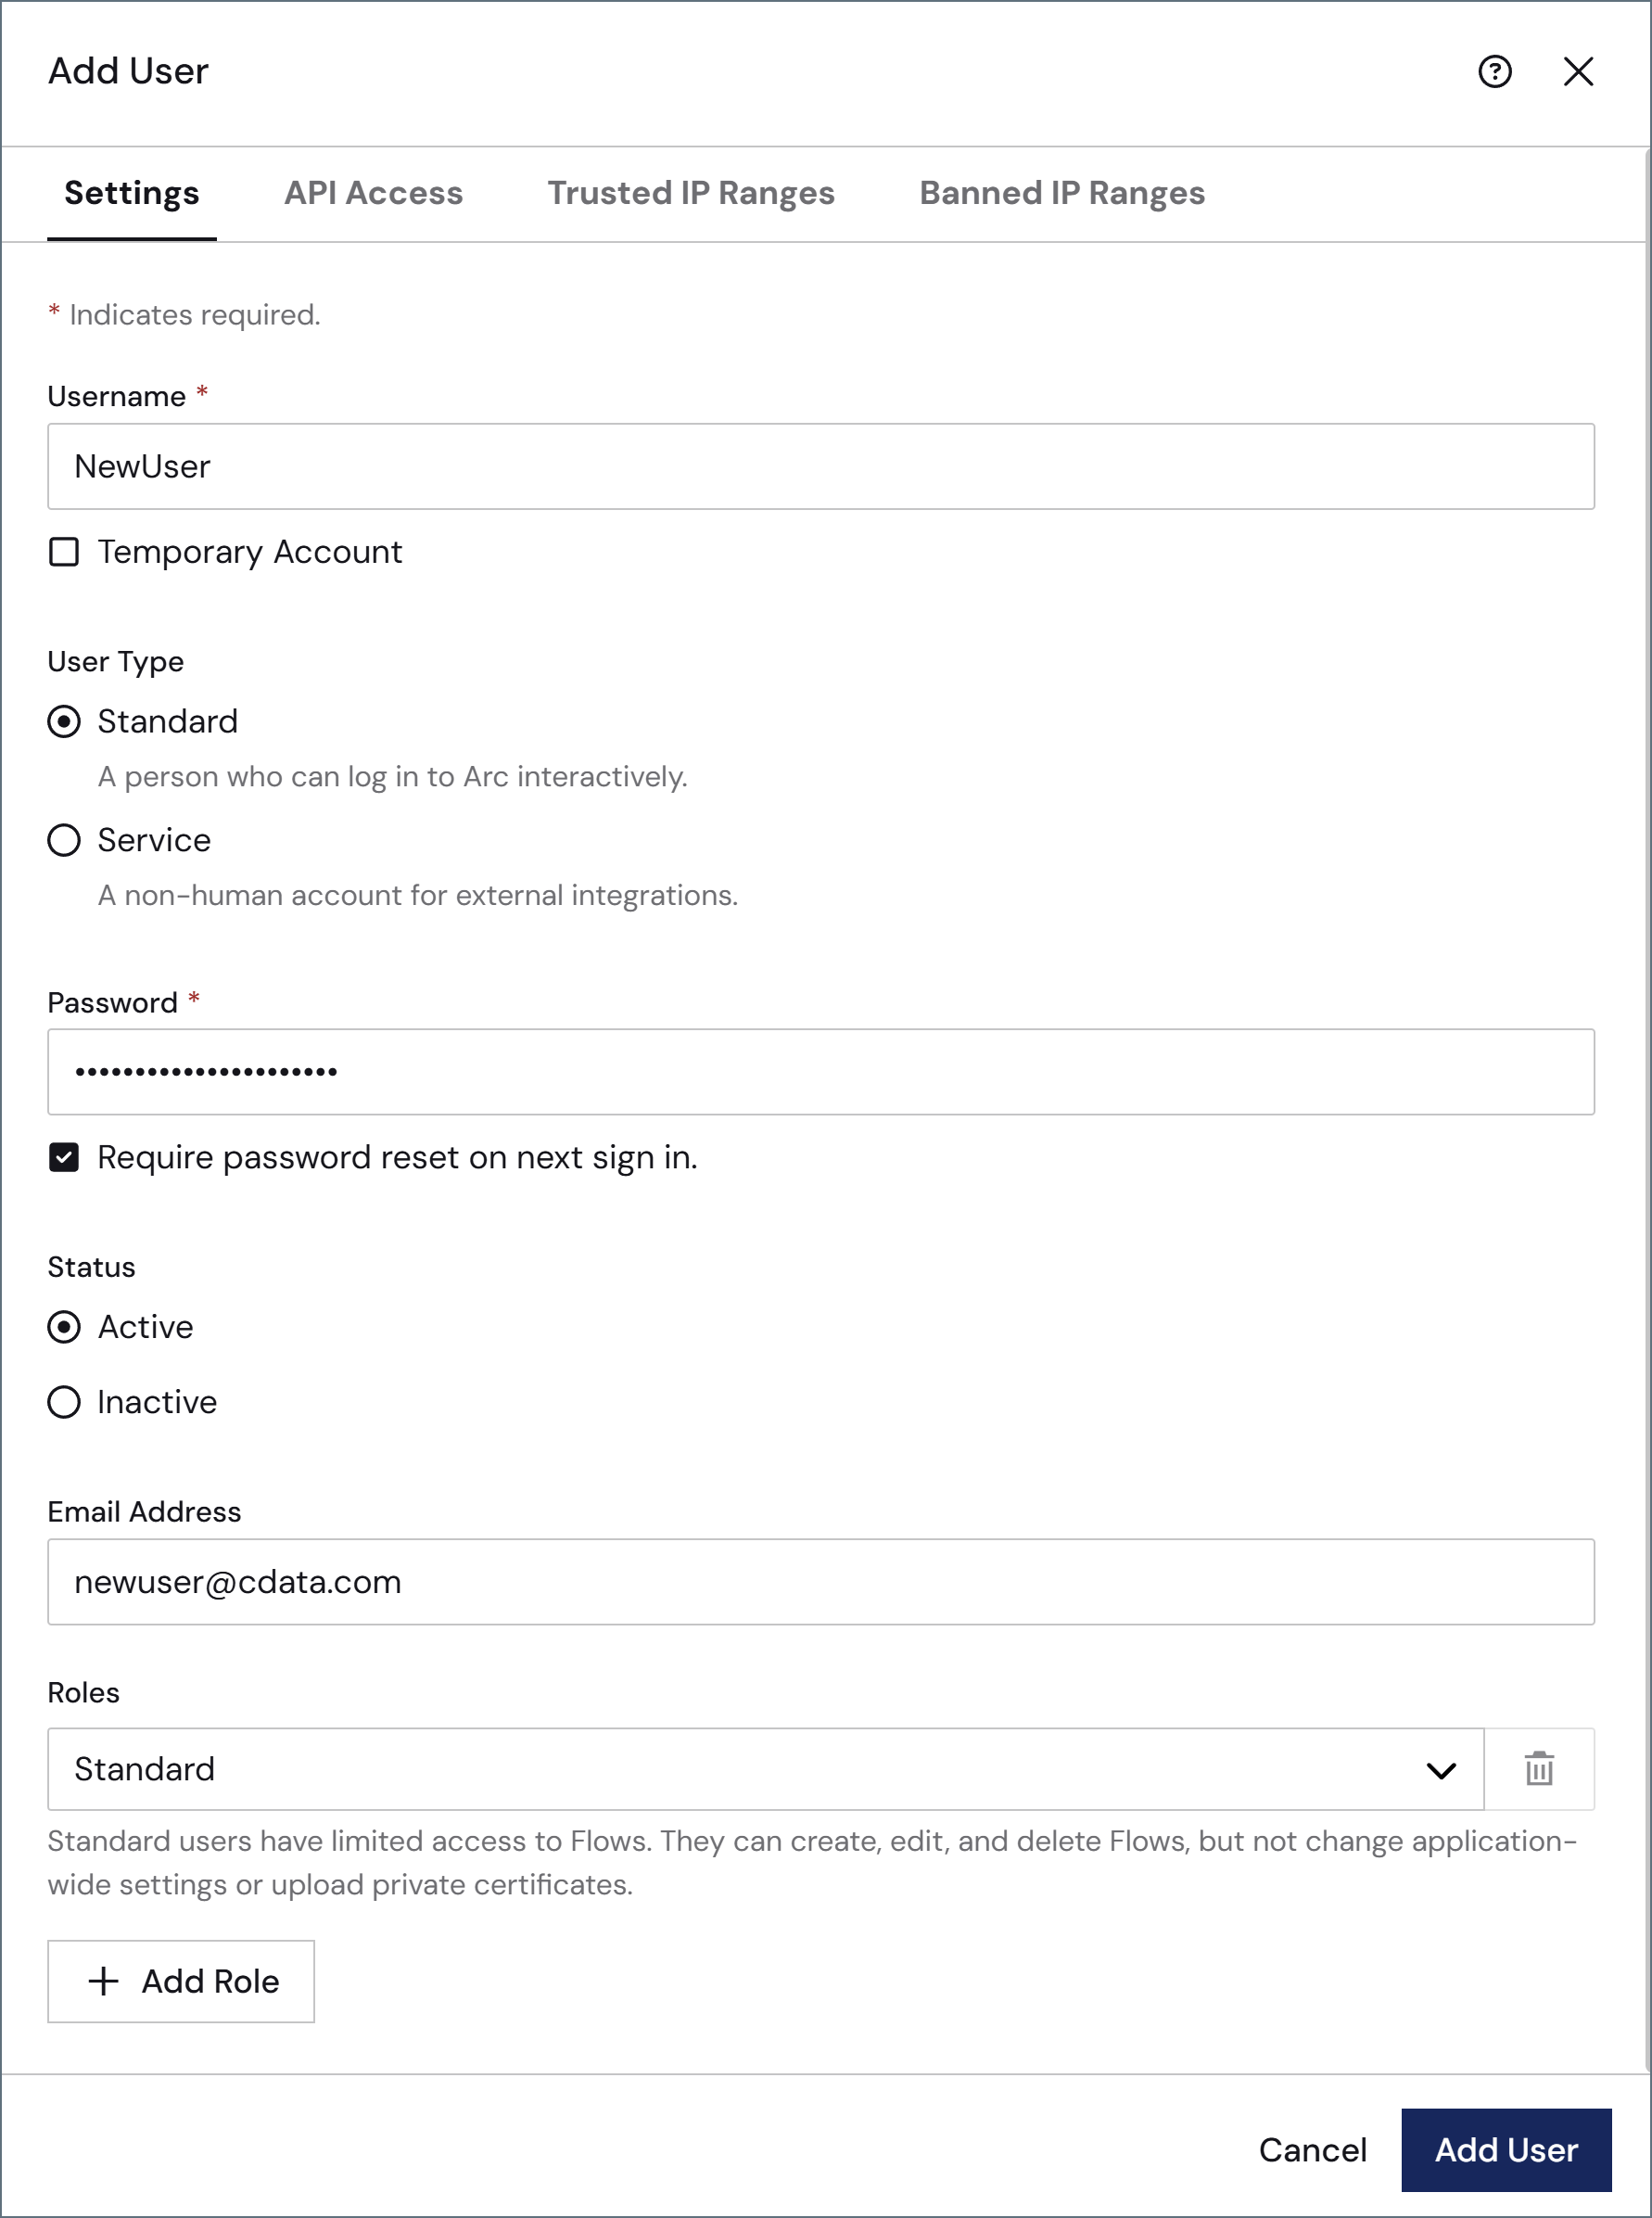
To add a user, click Add User. To edit an existing user, hover over their row in the table, click the ellipses, then choose Edit. The following image shows adding a new user to the application.Complete the following fields:
Field
Description
Username
Enter a username. This field cannot be changed once you save the user.
User Type
Choose whether this is a Standard or Service account. Standard accounts are for people who can sign in interactively with a username and password. Service accounts are intended for automated, machine-to-machine access (such as invoking Flow API endpoints), and cannot sign in interactively, so the Password field is hidden. See User Types.
Temporary Account
If the user should only have temporary access, check this and supply an Expiration Date (not pictured).
Password
Enter a password. Ensure that it meets the requirements in Sign In Settings. Check Require password reset on next sign in to force the user to change their password on login. This field does not appear for service accounts.
Status
Indicate whether the user is active or inactive.
Email Address
Best practice is to provide an email address for each user so that they can reset their passwords when necessary.
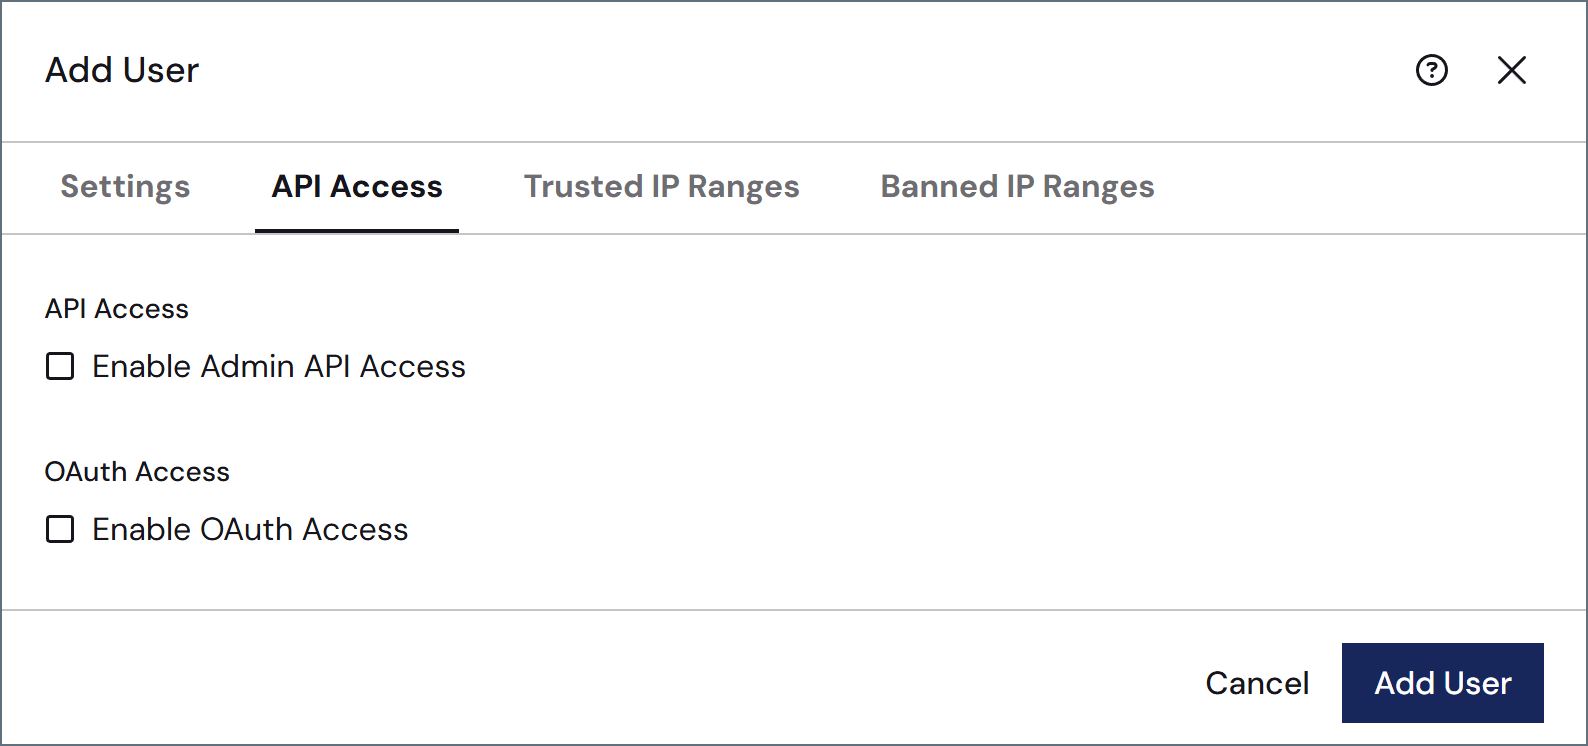
To give the new user Admin API and/or OAuth access, click the API Access tab.
Field
Description
API Access
Check Enable Authtoken Access to grant the user an authtoken that can be used to access the Admin API. See Admin API Access for details. When you enable API access, the rest of the fields in this table appear.
Token Expiration (days)
The number of days before the token expires. Check No Expiration if you do not want the token to expire.
Authtoken
The system-generated authtoken. Make sure to copy it to a safe location before saving the user, because it is not shown again.
Maximum Requests per Hour
Uncheck Unlimited Requests to set a limit on the maximum requests per hour for this user.
Maximum Concurrent Requests
Uncheck Unlimited Requests to set a limit on the maximum number of requests that can be sent simultaneously.
Enable OAuth Access
Check Enable OAuth Access to grant the user credentials that can be used to secure public API endpoints for the Admin API. OAuth 2.0 provides a structured authentication flow for clients that need to manage token lifecycles or integrate with external applications. When you enable OAuth access, the following fields appear:
Grant Type
The OAuth 2.0 grant type that determines how the client application obtains an access token. Client Credentials is currently the only option.
Client Id
The system-generated client Id token.
Client Secret
The system-generated client secret. Make sure to copy it to a safe location before saving the user, because it is not shown again.
Access URL
The endpoint URL used by the client application to request an access token using the configured credentials.
To add trusted or banned IP ranges specific to this user, click the Trusted IP Ranges or Banned IP Ranges tabs to add the ranges. You can provide single IP addresses, simple ranges (such as 203.0.113.* or 203.0.113.1-255), or Classless Inter-Domain Routing (CIDR) ranges. These tabs also display the global trusted and banned ranges that have been defined on the Network Access portion of the Settings > Security page.
Standard accounts are for people who sign in to the console interactively with a username and password.
Service accounts are for automated, machine-to-machine access, such as invoking Flow API endpoints or calling the Admin API. Service accounts do not sign in interactively, so the Password field is hidden; instead, they authenticate only with an authtoken or OAuth client credentials configured on the API Access tab. For example, you might pair a service account with a role that grants only the Flow API Invoke permission to let it call specific endpoints without any access to, or visibility into, the UI.
supports single sign-on (SSO) via identity providers that implement the OpenID standard. For more information, including specific guidance for Azure AD, see Single Sign-On.
Each user is granted an authtoken that can be used to access the Admin API. For more information on authenticating against the Admin API, see Admin API Authentication.The specific actions that a user can perform using the Admin API mirror the actions that the same user can perform using the UI. For example, a user that cannot delete connectors in the UI cannot use the Admin API to delete connectors. To perform any action using the Admin API, use an authtoken from an Admin user when invoking the API.
Every user can have an email address associated with their account. This way, if they need to reset their password, they can click the Forgot password link to have a reset link emailed to them. Every password reset that is sent adds a row to the application log.Users who do not have an email associated with their account must contact an administrator to have their password reset, so it is best practice for administrators to associate an email with each user account.If all admin users are locked out of , the embedded web servers in each edition provide the ability to reset their password to regain access to the application. This requires administrative access to the installation, and should only be used if there is no user with access available.For example, in the Cross-Platform edition: