

tracks your configuration files (such as
*.cfg, XML, JSON, and binaries), with two exceptions: the vault and its contents, and users and roles. To avoid versioning sensitive values like tokens, usernames, and passwords, recommends that you store all sensitive values in the vault and reference the vault items in connectors where the sensitive values are required. See Architecture for a complete list of tracked file types.To exclude files from version control, add entries to a .gitignore file in the root of your Application Directory. To exclude a file or pattern, add it on a new line in .gitignore. Common candidates for exclusion include environment-specific configuration files that differ across deployments and large binary files that would inflate repository size. Keep in mind that excluded files are never committed, pushed, pulled, or restored, so you must manage them separately in each environment.Installation and Configuration
Prerequisites
Before you can use the version control features, you must install Git on all environments, including development and production. If you are using a remote repository, you must also create it before configuring version control. supports all major Git platforms, including GitHub, GitLab, Azure DevOps, and Bitbucket. If you are using a local repository, no remote setup is required.Installing Git
Windows
- Download the Git installer from git-scm.com/download/win.
- Run the installer and follow the installation wizard using your preferred settings.
-
Verify the installation by opening a command prompt or PowerShell and running:
Linux Debian/Ubuntu
Run the following:Linux Fedora/RHEL/CentOS
Run the following:Configure Version Control
Navigate to Settings > Advanced > Git Version Control to set up version control. See Git Version Control Settings for the complete settings reference. When you click Configure, you first choose a Configuration Type:- Remote: connects to a hosted Git repository. This enables push, pull, and team collaboration across multiple environments.
- Local: creates a standalone Git repository directly on the server. No remote URL or credentials are required. This is the fastest way to get started with version control.
Development Environments
This section applies to remote repositories only. Local repositories do not have a remote to sync with, so separate development environments are not required.
- Merge conflicts when multiple users make changes at the same time
- Poor user experience due to competing version control operations
-
Export the data encryption key from production (see Understanding Data Encryption Keys and Master Keys for more information on key usage)
- In your production environment, use your API key to call the Admin API exportDataEncryptionKey endpoint. Use the
passphraseparameter to create the passphrase that will be used when you import the key to the development environment. - Save the response because you need this data encryption key for your development environment.
- In your production environment, use your API key to call the Admin API exportDataEncryptionKey endpoint. Use the
-
Export the vault from your production environment:
-
Use the UI
- Navigate to Settings > Advanced > Migration > Export
- Select Custom Export and create a Password, then click Next
- On the Settings tab, only check Vault
- Click Export to perform the export and download the file
- Use the Admin API export endpoint with the vault option enabled
-
Use the UI
-
Install in your development environment (if it is not already installed)
- Install on your development machine
- Complete the initial setup and create your first user account
- Install your development license
- Create an API key for API access
- Import the data encryption key to development: In your development environment, use your API key to call the Admin API importDataEncryptionKey endpoint with the same passphrase you used when you exported the key from production. This ensures that your development environment uses the same data encryption key and can decrypt the vault contents.
-
Import the vault to development
-
Use the UI
- Navigate to Settings > Advanced > Migration > Import
- Upload the vault file you exported earlier
- Complete the import process
- Use the Admin API import endpoint to upload and import the vault file.
-
Use the UI
-
Pull the remote repository to sync your development environment with the production configuration
-
Use the UI
- Install Git by following the instructions in Prerequisites
- Navigate to Settings > Advanced > Git Version Control
- Configure your remote repository connection (see Git Version Control Settings for instructions)
- Pull the latest changes from the remote repository
- Use standard Git commands to configure the repository connection on your local machine
-
Use the UI
- Make and test changes locally without affecting production
- Commit changes to your local repository
- Push completed work to the remote repository
- Pull updates made by other team members
- Follow standard Git workflows (such as branches and pull requests) for collaborative development
Version Control Operations
‘s Git integration provides essential version control operations that allow you to manage configuration changes, synchronize with remote repositories, and maintain multiple development branches. These operations follow standard Git workflows while being tailored specifically for ‘s configuration management needs. Once version control is implemented on your environments, the standard footer becomes a status bar that displays Git metrics and actions such as the number of local files changed, the number of remote commits, and the current branch.
Permissions
Version control features are visible to all users, not just administrators. Role-based access control permissions determine what Git actions you can perform.- Read-only users can view status and history only
- Write users can commit, push, pull, and create branches
Commit and Push
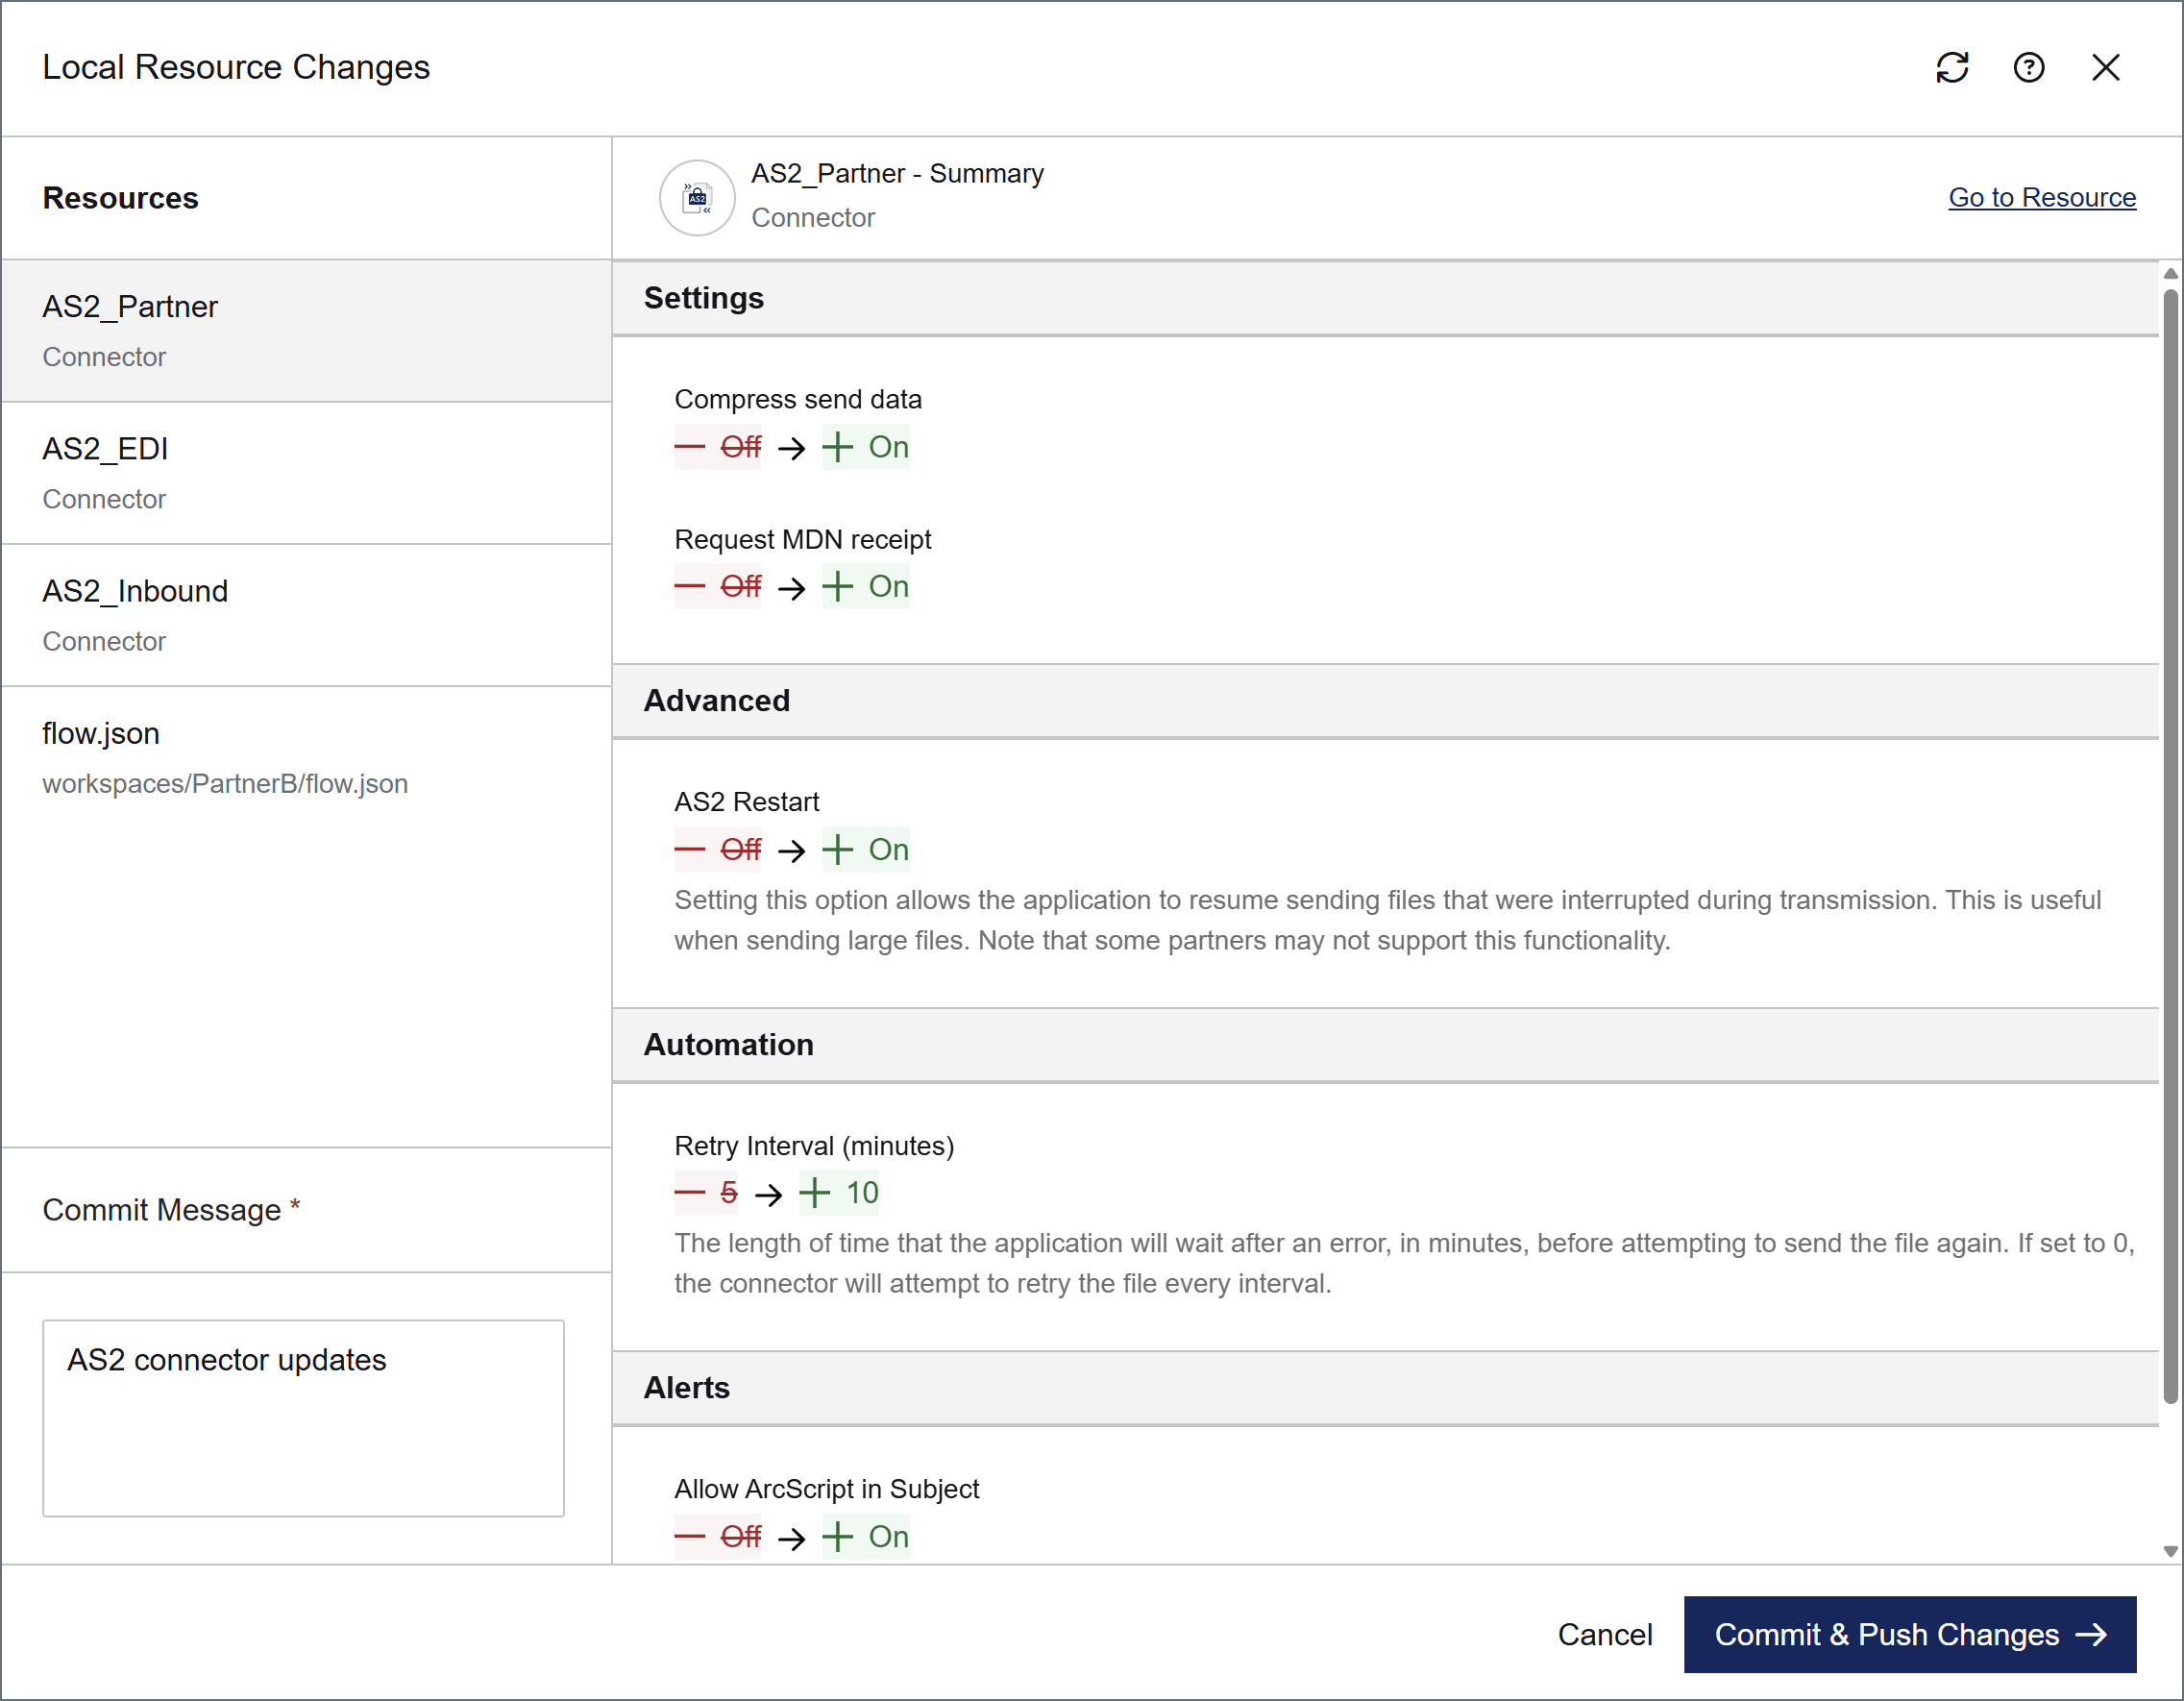
Commit captures all configuration changes in as a single atomic unit and saves them to your local Git repository. When you commit, automatically records your username as the author and timestamps the change, ensuring full traceability of who made what changes, and when. A commit message is required to document the purpose of your changes, and you must have Write permissions to perform commits. Push synchronizes your local commits to the remote Git repository, making your changes available to other team members and backup systems. If the remote branch contains newer changes that you haven’t pulled yet, the push operation fails with an error message and suggestions of what to do next. This prevents overwriting other users’ work and ensures proper merge handling. For remote repositories, commit and push are handled in a single action. See Commit and Push New Changes for details. For local repositories, there is no push step; the toolbar shows Commit instead of Commit and Push.Pull
Pull is available for remote repositories only. Local repositories do not have a remote to pull from.
Branch
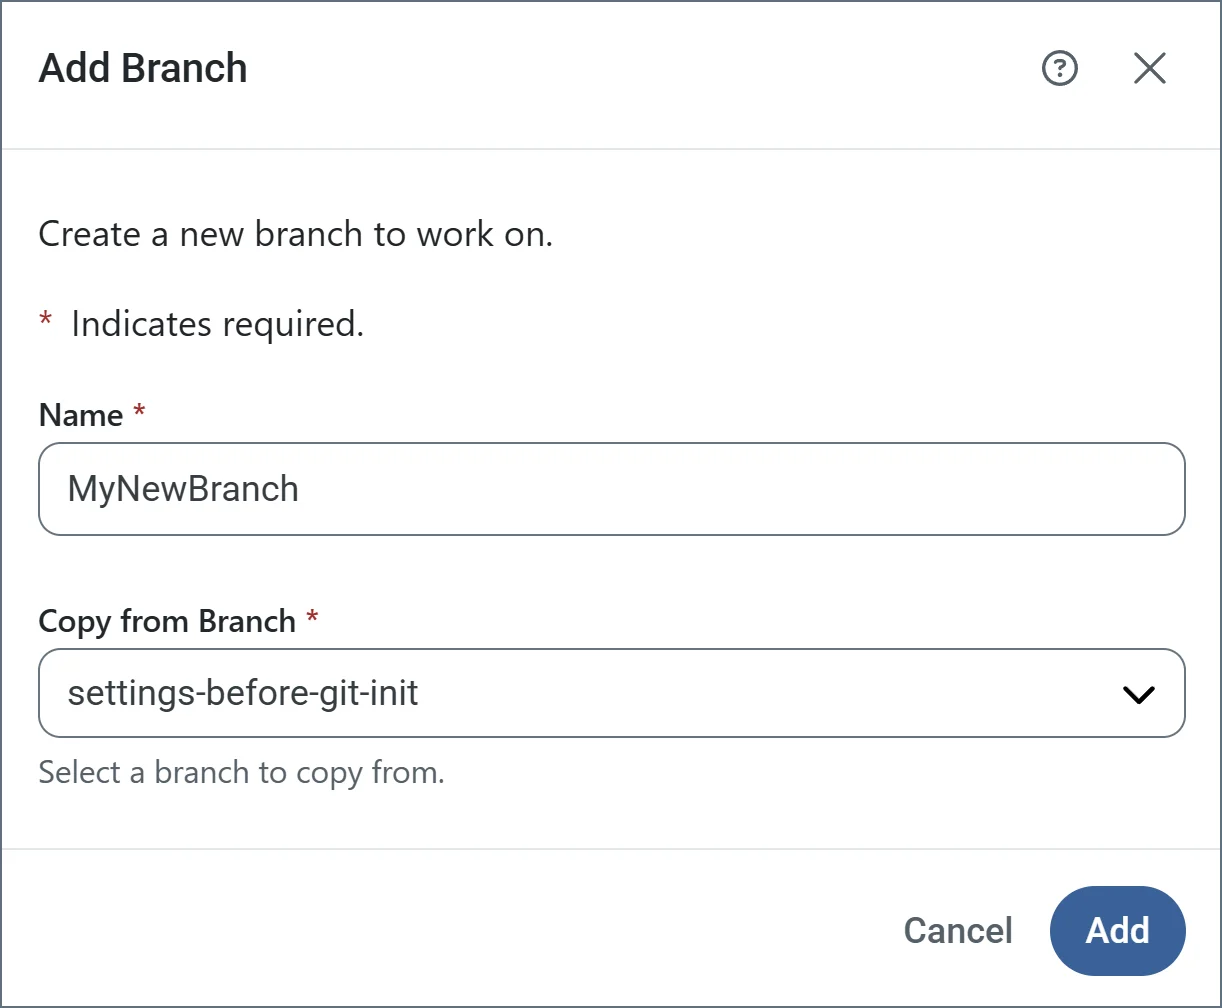
Branch management allows you to maintain separate configuration versions for different purposes, such as development, testing, and production environments. Use the branch dropdown in the toolbar to switch between branches, create new ones, or delete stale ones. When creating a new branch, specify the branch name and select which branch to create it from (the default is to use your current branch). This enables you to experiment with configuration changes without affecting your main environment. See Create Branches and Delete Branches for details.Logging
All version control changes are captured in the Audit logs section of the Activity page. You can download logs from that page as necessary.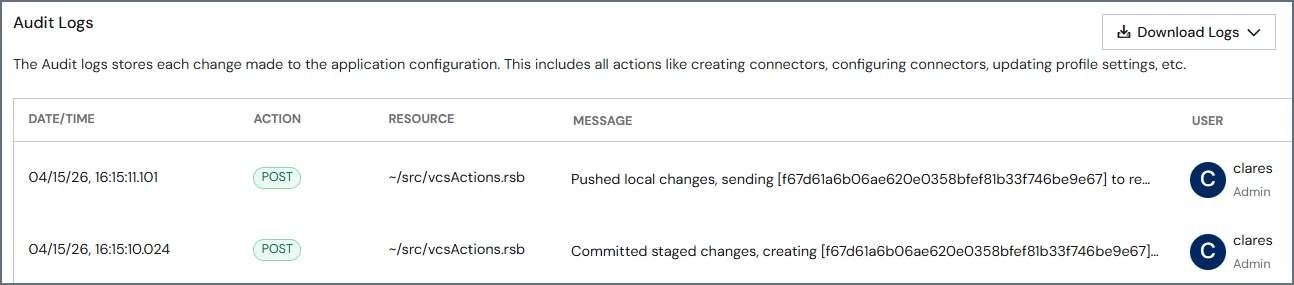
History Viewer
Once version control is enabled, a Commits History tab appears on the Activity page. It shows the complete commit history and provides details such as the commit hash, commit message, author, date and time, and a list of the files that were changed in each commit. You can search and filter the content on this tab.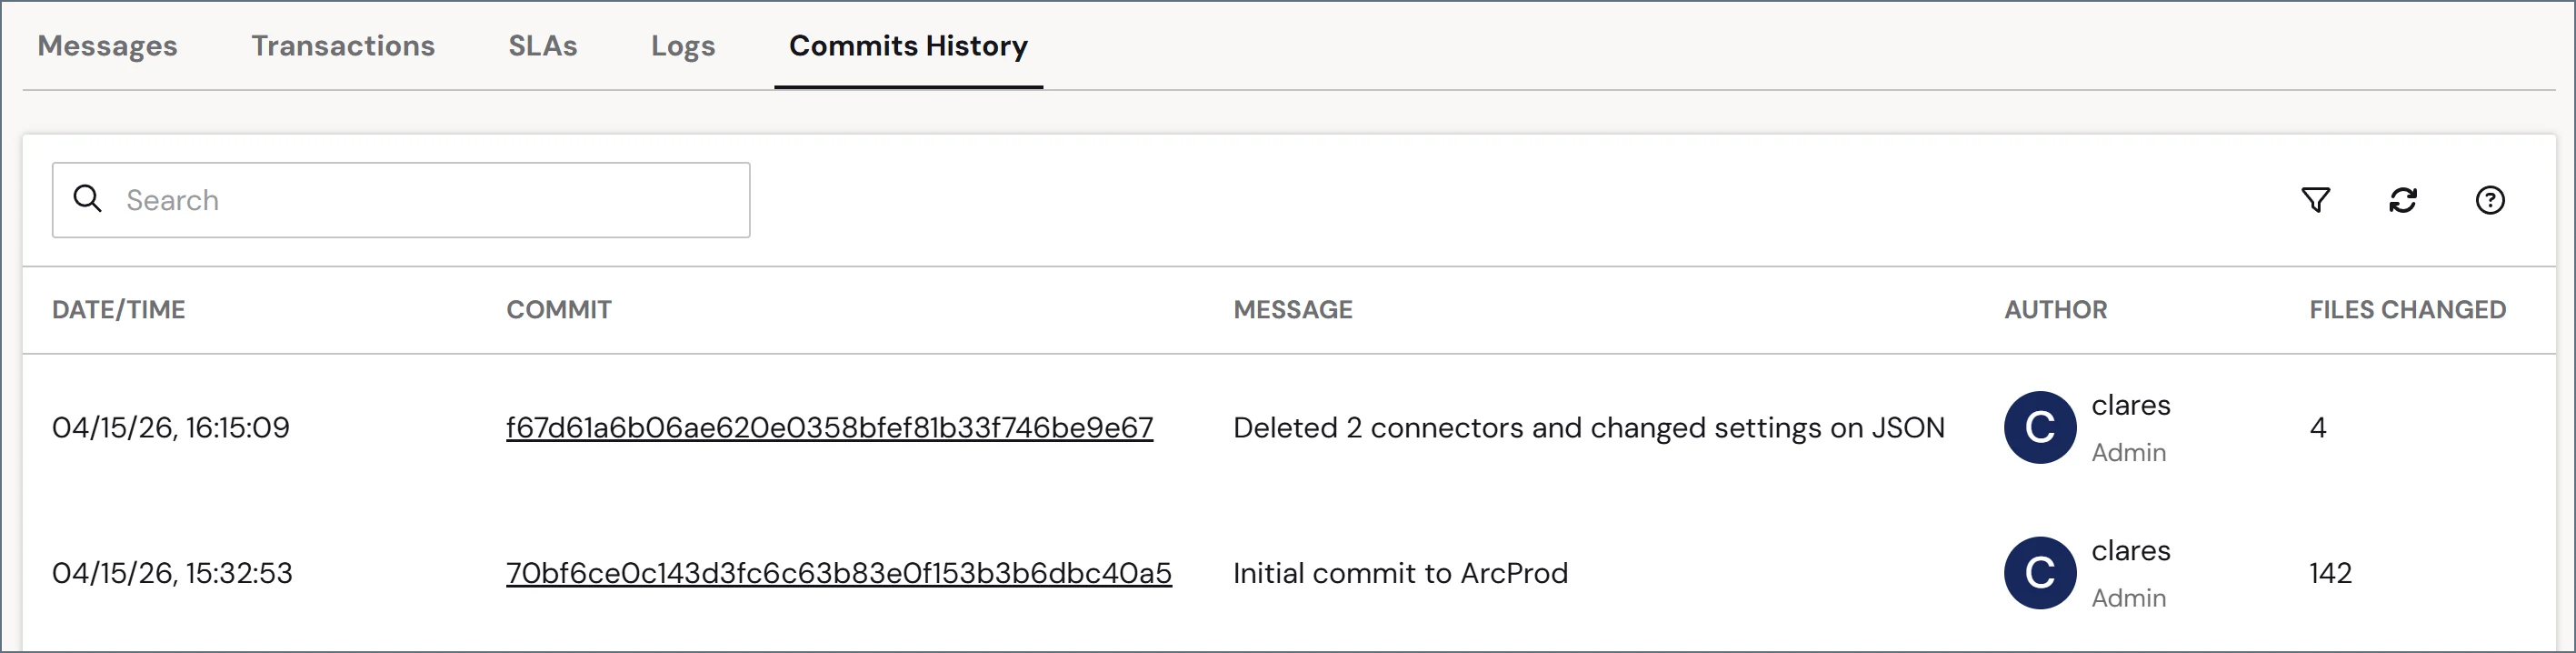
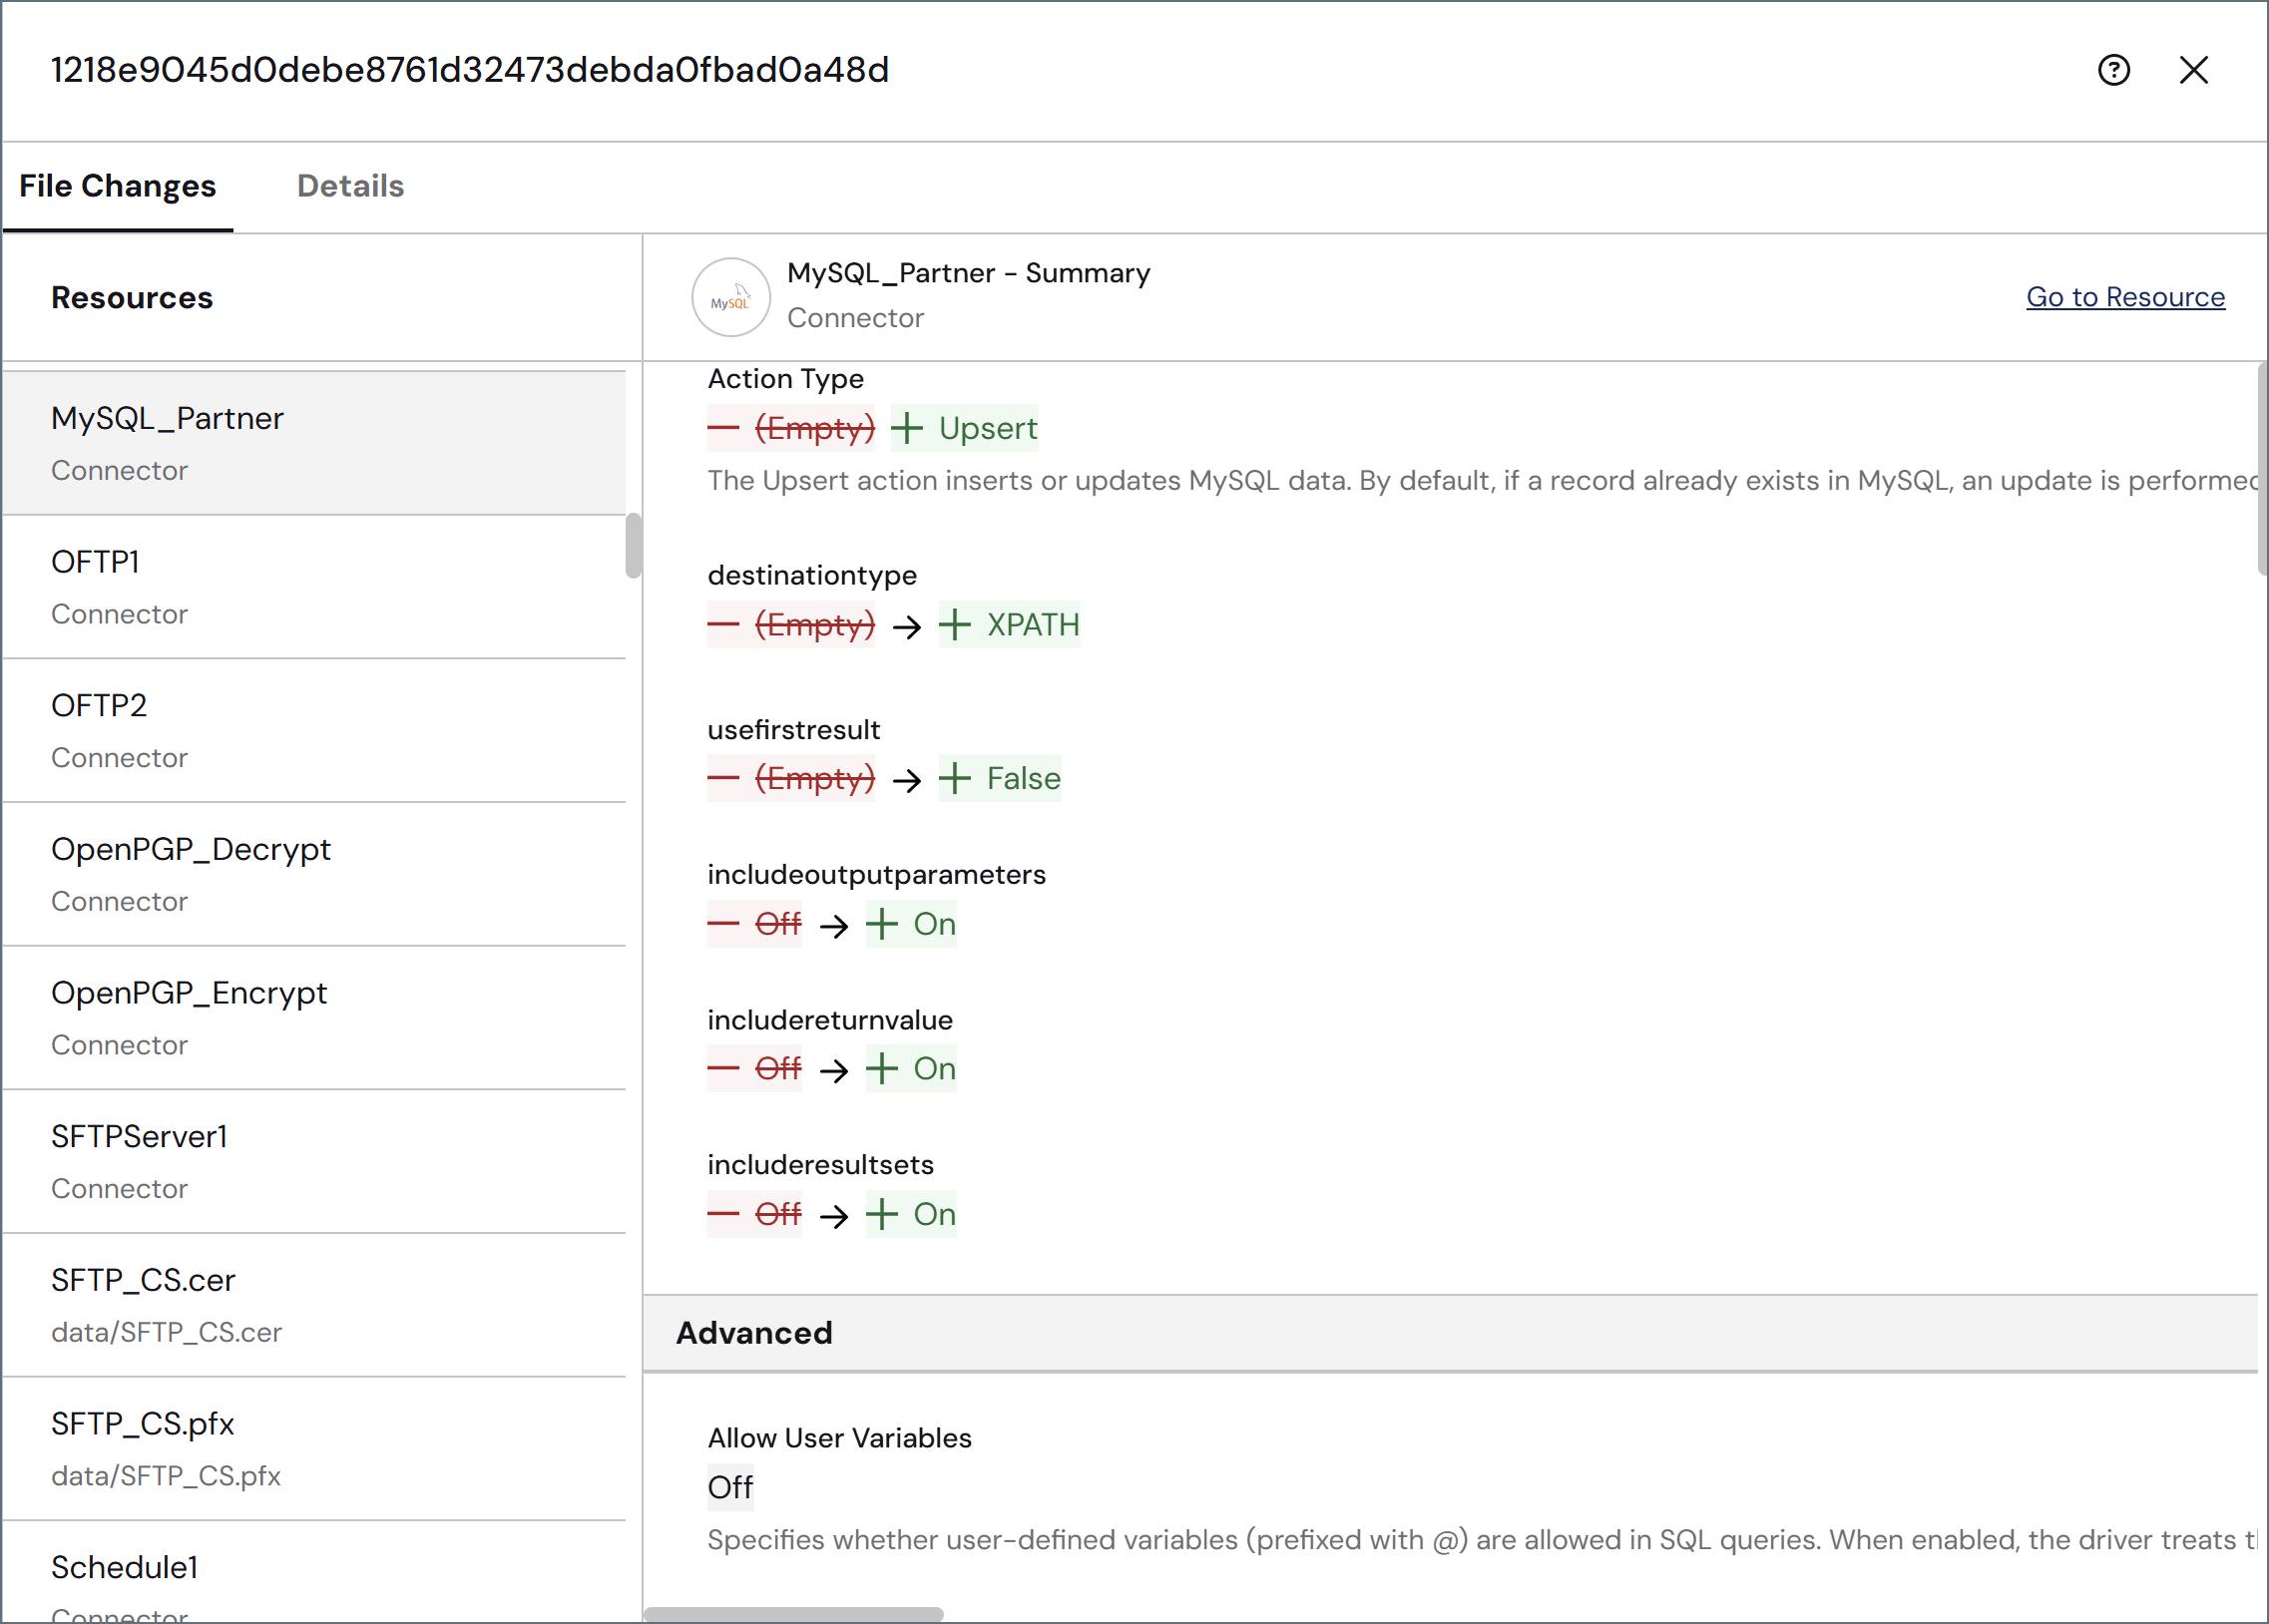
- Passwords and secrets are masked
- Vault references are prefixed with a key symbol
Version Control Workflows Examples
The following examples demonstrate common version control scenarios encountered when working with ‘s Git integration. These workflows cover the essential operations: pulling updates from remote repositories, creating and deleting branches, committing and pushing changes, restoring changes, resolving conflicts when local and remote changes diverge, and discarding unwanted modifications.Pull Changes
This workflow applies to remote repositories only.
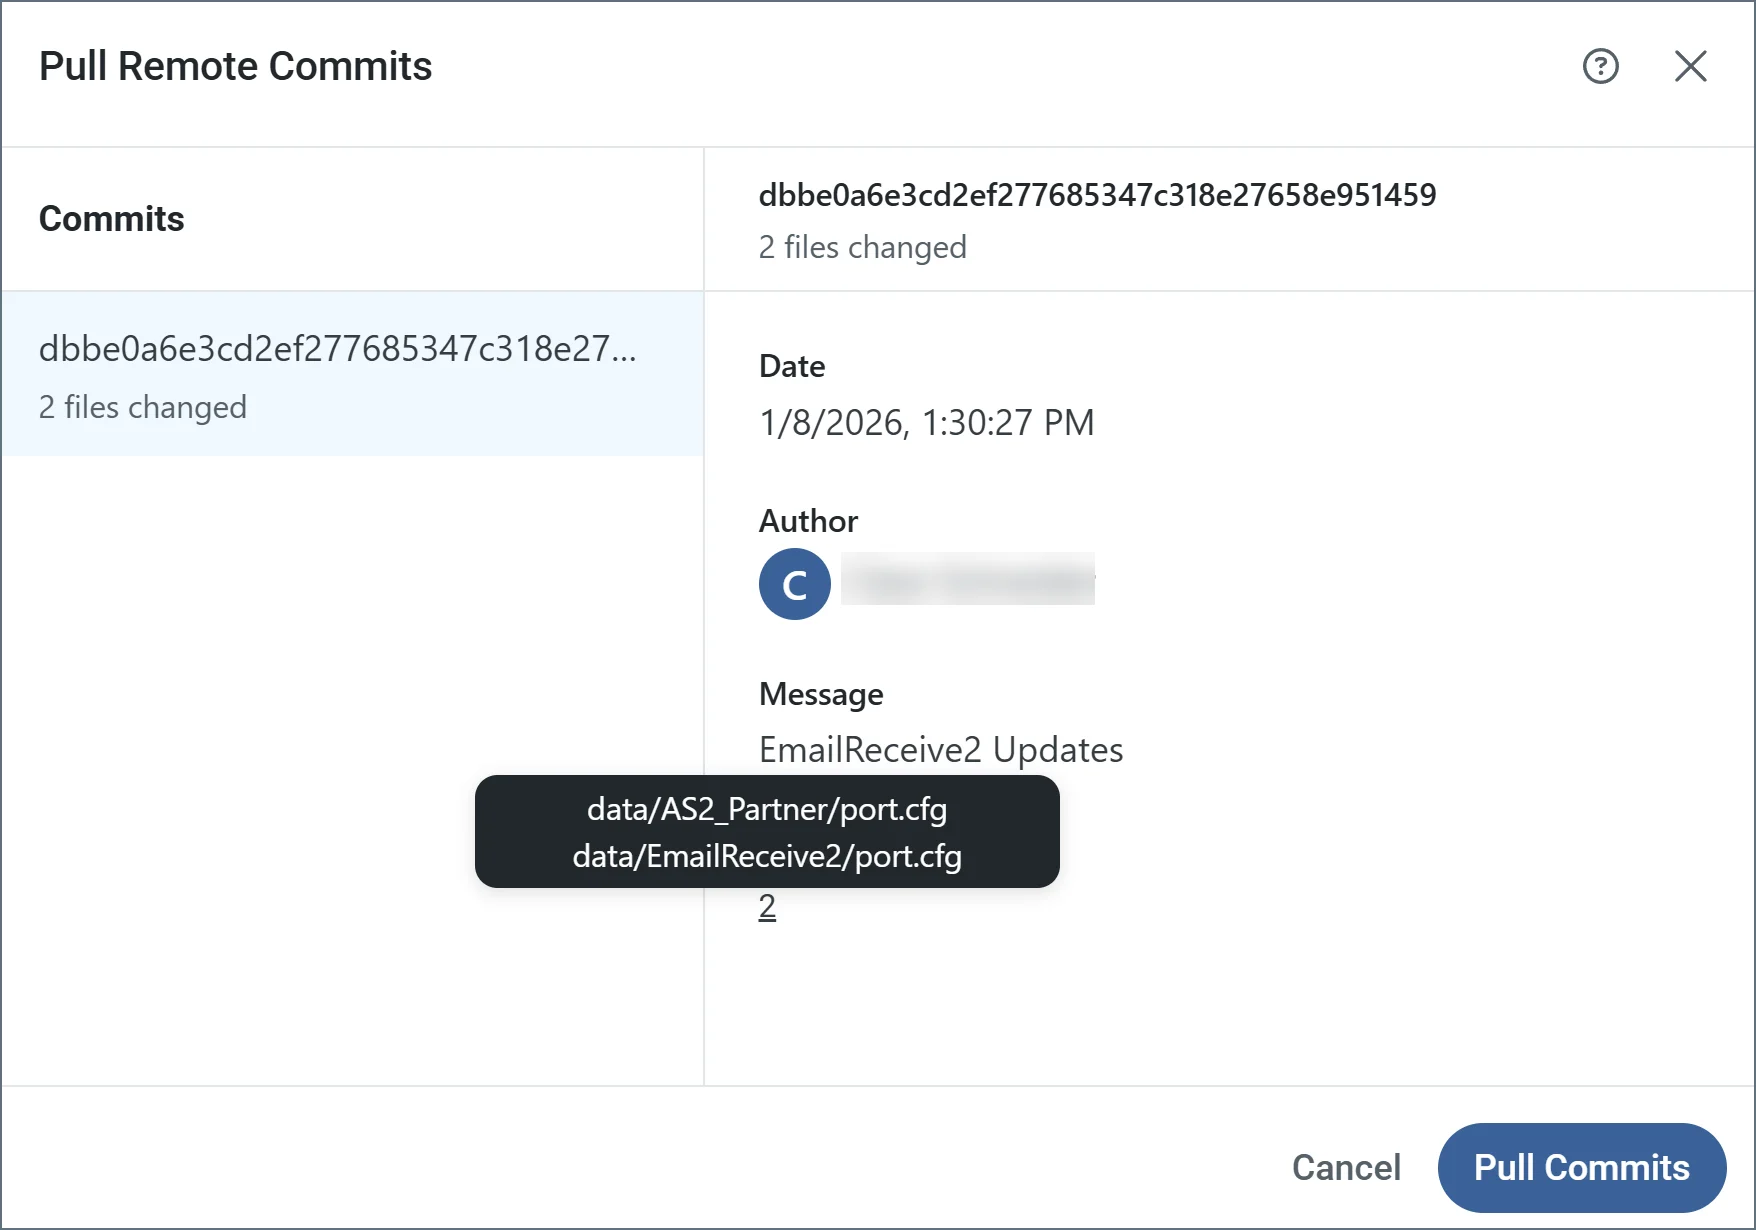
- Click Pull on the toolbar to pull the commits without reviewing them
-
Click the number of commits on the toolbar to open the Pull Remote Commits preview

- Navigate to the Commits History tab on the Activity page and click the link to the number of remote commits on the left or the Pull button on the right to open the Pull Remote Commits preview
Create Branches
To create a new branch, click the branch icon on the toolbar (you can also switch between branches here).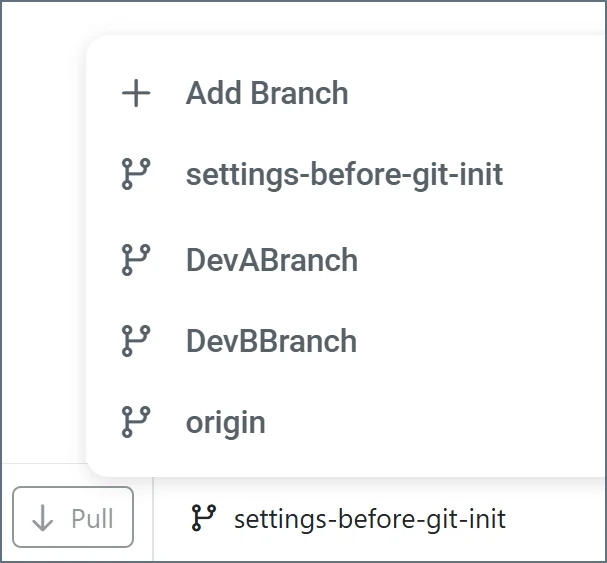
Delete Branches
To delete a branch, click the branch icon on the toolbar. Hover over the branch you want to delete and click the trashcan icon.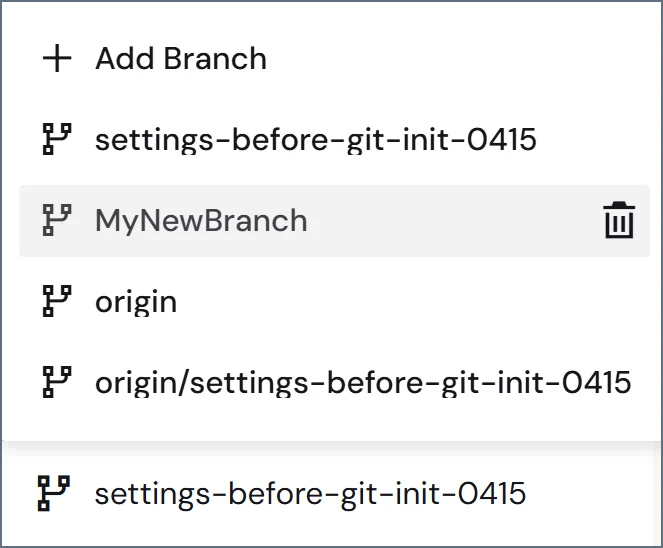
Commit and Push New Changes
When you are making changes in , the toolbar shows the total number of files that have been changed:For remote repositories, commit and push happen as a single step; you do not commit locally and then push separately. For local repositories, only Commit is available since there is no remote to push to.
Restore Changes from a Previous Revision
To restore resources to their previous state, navigate to the Commits History tab on the Activity page. Click the ellipses to the right of the Files Changed column, then click Restore. Review the diff between the current state and the proposed restore point state, then click Next. Be aware that if you proceed with the restore, any uncommitted changes in those files are permanently lost. Click Restore Resources to complete the task.Manage Commit and Pull Conflicts
This section applies to remote repositories only. Commit conflicts do not occur with local repositories because there is no remote branch to diverge from.

Discard Changes
To discard your current changes, click the trashcan icon in the toolbar. This opens a Discard Changes pane, where you can select exactly which changes to discard. Click Next, confirm that your selections are correct, then click Discard Changes. Once complete, a confirmation message appears and the number of changes in the toolbar is reduced by the number of changes that were discarded.Migrate from a Local to a Remote Repository
If you start with a local repository and later want to connect to a remote server while preserving your commit history, follow these steps:- Create the remote repository: set up a new, empty repository on your Git platform (such as GitHub, GitLab, or Bitbucket).
-
Add the remote via the command line: on the server, navigate to the Application Directory and run:
- Update the configuration: navigate to Settings > Advanced > Git Version Control. recognizes the remote you added in Step 2, but push and pull operations are not fully functional until you edit and add your Username and Password/Token credentials. Once your Status shows Connected, all previous commits from the Local repository are visible in the remote.