> ## Documentation Index
> Fetch the complete documentation index at: https://docs.arc.cdata.com/llms.txt
> Use this file to discover all available pages before exploring further.
# Git Version Control Settings
> How to configure Git-based version control for CData Arc configuration tracking and environment management.
export const cloudEnv = false;
export const siteNameShort = "Arc";
export const siteName = "CData Arc";
{!cloudEnv && (
You can use Git-based version control in {siteName}, which enables configuration tracking, audit trails, and environment management. Before you can use it, you must install Git. See Prerequisites for instructions.
)}
To complete the configuration, navigate to **Settings > Advanced > Git Version Control**, then click **Configure**.
{cloudEnv ? (
<>
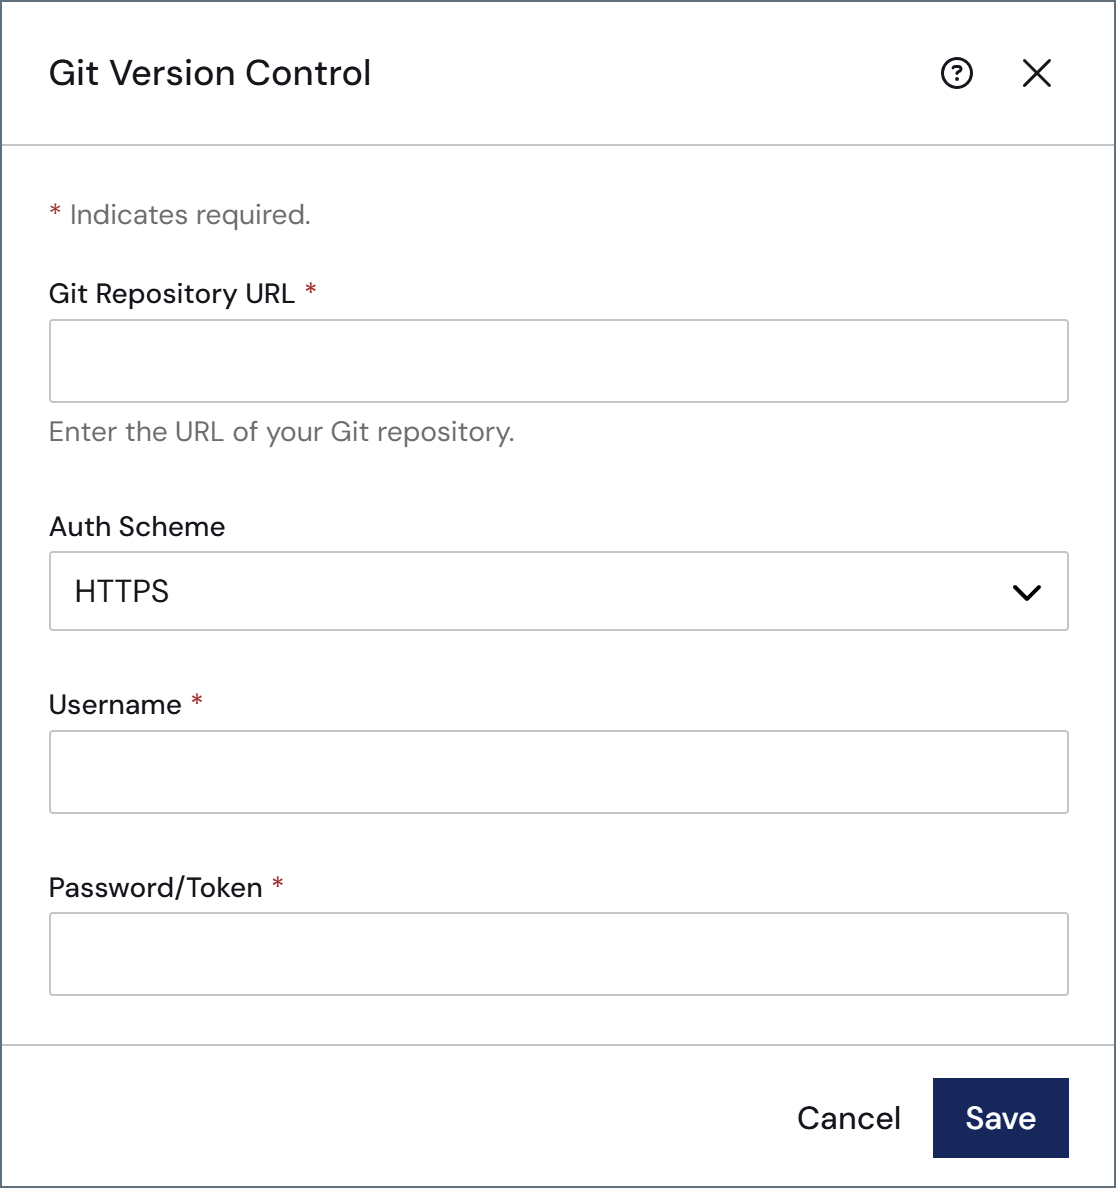
Provide the following:
) : (
<>
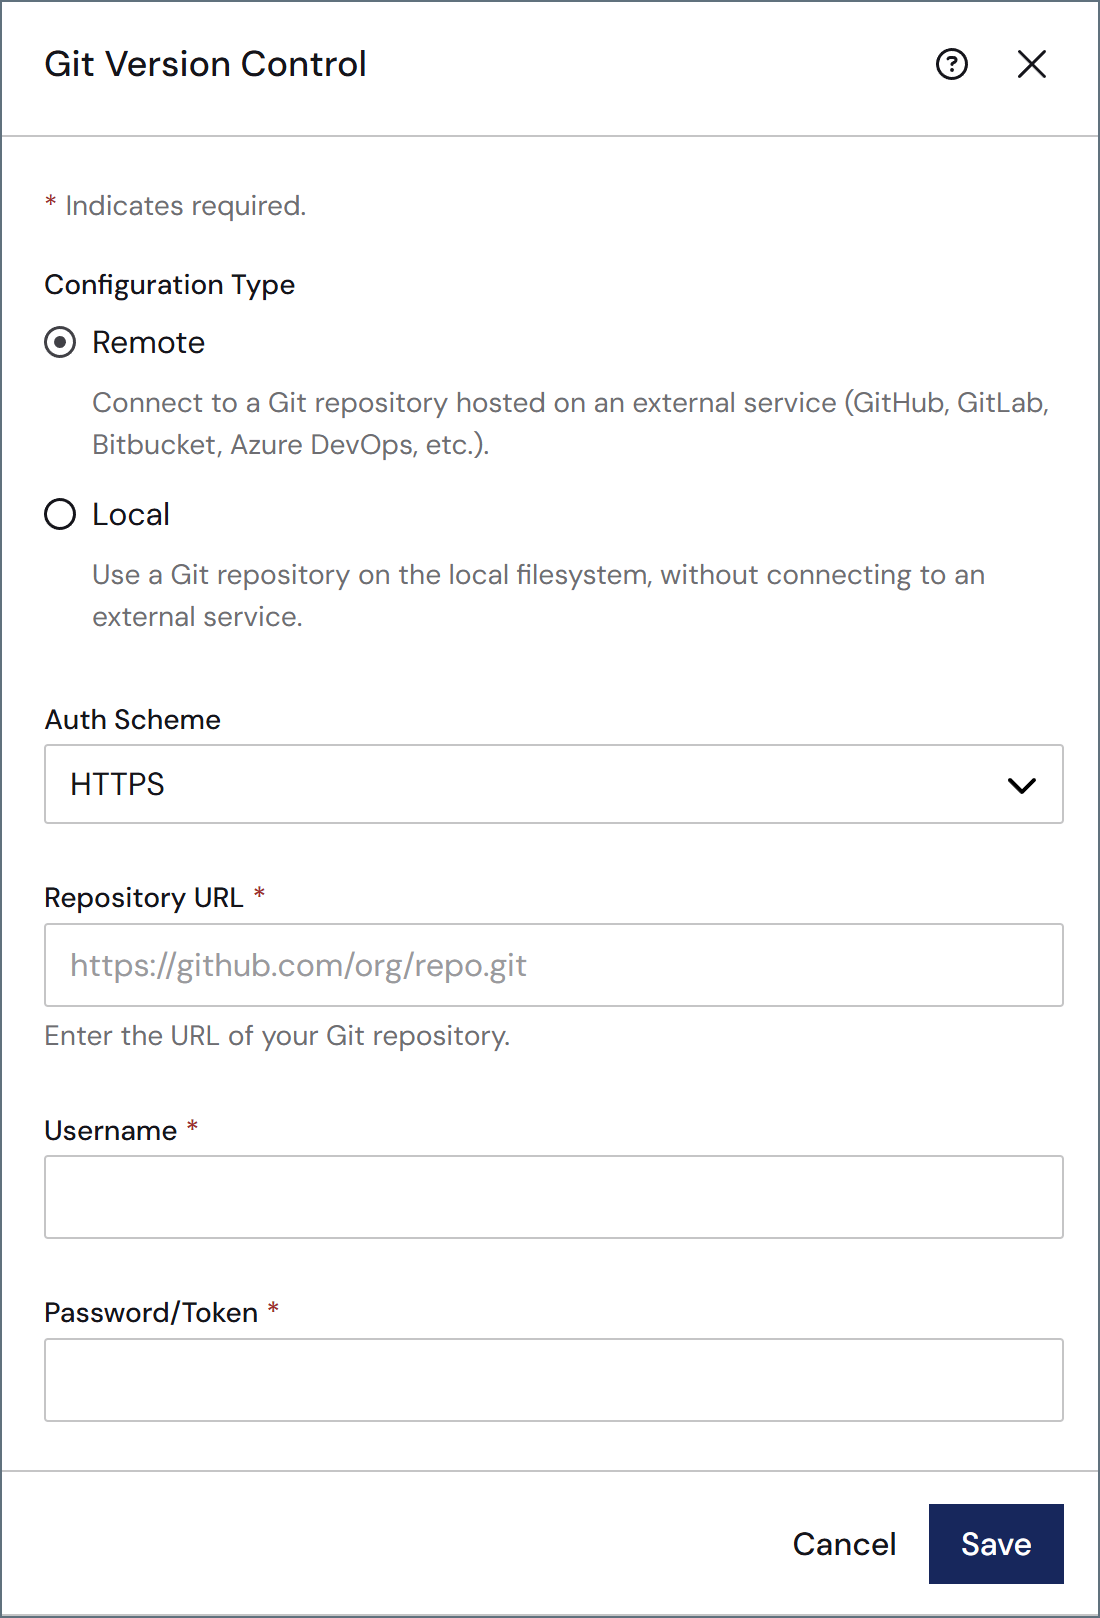
Select a Configuration Type:
- Remote: connects to a hosted Git repository. Provide the following:
- Local: creates a standalone Git repository directly on the {siteNameShort} server. No remote URL or credentials are required.
)}
When you click **Save**, {siteNameShort} runs an initialization task. This initialization creates a Git repository inside `AppDirectory`, creates a branch named `settings-before-git-init-` that contains the configuration that exists at initialization, and stages those configuration files for commit. This ensures that no configurations are lost in the event that the remote repository already has content that would conflict with those settings.
The {siteNameShort} footer changes to a status bar showing Git metrics and actions such as the current number of local files changed, the current branch, and (for remote repositories) the number of remote commits. For remote repositories, click **Commit and Push** on the toolbar to push the initial commit.{/* cloud:remove:start */} For local repositories, click **Commit**.{/* cloud:remove:end */}
 ## Authenticating with SSH
Follow these steps to authenticate using SSH:
* Run `ls -al ~/.ssh` to check for an existing SSH key.
* If you have an existing key, you can use it. Alternatively, run this command to generate a new SSH public/private key pair: `ssh-keygen -t ed25519 -C "your_email@example.com"`.
* Optionally, add a passphrase to the key for added security.
* Use the **SSH Private Key** field to upload your private key.
* Add the public SSH key to your Git platform.
For more information on how to authenticate with SSH, review your Git platform's documentation.
## Removing a Git Configuration
To remove your Git version control configuration, click the trashcan icon on the settings panel, then choose a **Git Repository Option**:
* **Leave the underlying repository intact**: {siteNameShort} disconnects from the repository, but the `.git` folder remains on disk. You can still interact with the repository directly using Git tools on the server.
* **Remove the underlying repository**: Deletes the `.git` folder, fully disabling version control on this installation. Any staged changes are permanently lost.
The **Leave...** option is useful when you are using a local repository, because it preserves your commit history and allows you to reconnect or [migrate to a remote repository](../git-version-control#migrate-from-a-local-to-a-remote-repository) later.
After removing the configuration, you can set up version control again at any time by clicking **Configure**.
## Authenticating with SSH
Follow these steps to authenticate using SSH:
* Run `ls -al ~/.ssh` to check for an existing SSH key.
* If you have an existing key, you can use it. Alternatively, run this command to generate a new SSH public/private key pair: `ssh-keygen -t ed25519 -C "your_email@example.com"`.
* Optionally, add a passphrase to the key for added security.
* Use the **SSH Private Key** field to upload your private key.
* Add the public SSH key to your Git platform.
For more information on how to authenticate with SSH, review your Git platform's documentation.
## Removing a Git Configuration
To remove your Git version control configuration, click the trashcan icon on the settings panel, then choose a **Git Repository Option**:
* **Leave the underlying repository intact**: {siteNameShort} disconnects from the repository, but the `.git` folder remains on disk. You can still interact with the repository directly using Git tools on the server.
* **Remove the underlying repository**: Deletes the `.git` folder, fully disabling version control on this installation. Any staged changes are permanently lost.
The **Leave...** option is useful when you are using a local repository, because it preserves your commit history and allows you to reconnect or [migrate to a remote repository](../git-version-control#migrate-from-a-local-to-a-remote-repository) later.
After removing the configuration, you can set up version control again at any time by clicking **Configure**.