> ## Documentation Index
> Fetch the complete documentation index at: https://docs.arc.cdata.com/llms.txt
> Use this file to discover all available pages before exploring further.
# Certificates
> How to manage TLS/SSL certificates in CData Arc.
export const siteNameShort = "Arc";
export const siteName = "CData Arc";
The **Certificates** tab displays a sortable table of all certificates that are used and managed by the application. Use this tab as a reference to quickly determine which certificates are in use by which connectors in your flows.
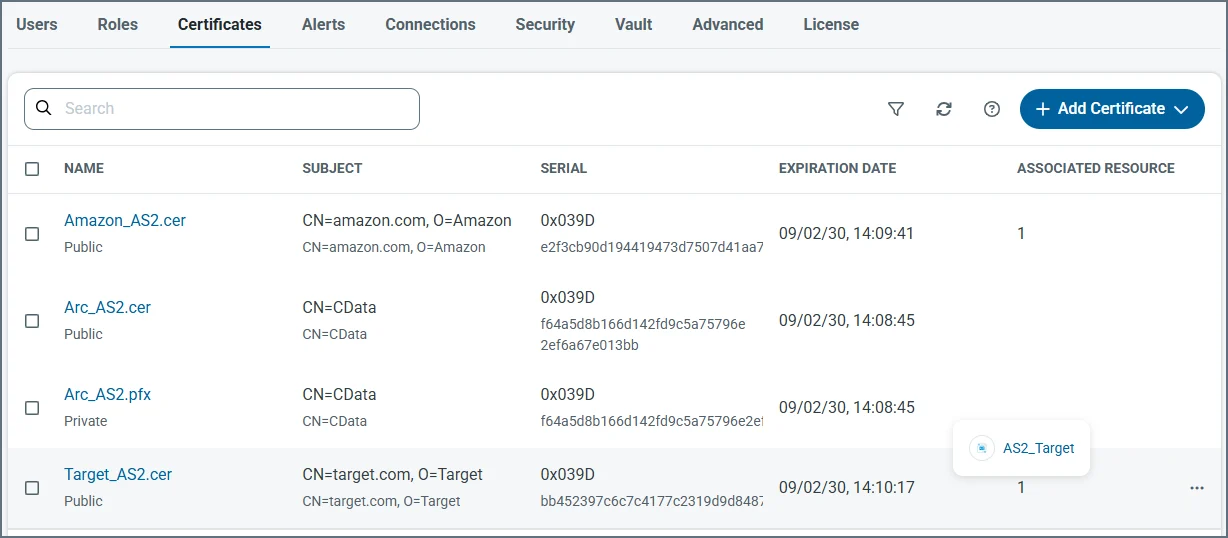 If you have the appropriate permissions, you can add or upload new certificates, edit the names of existing certificates, download certificates, and remove those you no longer need. Click **Add Certificate** to see the options for [creating](#creating-certificates) or uploading certificates. To edit, download or delete a certificate, click the ellipses that appear when you hover over a certificate and choose one of the options.
Use the search bar to search in columns such as **Name** or **Serial** to find specific certificates. Hover over a number in the **Associated Resources** column to see the connector Ids of all connectors using a specific certificate. Click a connector Id to go directly to its settings.
All certificates created or uploaded in {siteName} are stored in the `data` directory. Typically, certificates come in public/private pairs with the same filename but different file extensions: `.pfx` for private and `.cer` for public. Certificates in other formats that are uploaded to the application are stored as-is.
{siteNameShort} enumerates the certificates in the `data` directory to determine the options available when configuring a certificate in the UI. Adding a certificate file to the `data` directory accomplishes the same thing as uploading a certificate in the UI.
## Creating Certificates
To manually create a new certificate, choose **Create Certificate** under **Add Certificate**:
If you have the appropriate permissions, you can add or upload new certificates, edit the names of existing certificates, download certificates, and remove those you no longer need. Click **Add Certificate** to see the options for [creating](#creating-certificates) or uploading certificates. To edit, download or delete a certificate, click the ellipses that appear when you hover over a certificate and choose one of the options.
Use the search bar to search in columns such as **Name** or **Serial** to find specific certificates. Hover over a number in the **Associated Resources** column to see the connector Ids of all connectors using a specific certificate. Click a connector Id to go directly to its settings.
All certificates created or uploaded in {siteName} are stored in the `data` directory. Typically, certificates come in public/private pairs with the same filename but different file extensions: `.pfx` for private and `.cer` for public. Certificates in other formats that are uploaded to the application are stored as-is.
{siteNameShort} enumerates the certificates in the `data` directory to determine the options available when configuring a certificate in the UI. Adding a certificate file to the `data` directory accomplishes the same thing as uploading a certificate in the UI.
## Creating Certificates
To manually create a new certificate, choose **Create Certificate** under **Add Certificate**:
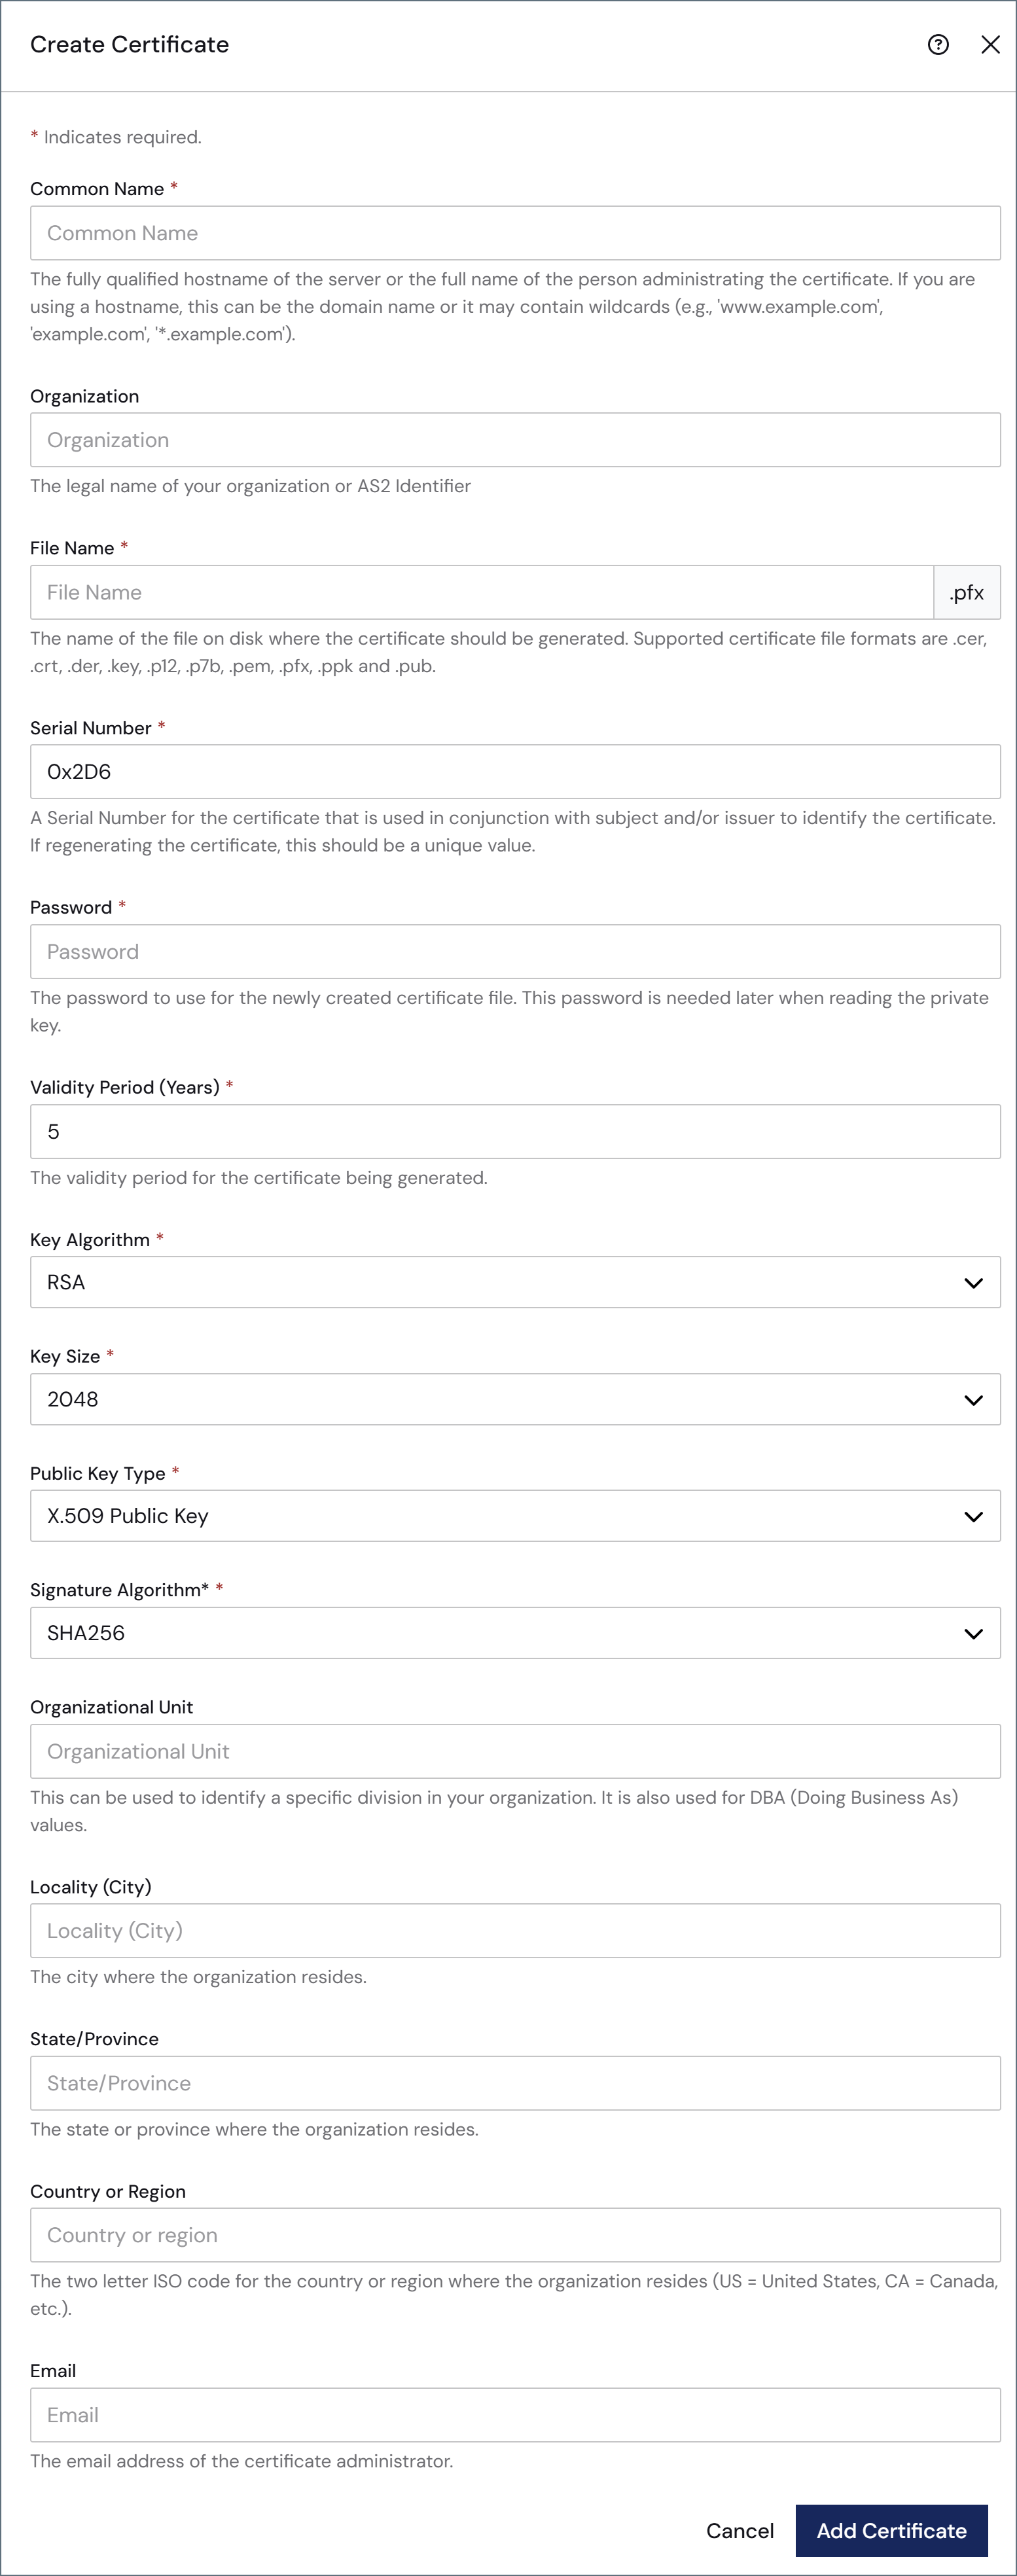 The following fields are required:
| Setting | Description |
| ----------------------------- | --------------------------------------------------------------------------------------------------------------------------------------------------- |
| **Common Name** | The hostname of the server using the certificate. It is used in conjunction with the serial number to identify the certificate. |
| **File Name** | The name of the certificate file, with a `.pfx` extension. The corresponding public key certificate is given the same name with a `.cer` extension. |
| **Serial Number** | A unique serial number that is used in conjunction with the common name to identify the certificate. |
| **Password** | The password required to access the private key. |
| **Validity Period** | Determines the expiration date of the certificate. |
| **Key Algorithm** | The type of key algorithm to use. Options are: RSA (the default), ED25519, and X25519. |
| **Key Size** | (RSA only) Whether to create a 512, 1024, 2048, or 4096-bit key. |
| **Public Key Type** | (RSA only) Whether to create an X.509, OpenSSH, or SSH2 public key. |
| **Signature Algorithm** | (RSA only) The algorithm to use when applying a digital signature to the certificate to verify its authenticity. |
| **Create Paired Certificate** | (ED25519 only) Whether to also create a paired X25519 key exchange certificate. |
| **Signing Certificate** | (X25519 only) The ED25519 certificate used to sign outgoing messages. |
The remaining fields are optional, but you can use them to add further context and metadata to the certificate.
When you are finished, click **Add Certificate**.
The following fields are required:
| Setting | Description |
| ----------------------------- | --------------------------------------------------------------------------------------------------------------------------------------------------- |
| **Common Name** | The hostname of the server using the certificate. It is used in conjunction with the serial number to identify the certificate. |
| **File Name** | The name of the certificate file, with a `.pfx` extension. The corresponding public key certificate is given the same name with a `.cer` extension. |
| **Serial Number** | A unique serial number that is used in conjunction with the common name to identify the certificate. |
| **Password** | The password required to access the private key. |
| **Validity Period** | Determines the expiration date of the certificate. |
| **Key Algorithm** | The type of key algorithm to use. Options are: RSA (the default), ED25519, and X25519. |
| **Key Size** | (RSA only) Whether to create a 512, 1024, 2048, or 4096-bit key. |
| **Public Key Type** | (RSA only) Whether to create an X.509, OpenSSH, or SSH2 public key. |
| **Signature Algorithm** | (RSA only) The algorithm to use when applying a digital signature to the certificate to verify its authenticity. |
| **Create Paired Certificate** | (ED25519 only) Whether to also create a paired X25519 key exchange certificate. |
| **Signing Certificate** | (X25519 only) The ED25519 certificate used to sign outgoing messages. |
The remaining fields are optional, but you can use them to add further context and metadata to the certificate.
When you are finished, click **Add Certificate**.