> ## Documentation Index
> Fetch the complete documentation index at: https://docs.arc.cdata.com/llms.txt
> Use this file to discover all available pages before exploring further.

# SQLite Select Configuration

> Select records from a SQLite database and pass them into the flow as Arc messages.

export const DbasaSelectExampleFlow = ({datasource = "the data source", selectXmlFlow = "dbsa_select_flow.png", siteNameShort = "Arc"}) => <>
    <p>After you choose the tables and columns for the Select-configured {datasource} connector, place the connector at the beginning of an {siteNameShort} flow. The screenshot below depicts an example flow with a {datasource} Select connector, an XML Map connector, a CSV connector, and a File connector at the end:</p>

    <img src={`/public/images/${selectXmlFlow}`} width="900" />

    <p>Data in this example flow passes through these steps:</p>

    <ol>
      <li>The <strong>{datasource}_Select</strong> connector pulls data from a {datasource} connection.</li>
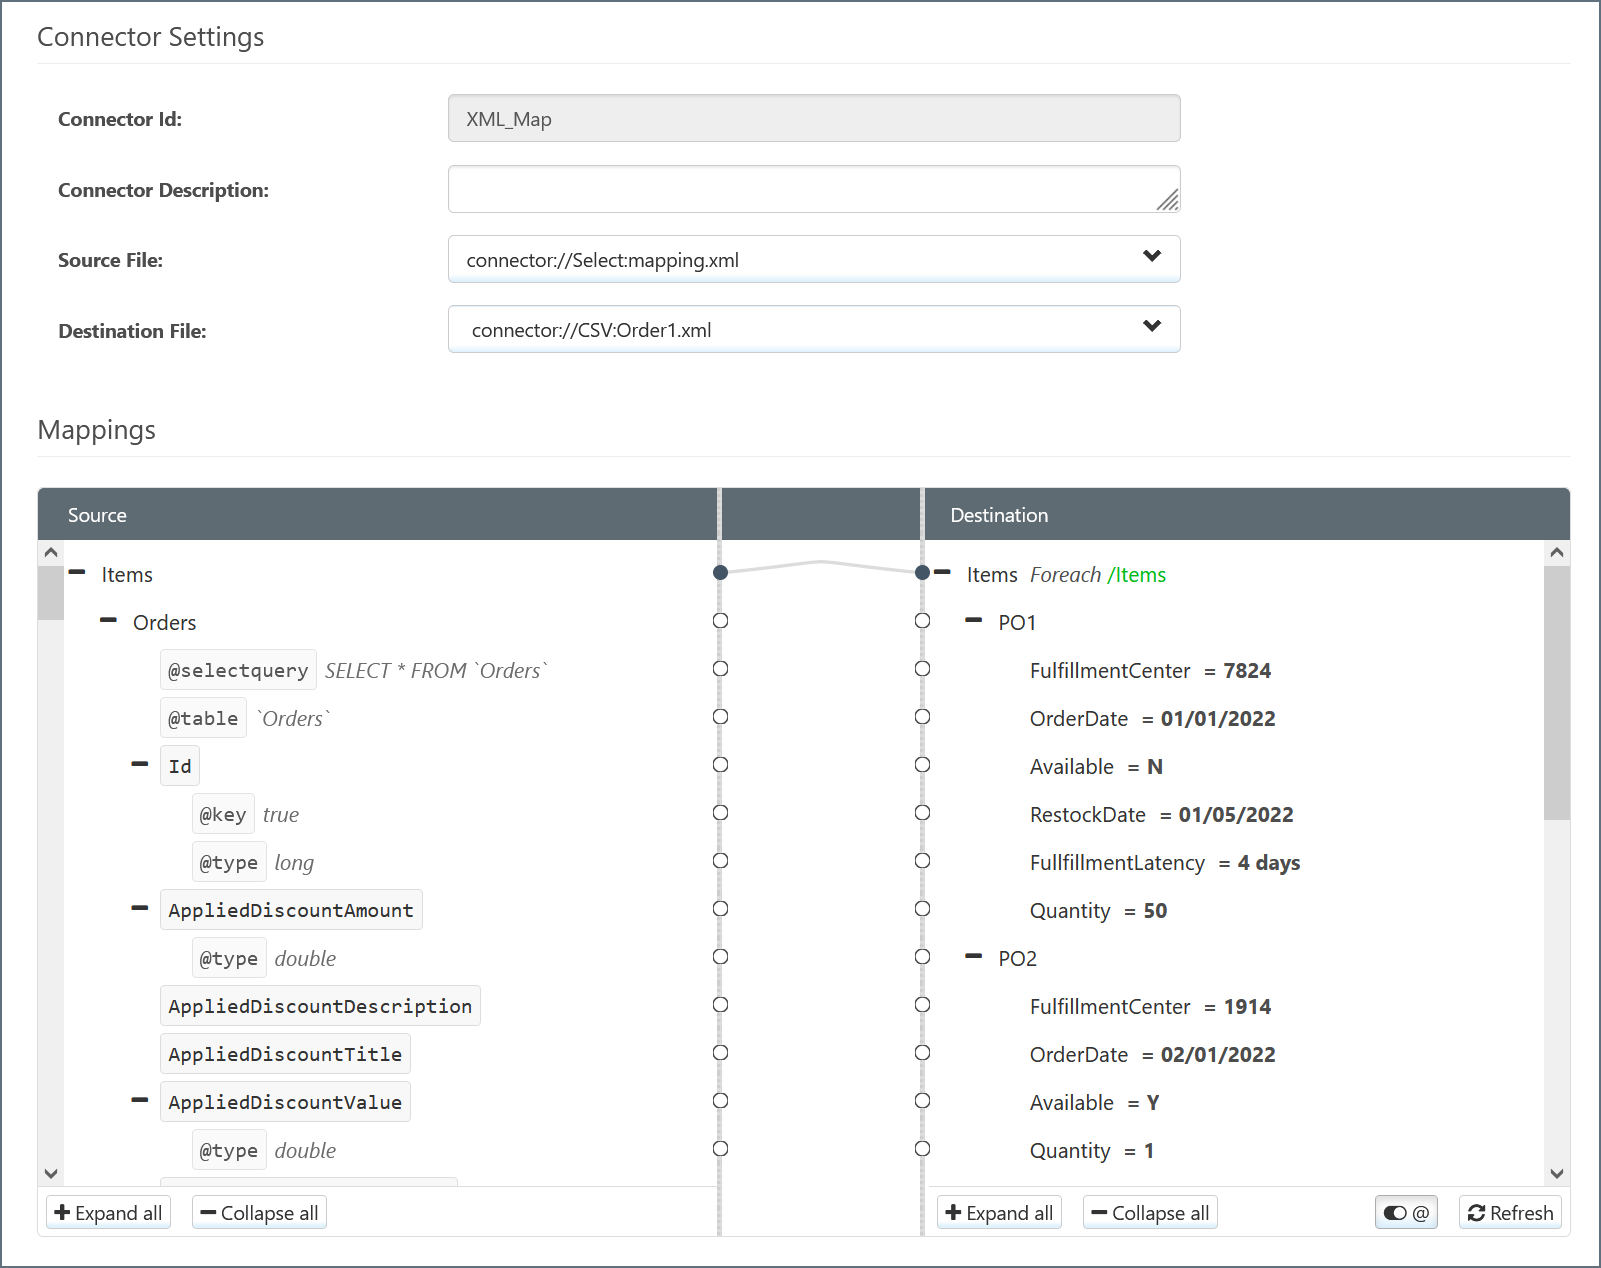
      <li>This data passes to the <strong>XML_Map</strong> connector as the <strong>Source File</strong>, which maps to the <strong>Source</strong> tree.</li>
      <li>Data from the <strong>CSV1</strong> connector passes to the <strong>XML_Map</strong> connector as the <strong>Destination File</strong>, which maps to the <strong>Destination</strong> tree.
        <img src="/public/images/dbsa_xmlmap_select.png" width="800" />
      </li>
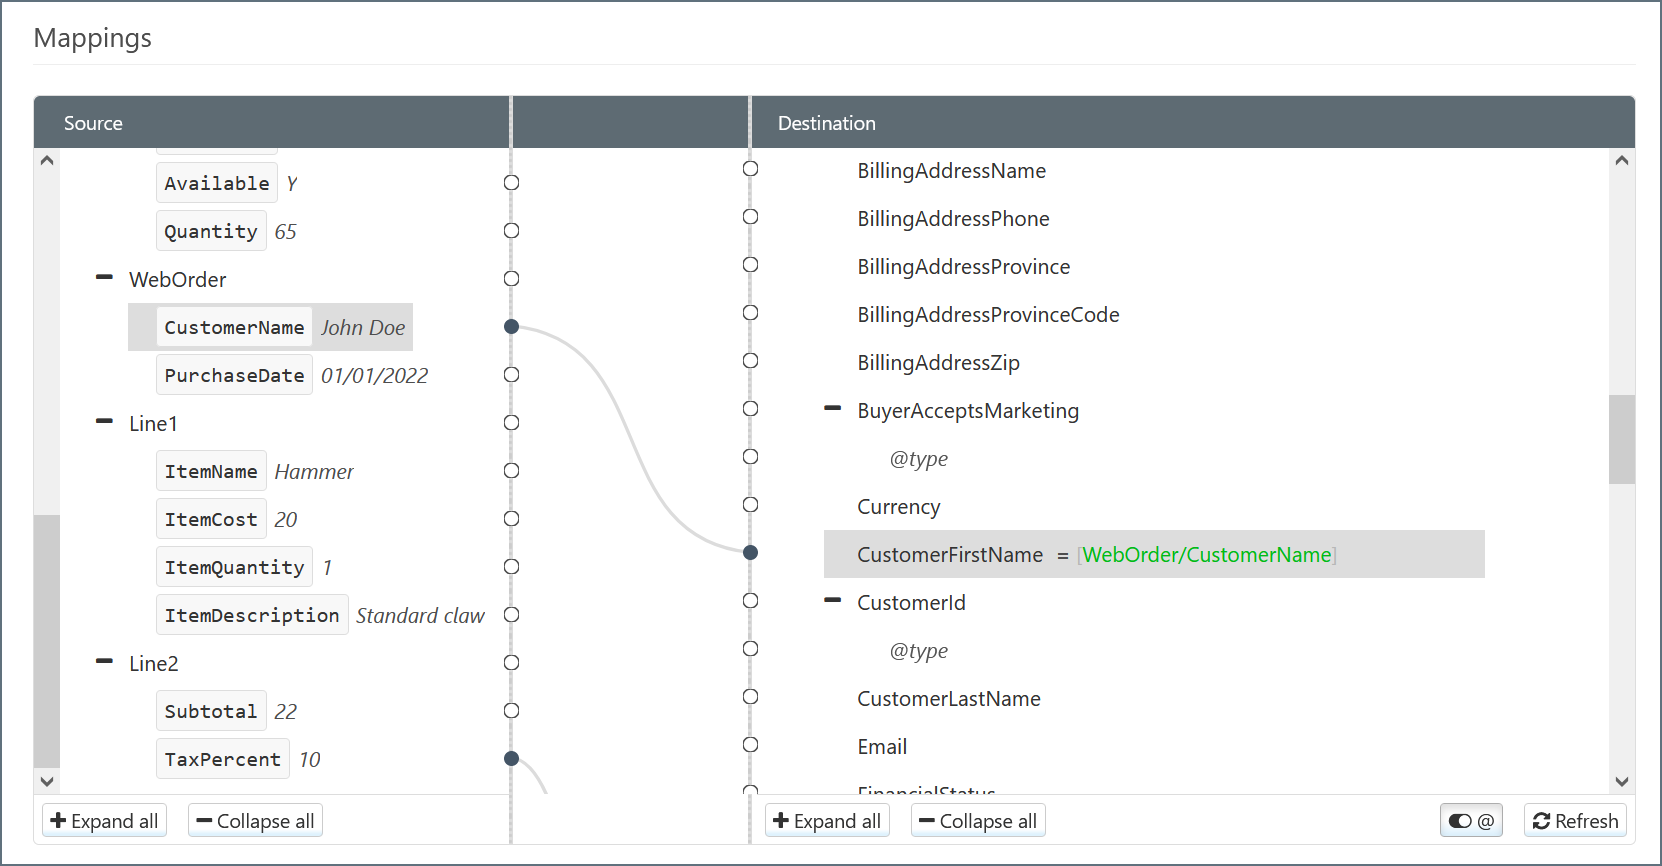
      <li>The <strong>XML_Map</strong> connector attempts to automatically map <strong>Source</strong> elements to <strong>Destination</strong> elements with the same name. You can manually change these and fill in blank mappings by dragging elements from <strong>Source</strong> to <strong>Destination</strong>.
        <img src="/public/images/dbsa_xmlmap_elements.png" width="800" />
      </li>
      <li>The file from <strong>CSV1</strong> that has been modified with data from <strong>{datasource}_Select</strong> then passes down the flow from <strong>CSV1</strong>.</li>
    </ol>
  </>;

export const DbasaSelectJoinAdvanced = () => <>
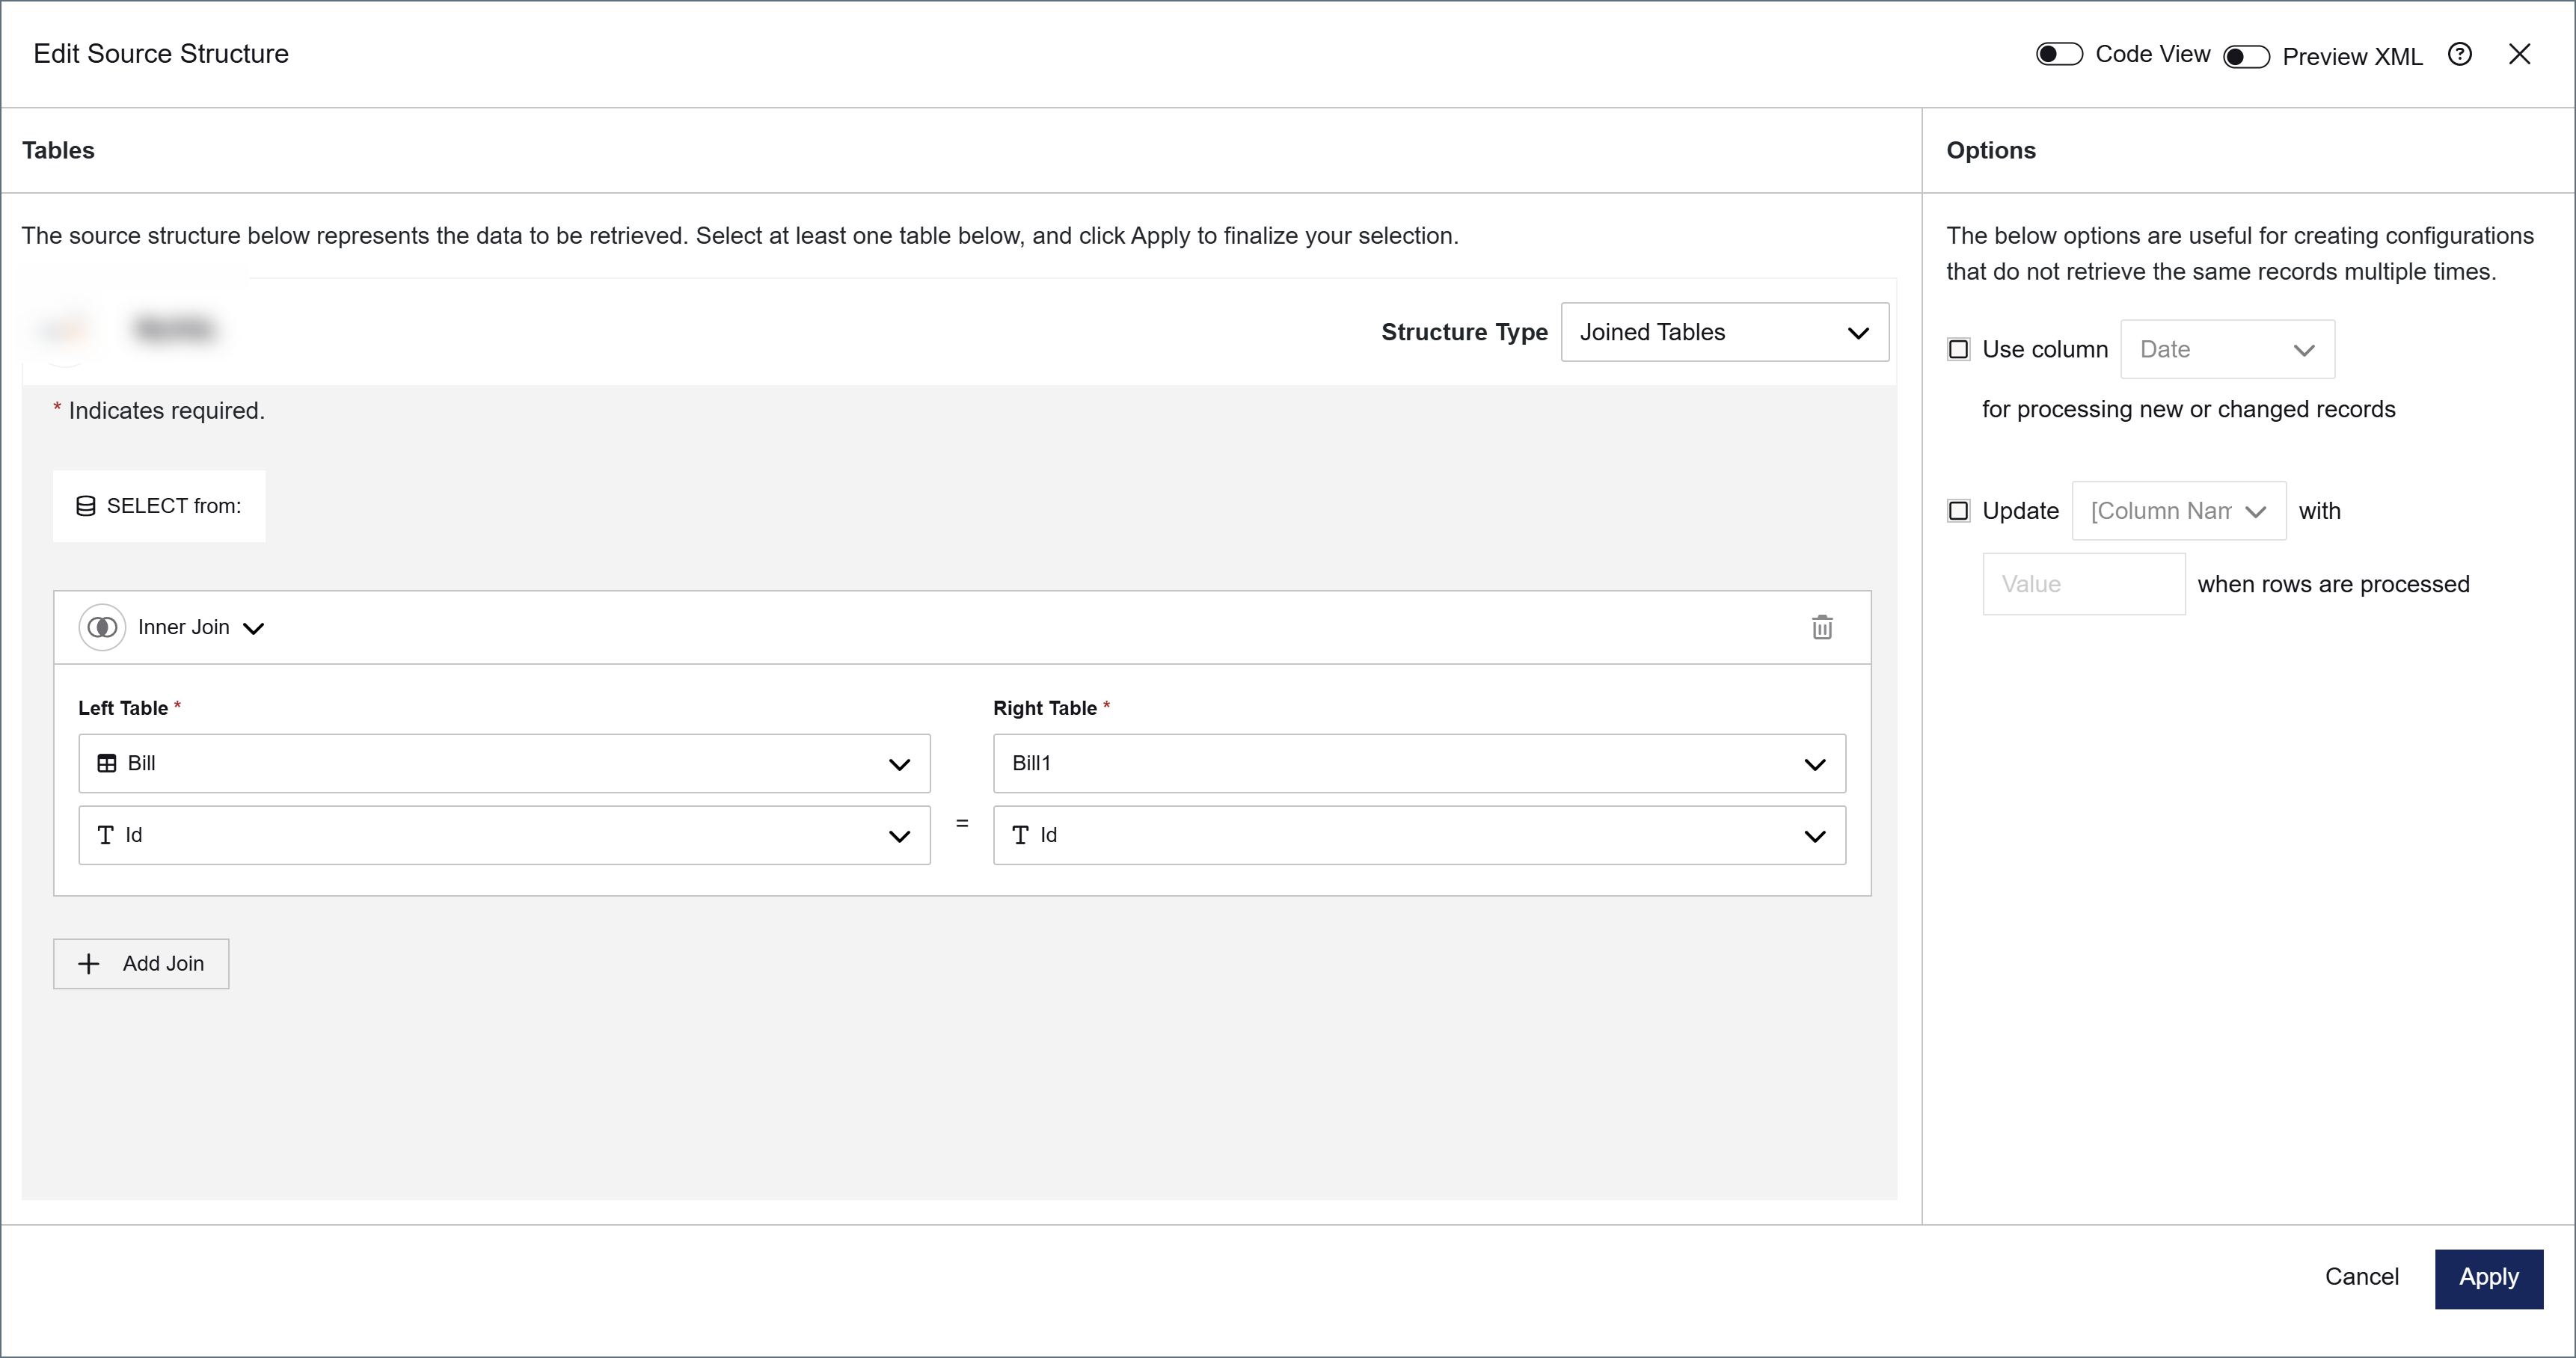
    <p>The <strong>Options</strong> panel on the right side of the <strong>Edit Source Structure</strong> dialog contains settings that control how the connector processes records. These settings are available alongside the JOIN designer and apply to the entire join query.</p>

    <ul>
      <li><strong>Use column [x] for processing new or changed records</strong>: Enables incremental processing so that the connector only selects rows that are new or changed since the last run. In a Joined Tables configuration, this column must come from the base (leftmost) table. Columns from joined tables are not available for this setting.</li>
      <li><strong>Update [column] with [value] when rows are processed</strong>: Updates a column with a specified value after each row is processed.</li>
    </ul>

    <p>You can also preview the output structure or view the underlying XML configuration by toggling <strong>Preview XML</strong> or <strong>Code View</strong> at the top of the <strong>Edit Source Structure</strong> dialog.</p>
  </>;

export const DbasaSelectJoinResults = () => <>
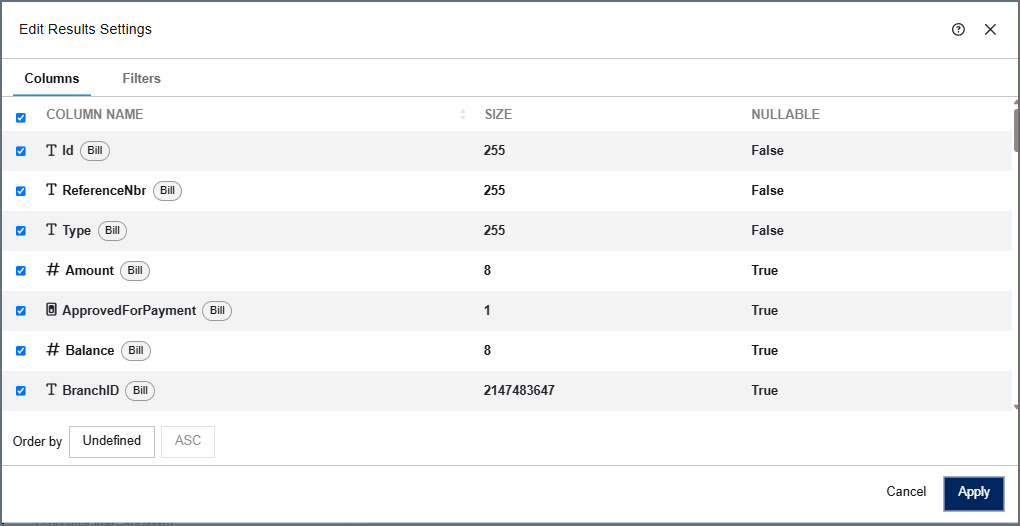
    <p>After you click <strong>Apply</strong>, a <strong>Results</strong> node appears in the results structure. To configure the columns and filters for your join output, click the ellipsis (<strong>...</strong>) on the Results node and choose <strong>Results Settings</strong>.</p>

    <p>The <strong>Edit Results Settings</strong> dialog opens with two tabs: <strong>Columns</strong> and <strong>Filters</strong>.</p>

    <img src="/public/images/dbsa_join_results.png" alt="Edit Results Settings dialog showing the Columns tab with source table tags" width="800" />

    <p>In the <strong>Columns</strong> tab, all columns from all joined tables are listed. Each column displays a tag indicating its source table. By default, all columns are selected. Uncheck a column to exclude it from the query output.</p>

    <Note>When two joined tables share a column name, the connector automatically prefixes the duplicate column with its table name to avoid collisions.</Note>

    <p>At the bottom of the <strong>Columns</strong> tab, use the <strong>Order by</strong> field to sort the output by a column, and choose <strong>ASC</strong> (ascending) or <strong>DESC</strong> (descending) order.</p>

    <p>The <strong>Filters</strong> tab lets you add filters to limit the rows the connector selects. See <a href="#filters">Filters</a> for more information.</p>
  </>;

export const DbasaSelectJoinedTables = ({datasource = "the data source"}) => <>
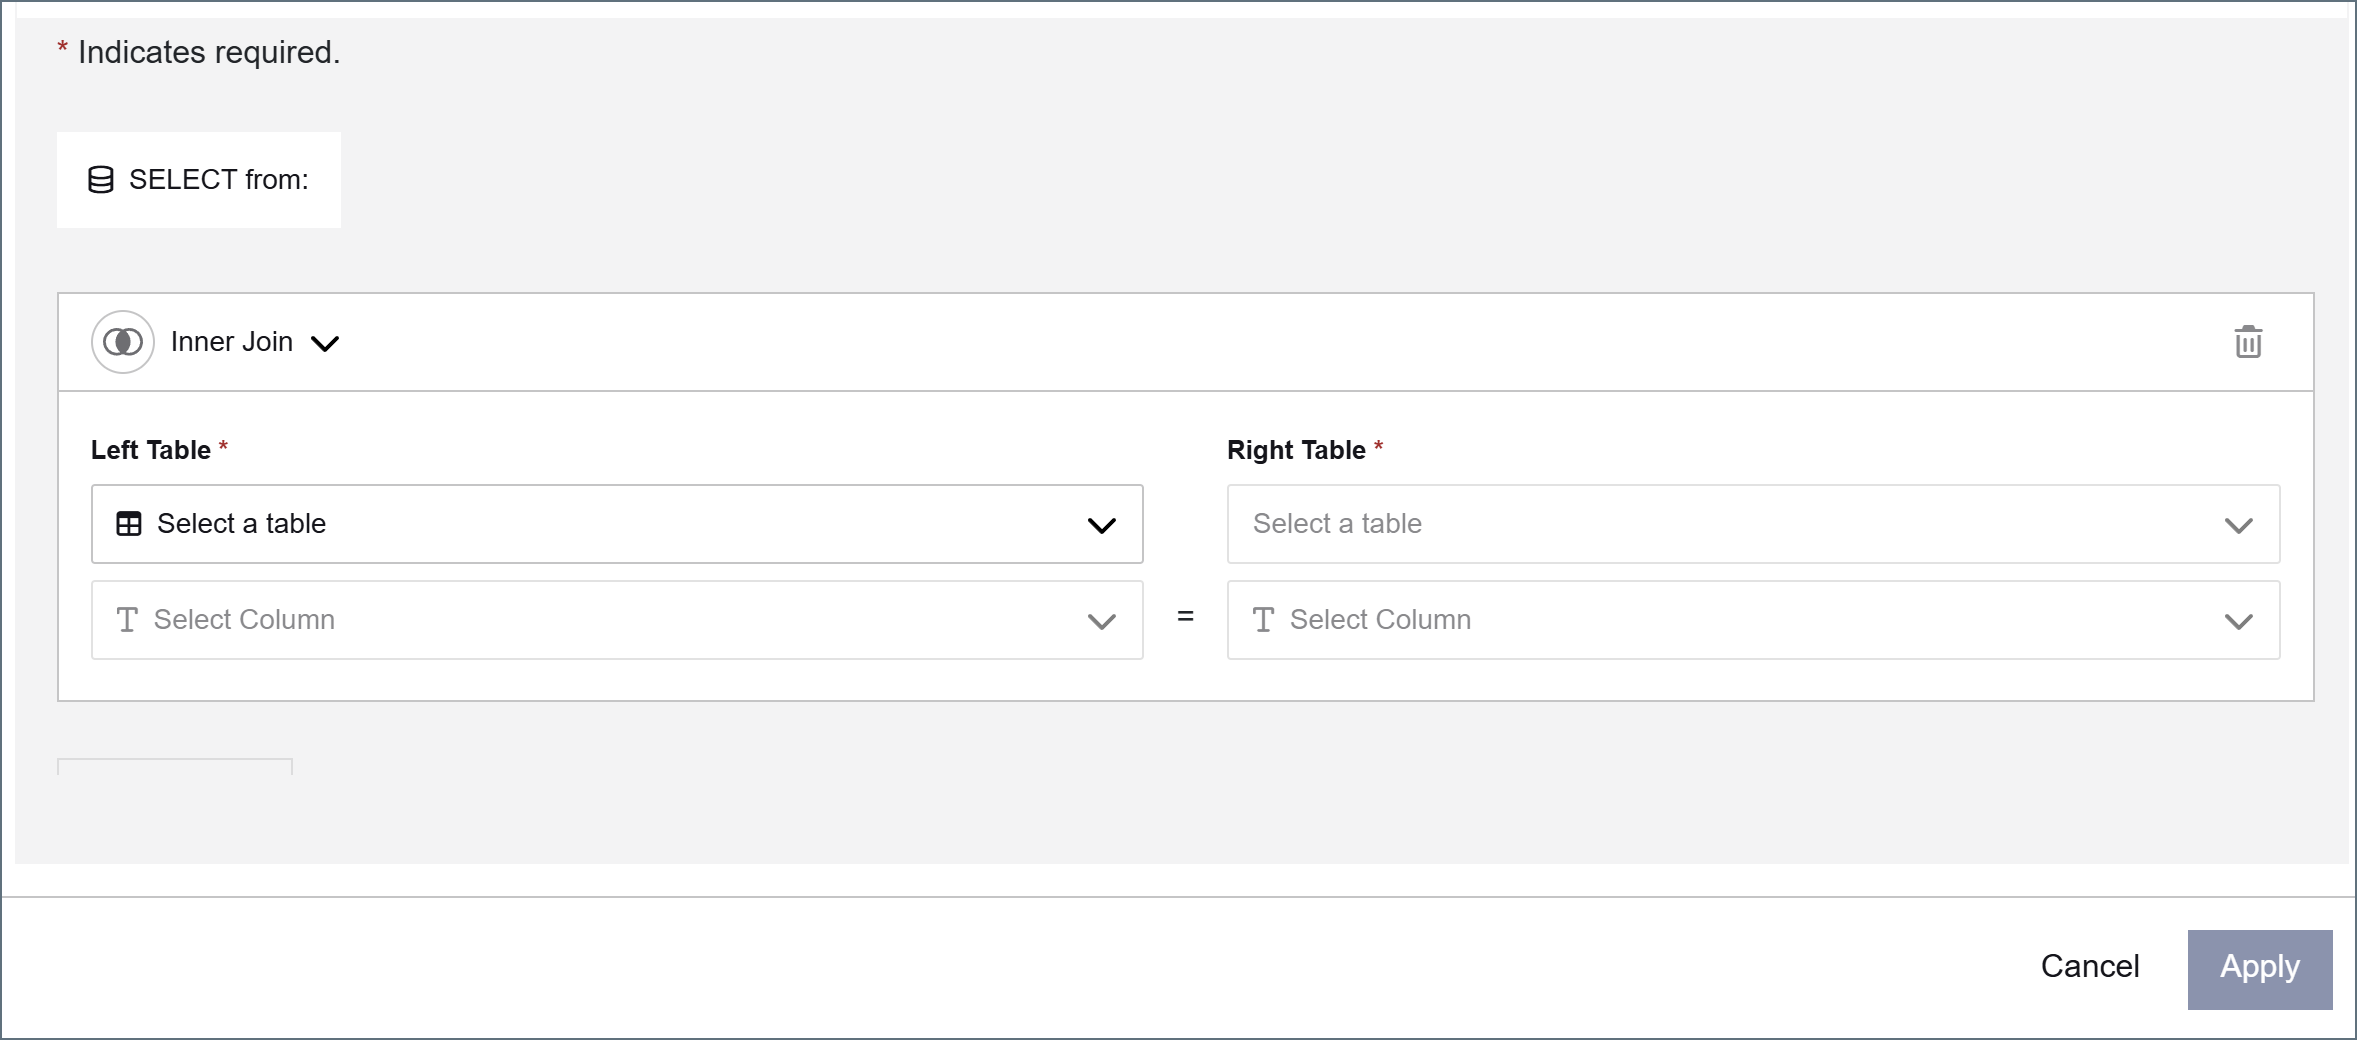
    <p>When you select <strong>Joined Tables</strong> as the structure type, the JOIN designer appears. Use the JOIN designer to define how tables in {datasource} relate to each other. The connector translates your configuration into a single JOIN query.</p>

    <img src="/public/images/dbsa_join_designer.png" alt="JOIN designer with empty join row fields" width="800" />

    <p>Each row in the JOIN designer represents one join relationship and contains the following fields:</p>

    <ul>
      <li><strong>Join Type</strong>: The type of SQL join to perform. The available options depend on what {datasource} supports. Common options include <strong>Inner Join</strong>, <strong>Left Join</strong>, <strong>Right Join</strong>, and <strong>Full Outer Join</strong>.</li>
      <li><strong>Left Table</strong>: The table on the left side of the join. The first join row's left table is the base table for the query.</li>
      <li><strong>Left Column</strong>: The column from the left table to join on.</li>
      <li><strong>Right Table</strong>: The related table on the right side of the join.</li>
      <li><strong>Right Column</strong>: The column from the right table that matches the left column.</li>
    </ul>

    <p>The following example joins a <strong>Bill</strong> table to a <strong>Bill1</strong> table on their shared <strong>Id</strong> column:</p>

    <img src="/public/images/dbsa_join_addtable.png" alt="JOIN designer with Bill and Bill1 tables joined on the Id column" width="800" />
  </>;

export const DbasaSelectAdvancedSettings = () => <>
    <p>The <strong>Options</strong> panel on the right side of the <strong>Edit Source Structure</strong> dialog contains settings that control how the connector processes records. These settings are available alongside the table designer and apply to the entire query.</p>
    <ul>
      <li><strong>Only process new or changed records</strong>: Enables incremental processing so that the connector only selects rows that are new or changed since the last run.</li>
      <li><strong>Update [column] with [value] when rows are processed</strong>: Updates a column with a specified value after each row is processed.</li>
    </ul>

    <p>You can also preview the output structure or view the underlying XML configuration by toggling <strong>Preview XML</strong> or <strong>Code View</strong> at the top of the <strong>Edit Source Structure</strong> dialog.</p>
  </>;

export const DbasaSelectFilterGroups = () => <>
    <p>You can apply multiple filters by clicking <strong>Add Filter</strong> and creating more filters. All filters belong to the same group by default. Click <strong>Add Group</strong> to create a nested group and separate filters by different logic.</p>

    <p>Each group has the following options at the top:</p>

    <ul>
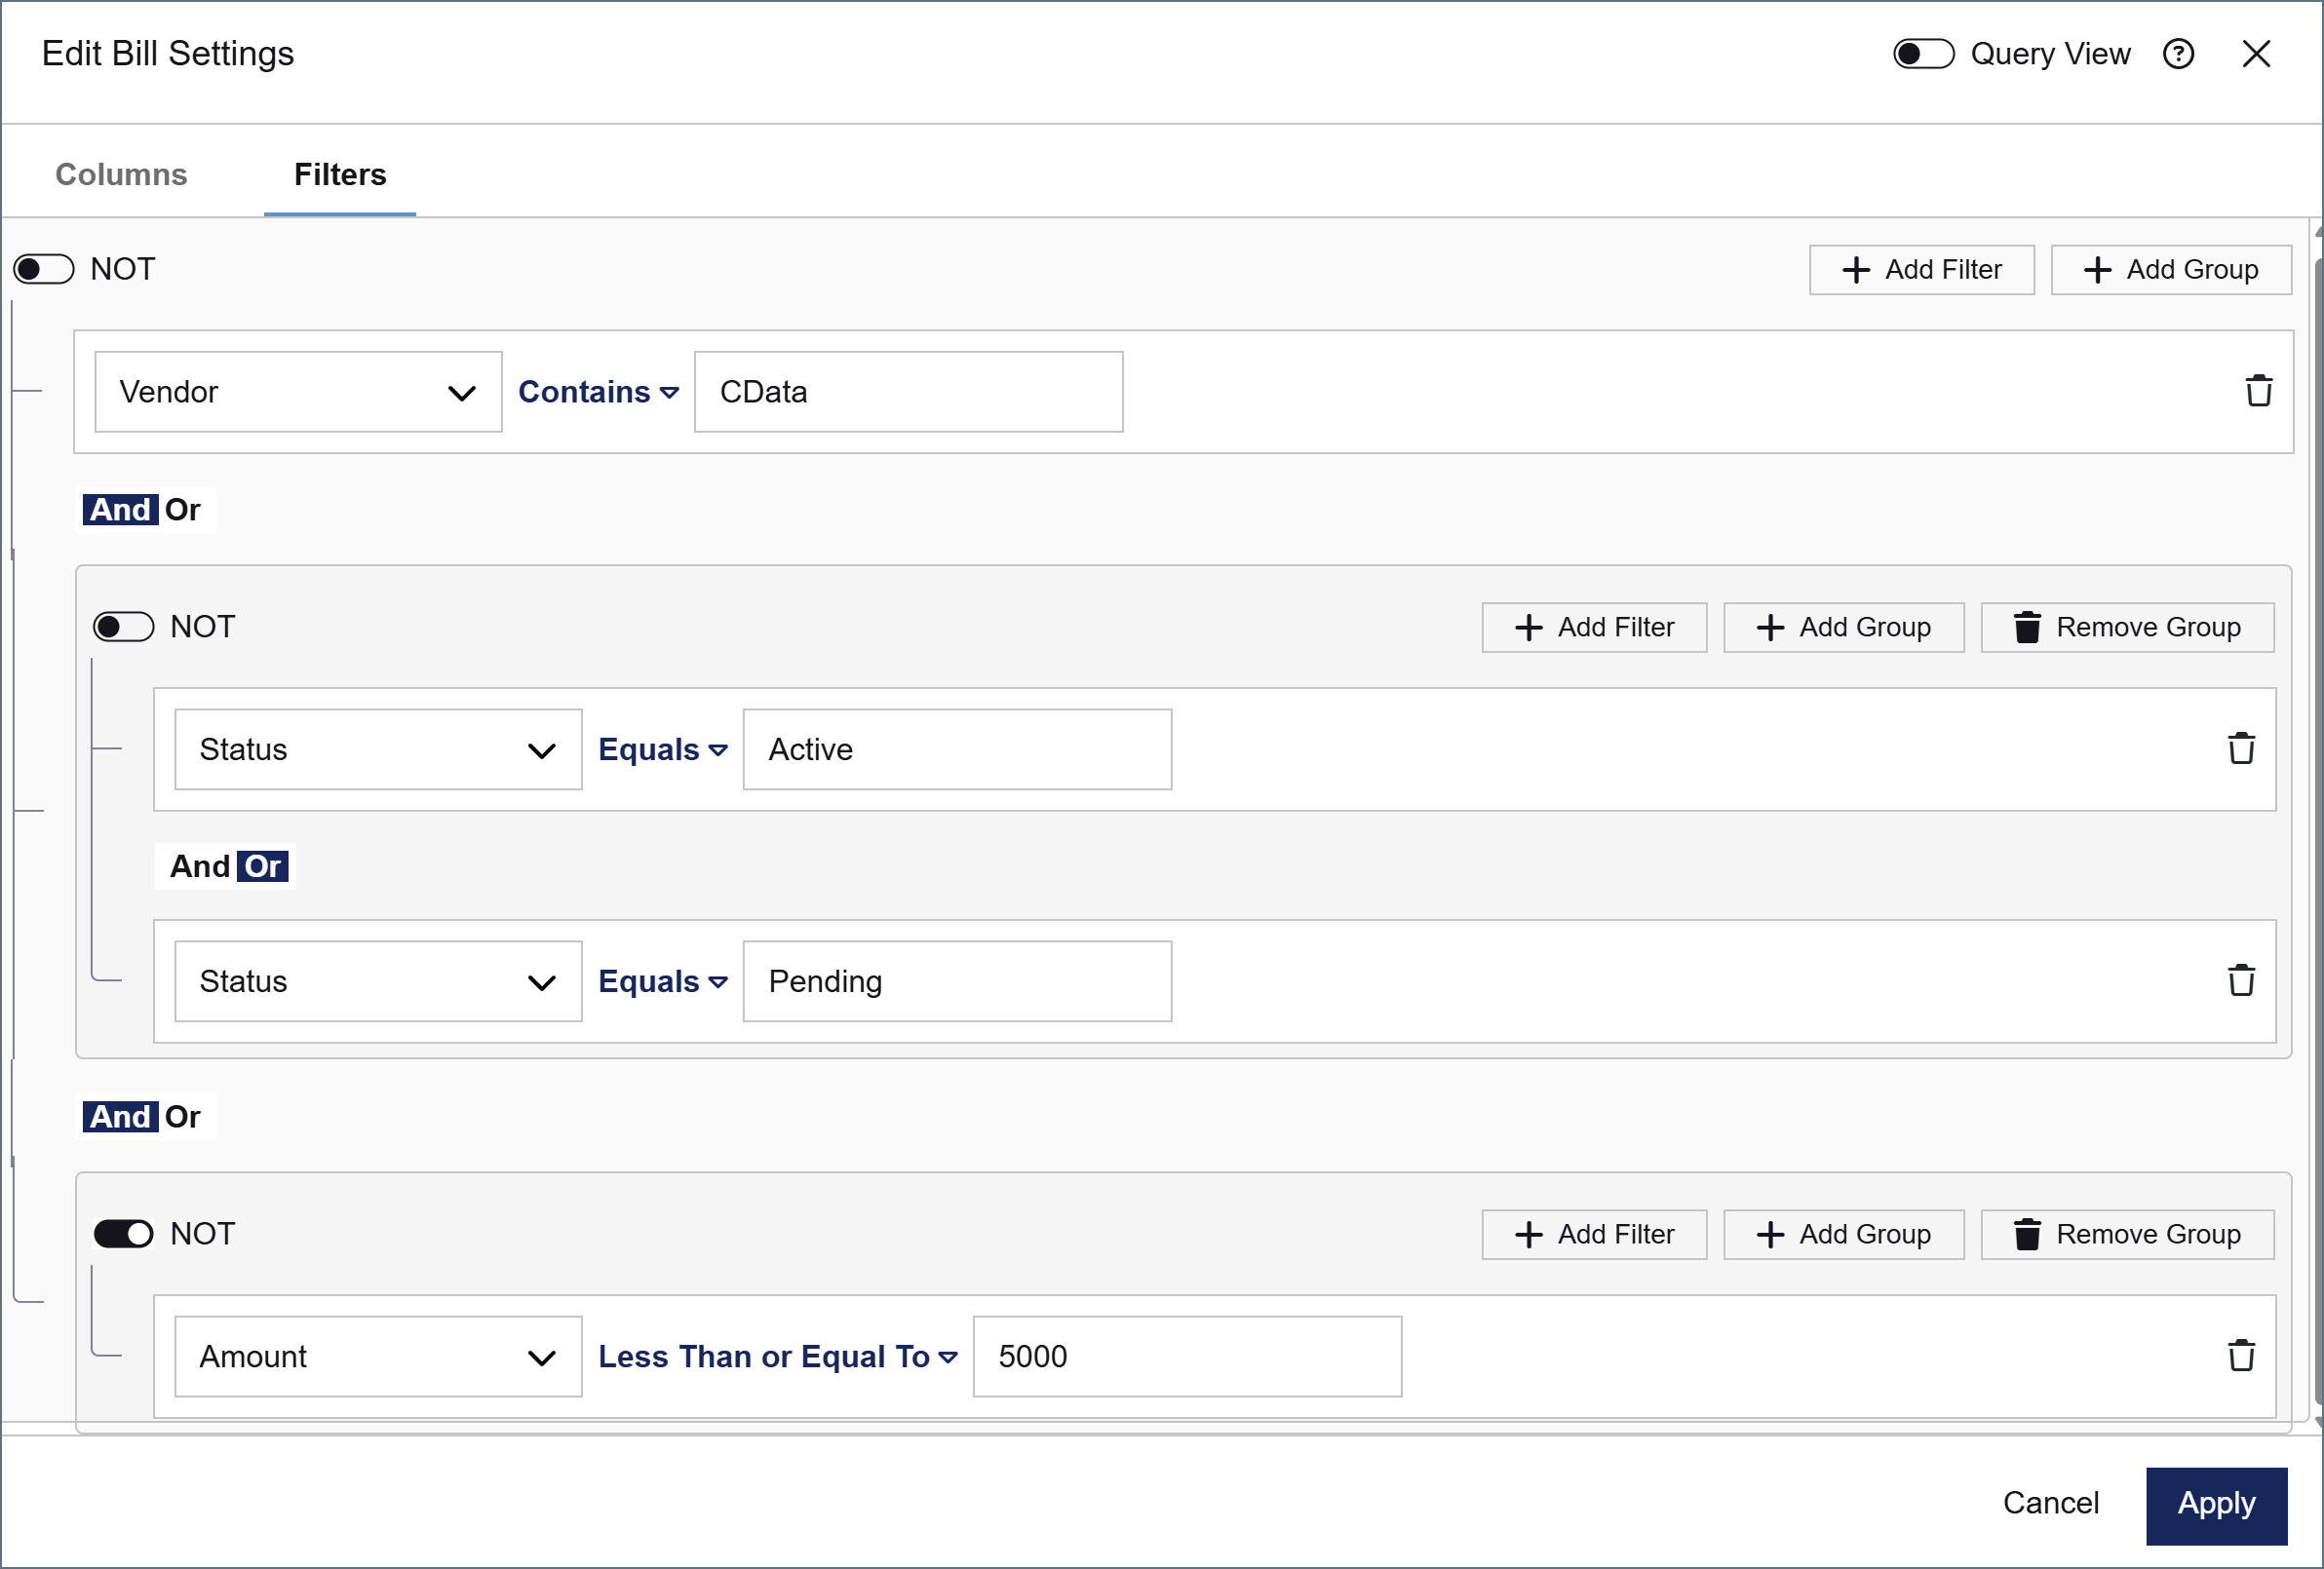
      <li><strong>NOT</strong> toggle: Inverts the logic of the entire group. For example, toggling NOT on a group that contains <strong>Amount Less Than or Equal To 5000</strong> instructs the connector to select only rows where the amount is greater than 5000.</li>
      <li><strong>And / Or</strong> toggle: Determines how this group relates to adjacent filters or groups.
        <ul>
          <li>If you select <strong>And</strong>, this group's condition must be true in addition to adjacent conditions.</li>
          <li>If you select <strong>Or</strong>, this group's condition is an alternative to adjacent conditions.</li>
        </ul>
      </li>
    </ul>

    <p>The screenshot below shows an example with multiple filter groups.</p>

    <img src="/public/images/dbsa_filter_group.png" alt="Multiple filter groups showing AND and OR logic" width="800" />

    <p>In this example, the filter condition is met when all of the following are true:</p>
    <ul>
      <li>The <strong>Vendor</strong> column contains <strong>CData</strong></li>
      <li>The <strong>Status</strong> column equals <strong>Active</strong> or <strong>Pending</strong></li>
      <li>The <strong>Amount</strong> column is <em>not</em> less than or equal to <strong>5000</strong> (that is, Amount is greater than 5000)</li>
    </ul>

    <p>If this filter condition is met, the connector selects the matching data and passes it down the flow.</p>
  </>;

export const DbasaSelectFilterRule = () => <>
    <p>To create a filter, follow these steps:</p>

    <ol>
      <li>Click <strong>Add Filter</strong>.</li>
      <li>In the column dropdown, choose the column that you want to filter.</li>
      <li>In the condition dropdown, choose the filtering condition. The available conditions depend on the data type of the column you selected. For example, a numeric column has the condition <strong>Less Than or Equal To</strong>, whereas a string column has <strong>Contains</strong>.</li>
      <li>Enter a value in the value field. If the condition does not require a value (for example, <strong>Is Null</strong>), the value field is not shown.</li>
    </ol>

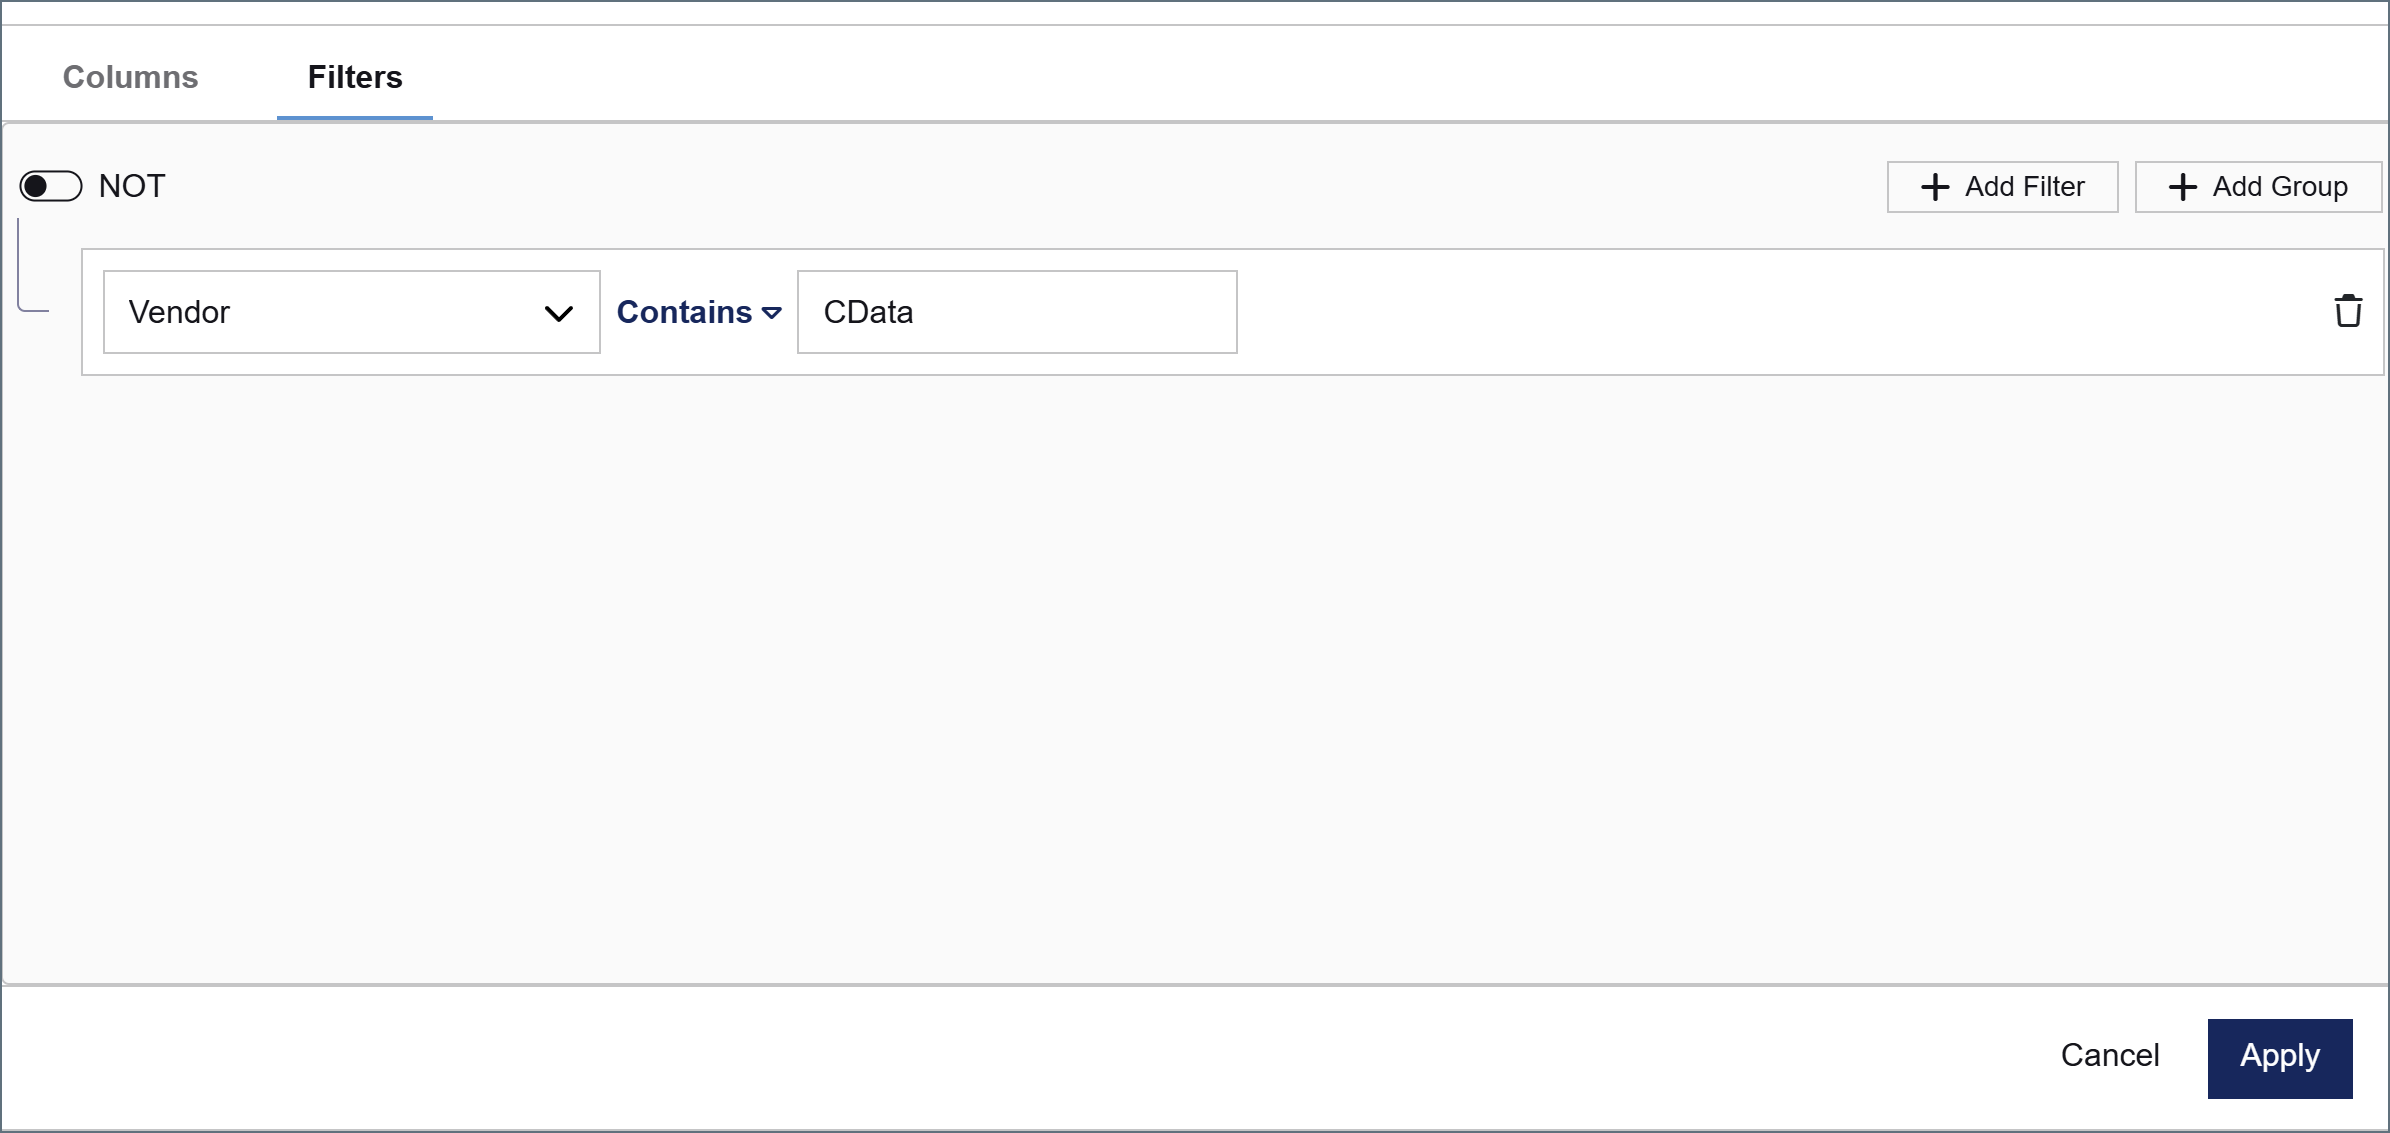
    <p>The image below shows an example of a filter on a column named <strong>Vendor</strong>. With this filter in place, the connector only selects rows where the <strong>Vendor</strong> column contains <strong>CData</strong>.</p>

    <img src="/public/images/dbsa_filter.png" alt="Filter configured on the Vendor column with Contains CData condition" width="800" />
  </>;

export const DbasaSelectFilters = () => <>
    <p>You can optionally add filters to limit the data the connector selects. Click the <strong>Filters</strong> tab in the settings dialog to configure filters. The connector translates your filters into query syntax.</p>

    <Note>You do not need to apply a filter to your data if it does not suit your use case.</Note>
  </>;

export const DbasaSelectTableResults = ({connectorSlug}) => <>
    <p>After you click <strong>Apply</strong>, an <strong>Items</strong> node appears in the results structure. To configure the columns and filters for your query, click the ellipsis (<strong>...</strong>) on the table name node and choose <strong>Table Settings</strong>.</p>

    <p>The <strong>Edit [table name] Settings</strong> dialog opens with two tabs: <strong>Columns</strong> and <strong>Filters</strong>.</p>

    <img src="/public/images/dbsa_join_results.png" alt="Edit table Settings dialog showing the Columns tab with source table tags" width="800" />

    <p>In the <strong>Columns</strong> tab, all columns from the selected tables are listed. Each column displays a tag indicating its source table. By default, all columns are selected. Uncheck a column to exclude it from the query output.</p>

    <Note>You can select more tables by clicking the link to your <strong>Source</strong> table name and returning to <strong>Edit Source Structure</strong> pane. See <a href={connectorSlug ? `/26.3/self-hosted/en/connectors/${connectorSlug}/${connectorSlug}-ac#child-tables` : "#child-tables"}>Child Tables</a> for more information.</Note>
    
    <p>At the bottom of the <strong>Columns</strong> tab, use the <strong>Order by</strong> field to sort the output by a column, and choose <strong>ASC</strong> (ascending) or <strong>DESC</strong> (descending) order.</p>

    <p>The <strong>Filters</strong> tab lets you add filters to limit the rows the connector selects. See <a href="#filters">Filters</a> for more information.</p>
  </>;

export const DbasaSelectTablesAndColumns = ({datasource = "the data source", connectorSlug}) => <>
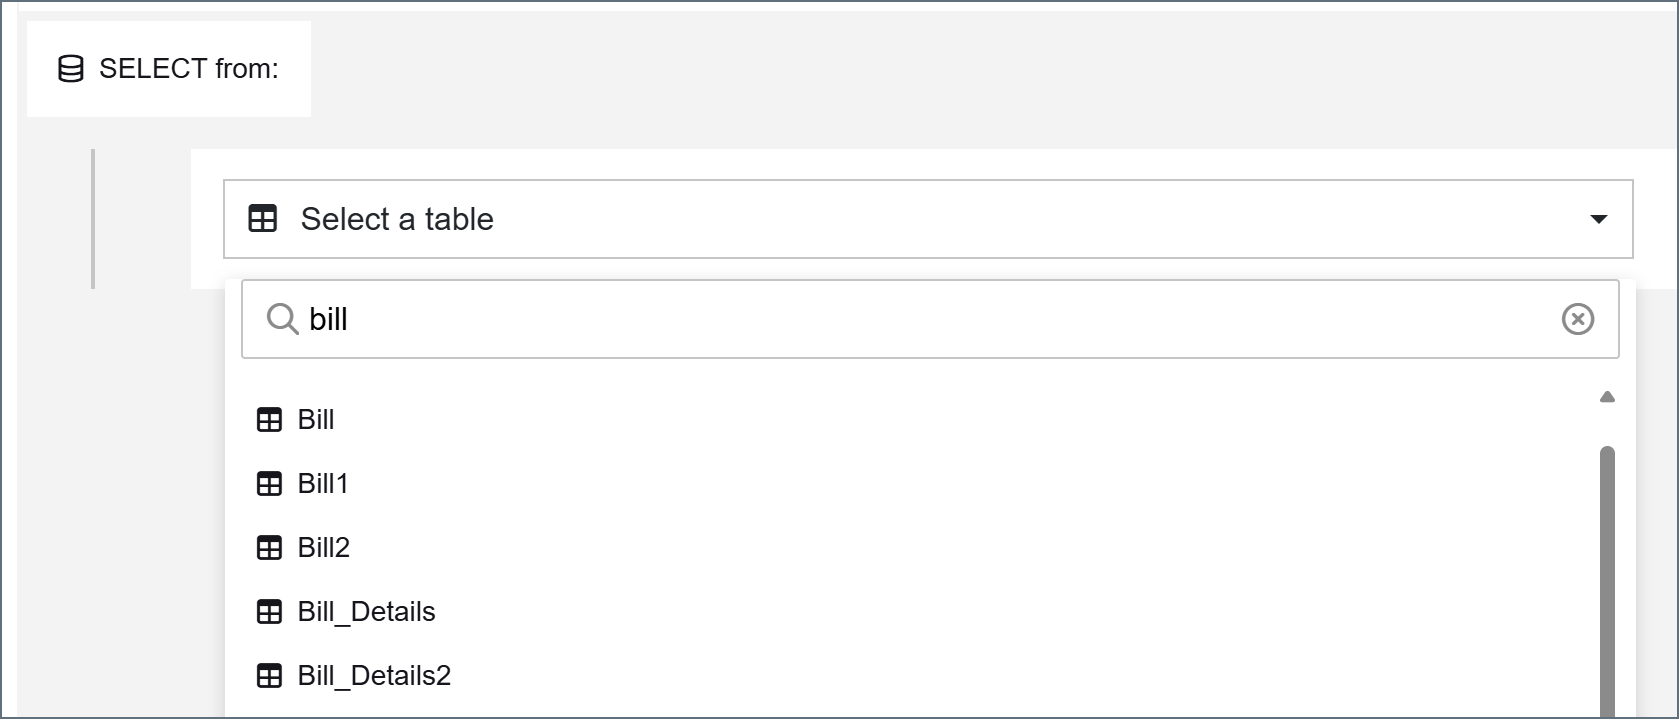
    <p>Use the dropdown list to select a target table from {datasource}.</p>

    <img src="/public/images/dbsa_select_tableadd_263.png" alt="Dropdown for selecting a target table in the source structure editor" width="700" />

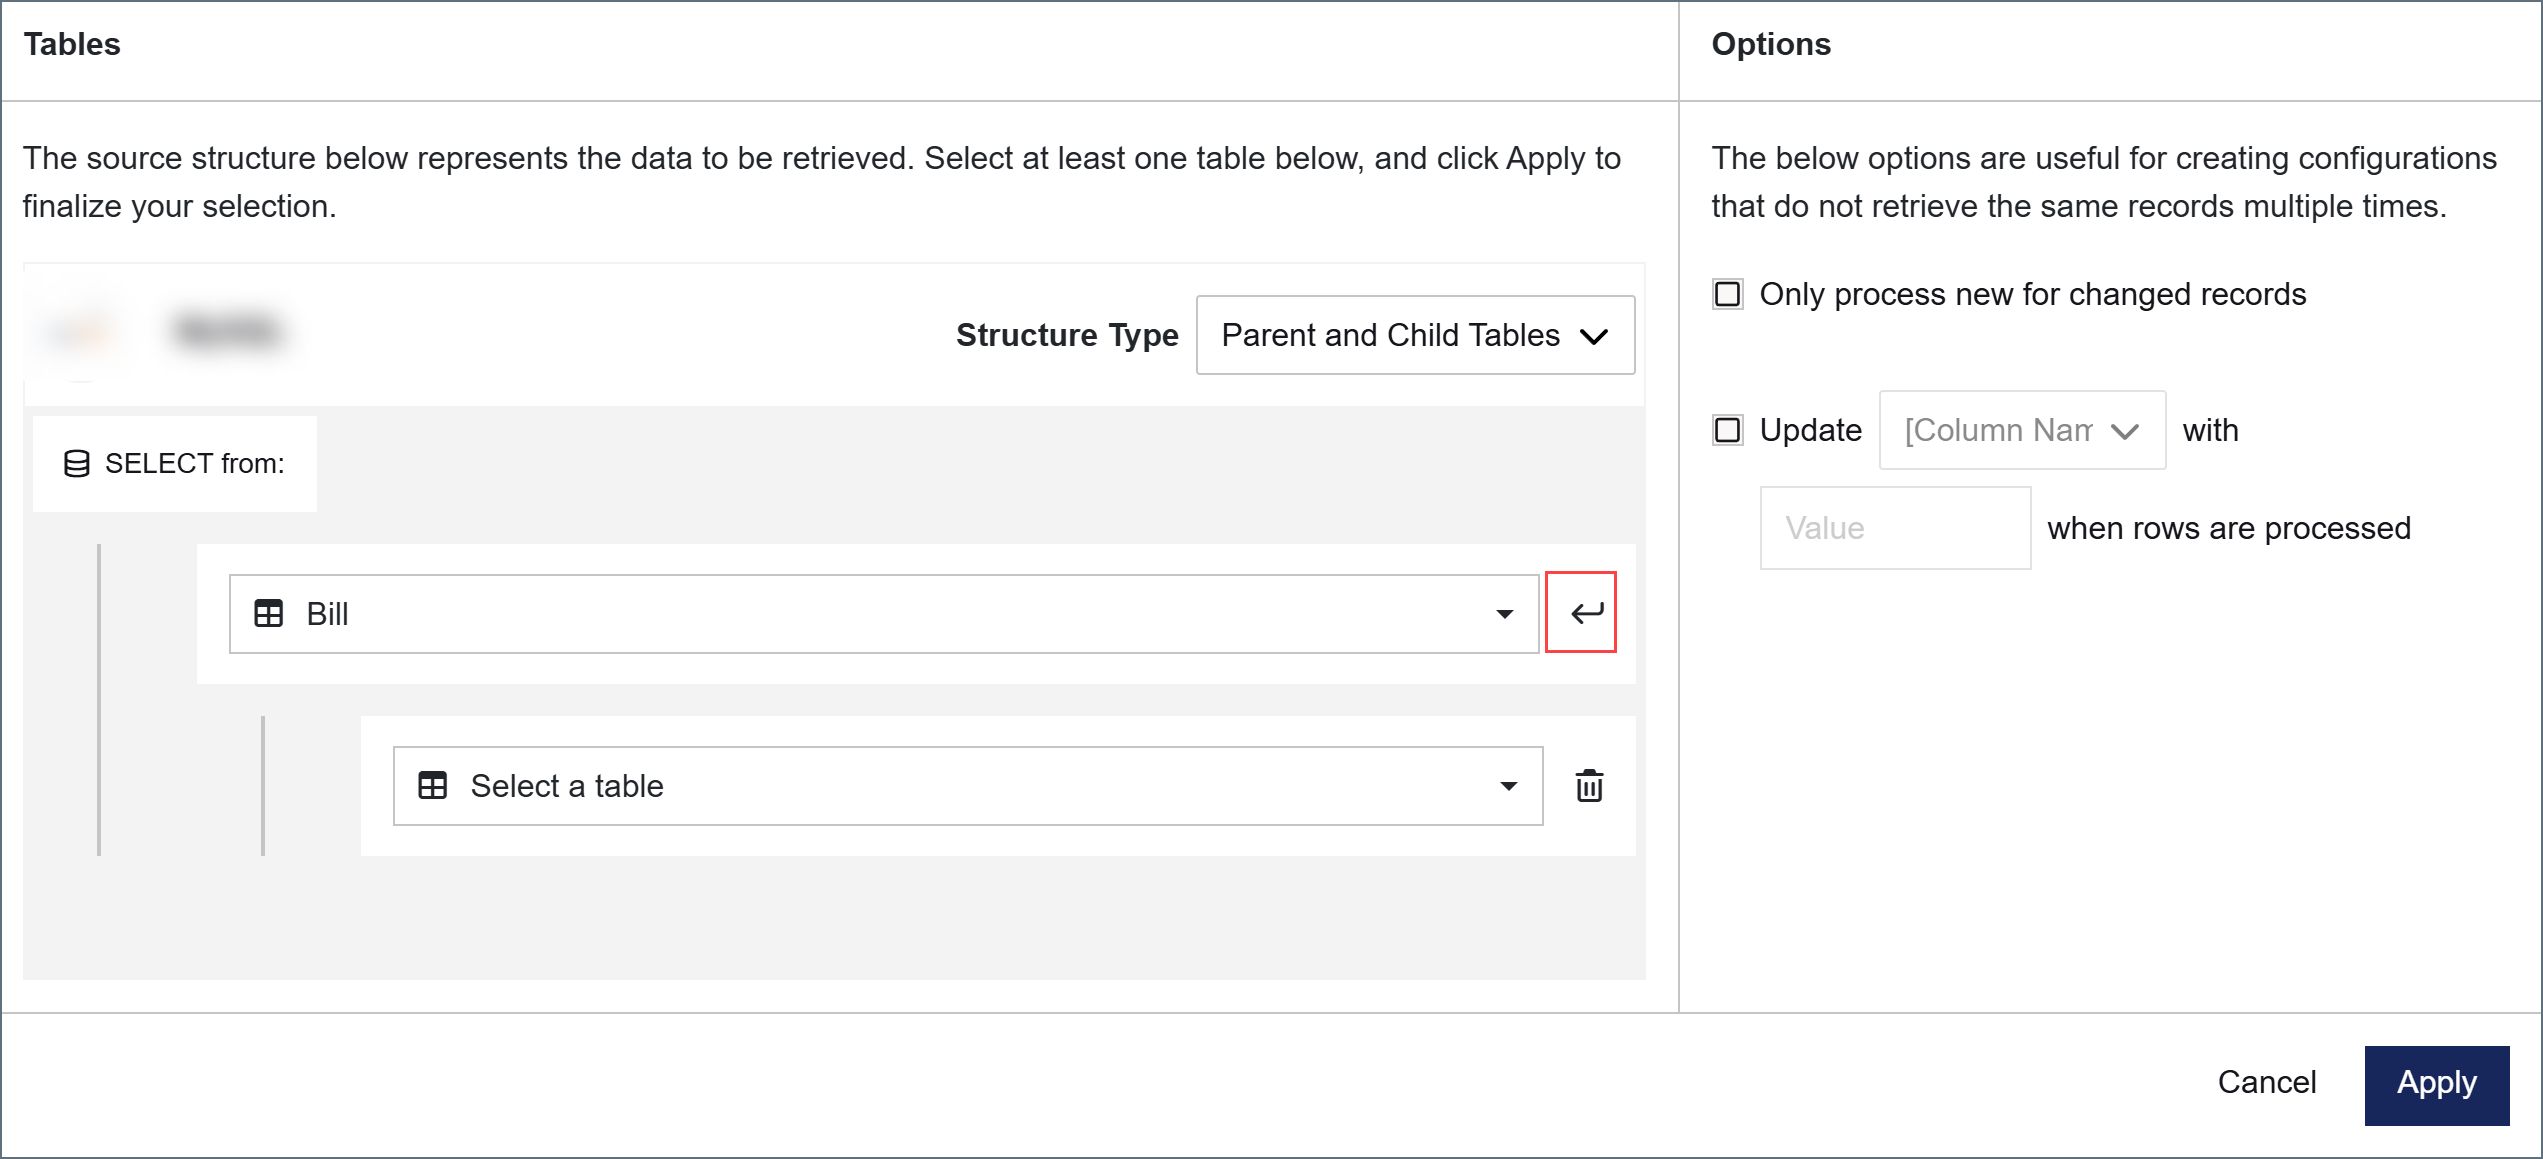
    <p>Use the arrow to add child tables to your structure. The following image shows Bill selected as the parent table, and a child table ready to be selected. When you have finished with your selections, click <strong>Apply</strong>.</p>

    <img src="/public/images/dbsa_tablelist_263.png" alt="Table list with Bill selected as the parent table and a child table ready to be selected" width="800" />
  </>;

export const DbasaSelectStructureType = ({datasource = "the data source"}) => <>
    <p>Once you have configured and tested your connection, click the <strong>Action</strong> tab. Ensure the <strong>Action</strong> dropdown is set to <strong>Select</strong>. Click <strong>Add Table Structure</strong> to define your tables and columns.</p> 
    
    <p>Choose a <strong>Structure Type</strong>. The structure type determines how the connector queries {datasource}. The available structure types are:</p>

    <ul>
      <li><a href="#parent-and-child-tables">Parent and Child Tables</a>: The connector queries tables using a parent-child hierarchy. You can add additional tables as child tables or by using multiple connectors in your flow.</li>
      <li><a href="#joined-tables">Joined Tables</a>: The connector issues a single JOIN query that combines data from two or more related tables.</li>
    </ul>

    <p>The structure types are described in the following sections.</p>

    <Note>Joined Tables issues a single query to {datasource}, which is more efficient than the Parent and Child Tables approach for data sources that enforce API rate limits.</Note>
  </>;

export const DbasaSelectIntro = ({datasource = "the data source", siteName = "CData Arc"}) => <p>The Select action retrieves data from {datasource} and brings it into {siteName}.</p>;

<DbasaSelectIntro datasource="SQLite" />

## Tables and Columns

<DbasaSelectStructureType datasource="SQLite" />

### Parent and Child Tables

<DbasaSelectTablesAndColumns datasource="SQLite" connectorSlug="sqlite" />

#### Results

<DbasaSelectTableResults connectorSlug="sqlite" />

#### Options

<DbasaSelectAdvancedSettings />

### Joined Tables

<DbasaSelectJoinedTables datasource="SQLite" />

This produces a query equivalent to:

```sql theme={null}
SELECT ... FROM Bill INNER JOIN Bill1 ON Bill.Id = Bill1.Id
```

To join more than two tables, click **Add Join** to add another join row. Each additional row joins a new table to the result of the previous join.

When you are done configuring the join, click **Apply**.

#### Results

<DbasaSelectJoinResults />

#### Options

<DbasaSelectJoinAdvanced />

## Filters

<DbasaSelectFilters />

### Creating a Filter

<DbasaSelectFilterRule />

### Filter Groups

<DbasaSelectFilterGroups />

## Example Arc Flow

<DbasaSelectExampleFlow datasource="SQLite" selectXmlFlow="sqlite_xmlflow_select.png" />