> ## Documentation Index
> Fetch the complete documentation index at: https://docs.arc.cdata.com/llms.txt
> Use this file to discover all available pages before exploring further.

# Shopify Select

> Retrieve data from Shopify and bring it into Arc.

export const DbasaSelectExampleFlow = ({datasource = "the data source", selectXmlFlow = "dbsa_select_flow.png", siteNameShort = "Arc"}) => <>
    <p>After you choose the tables and columns for the Select-configured {datasource} connector, place the connector at the beginning of an {siteNameShort} flow. The screenshot below depicts an example flow with a {datasource} Select connector, an XML Map connector, a CSV connector, and a File connector at the end:</p>

    <img src={`/public/images/${selectXmlFlow}`} width="900" />

    <p>Data in this example flow passes through these steps:</p>

    <ol>
      <li>The <strong>{datasource}_Select</strong> connector pulls data from a {datasource} connection.</li>
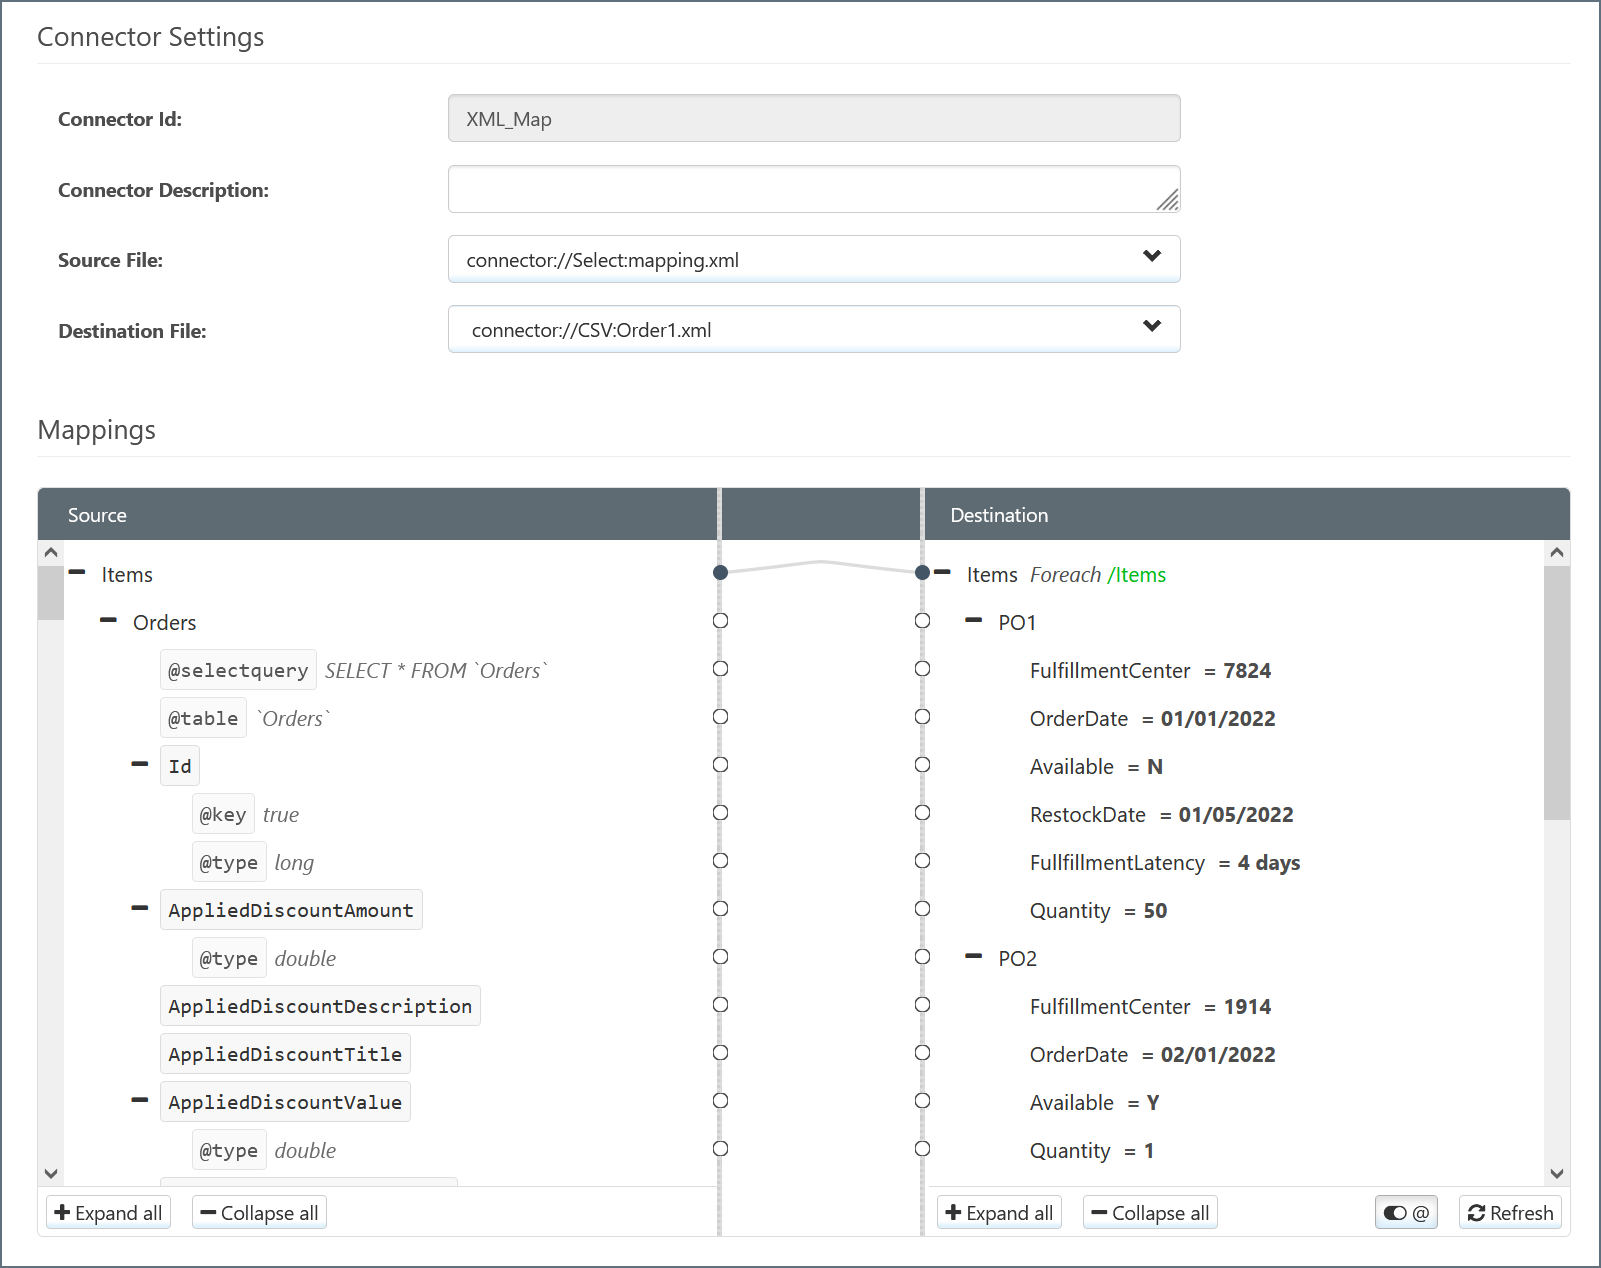
      <li>This data passes to the <strong>XML_Map</strong> connector as the <strong>Source File</strong>, which maps to the <strong>Source</strong> tree.</li>
      <li>Data from the <strong>CSV1</strong> connector passes to the <strong>XML_Map</strong> connector as the <strong>Destination File</strong>, which maps to the <strong>Destination</strong> tree.
        <img src="/public/images/dbsa_xmlmap_select.png" width="800" />
      </li>
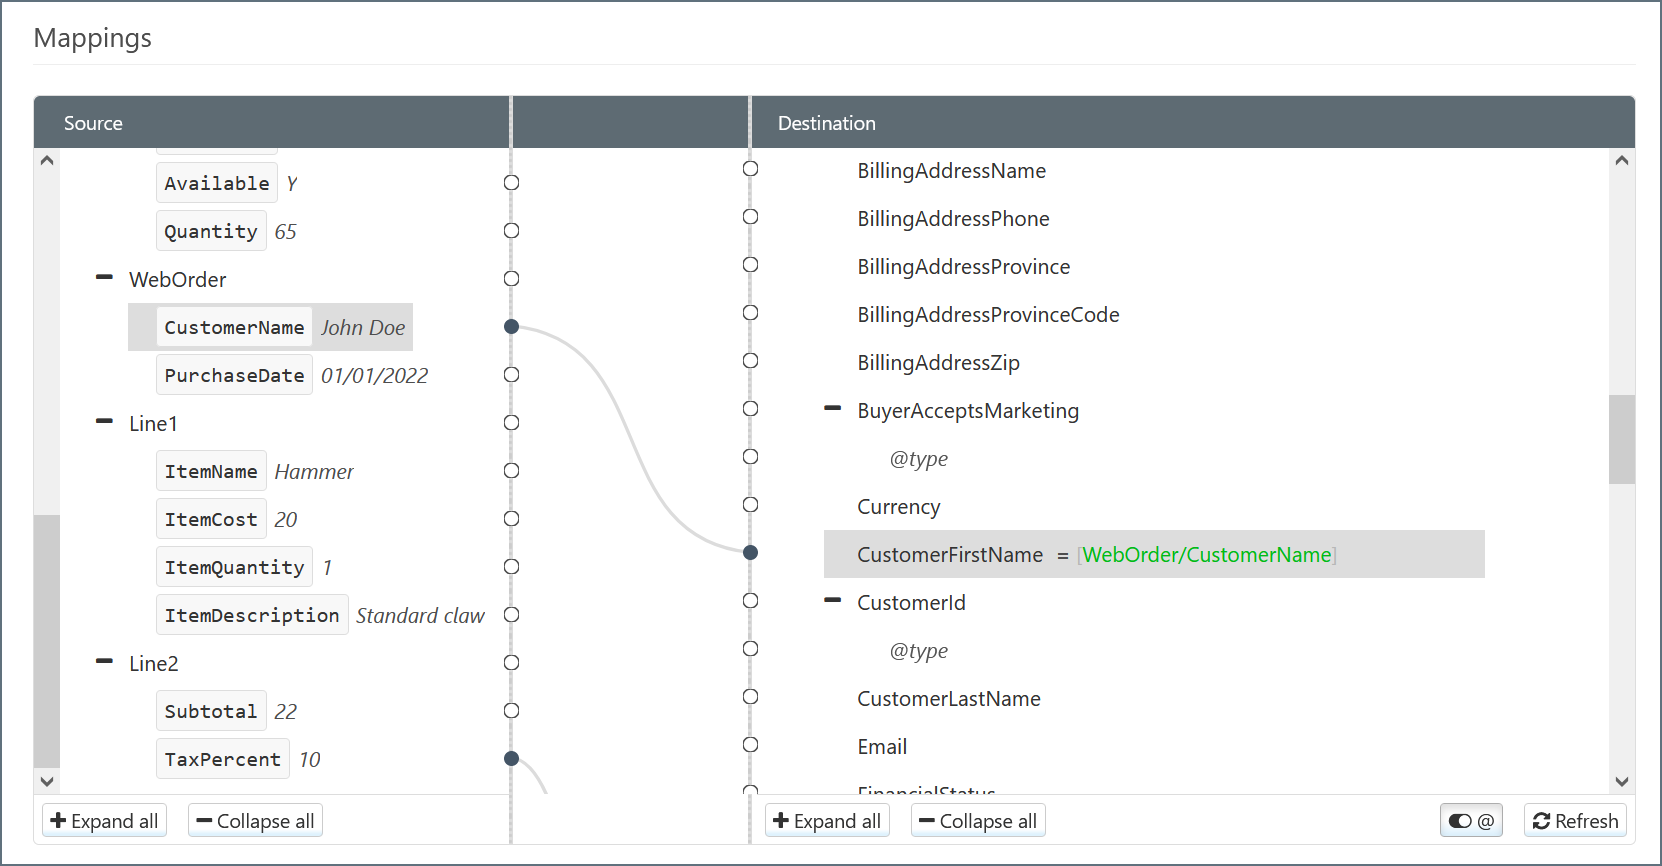
      <li>The <strong>XML_Map</strong> connector attempts to automatically map <strong>Source</strong> elements to <strong>Destination</strong> elements with the same name. You can manually change these and fill in blank mappings by dragging elements from <strong>Source</strong> to <strong>Destination</strong>.
        <img src="/public/images/dbsa_xmlmap_elements.png" width="800" />
      </li>
      <li>The file from <strong>CSV1</strong> that has been modified with data from <strong>{datasource}_Select</strong> then passes down the flow from <strong>CSV1</strong>.</li>
    </ol>
  </>;

export const DbasaSelectMultipleTables = ({datasource = "the data source", connectorSlug}) => <>
    <p>The {datasource} connector supports Selecting multiple tables with a single action. You can accomplish this in two ways:</p>

    <ul>
      <li>Assign extra tables as children of a parent table. See <a href={connectorSlug ? `/26.2/self-hosted/en/connectors/${connectorSlug}/${connectorSlug}-ac#child-tables` : "#child-tables"}>Child Tables</a> for more information.</li>
      <li>Create multiple Select-configured {datasource} connectors, assign each of them a different table, and connect them all to the same connector in the flow.</li>
    </ul>

    <p>You can assign separate queries to each child table or individual {datasource} connector as needed. See <a href="#filters">Filters</a> for more information.</p>
  </>;

export const DbasaSelectAdvancedSettings = () => <p>In the <strong>Advanced</strong> section, you can configure settings for using specific columns for processing records and updating columns with specific values when rows are processed successfully. These settings are useful for maintaining and tracking changes in your flow.</p>;

export const DbasaSelectFilterGroups = () => <>
    <p>You can apply multiple filter rules to your connector by clicking <strong>Add rule</strong> and creating more rules. Filter rules are separated by groups, and all filters belong to the same group by default. You can create multiple groups to separate filter rules by clicking <strong>Add group</strong>.</p>

    <p>Each filter rule in a group interacts with the others based on the options you select at the top of the group:</p>

    <ul>
      <li>Check the <strong>NOT</strong> box to invert the filter conditions. For example, in the <strong>Author</strong> filter shown above, checking the <strong>NOT</strong> box instructs the connector to select Author values that do <em>not</em> contain <strong>Smith</strong>.</li>
      <li>Select either <strong>AND</strong> or <strong>OR</strong> to determine the group logic for multiple filters.
        <ul>
          <li>If you select <strong>AND</strong>, every filter rule in the group must be true for the filter conditions to be met.</li>
          <li>If you select <strong>OR</strong>, at least one filter rule in the group must be true for the filter conditions to be met. Multiple filter rules can be met, and the results are the same as if only one were met.</li>
        </ul>
      </li>
    </ul>

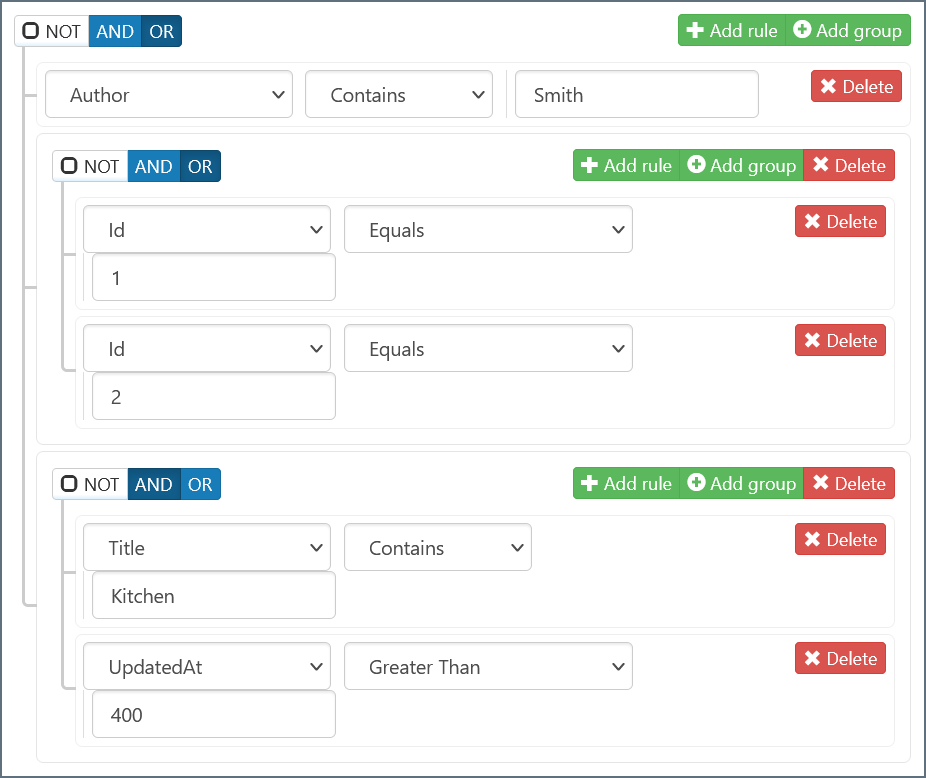
    <p>Filter groups have simple parent/child relationships. Each filter rule and filter group that belongs to a parent group exists as a single entity for the filter logic. For example, the screenshot below shows multiple filter groups.</p>

    <img src="/public/images/dbsa_filter_multiple.png" width="600" />

    <p>In this example, the parent group is using <strong>OR</strong> logic. This means that if <em>any</em> of the following statements is true, the filter condition is met:</p>
    <ul>
      <li>The <strong>Author</strong> column contains the value <strong>Smith</strong></li>
      <li>The <strong>Id</strong> column equals <strong>1</strong> or <strong>2</strong></li>
      <li>The <strong>Title</strong> column contains the value <strong>Kitchen</strong> and the <strong>UpdatedAt</strong> column is greater than <strong>400</strong></li>
    </ul>

    <p>If this filter condition is met, the connector Selects the data that meets the condition and passes it down the flow.</p>
  </>;

export const DbasaSelectFilterRule = () => <>
    <p>To create a filter rule, follow these steps:</p>

    <ol>
      <li>Click <strong>Add rule</strong>.</li>
      <li>In the drop-down list for the new rule, choose the column that you want to filter.</li>
      <li>Two new fields appear. In the new drop-down list, choose the filtering condition.
        <ul>
          <li>The available filtering conditions depend on the data type for the column you select. For example, a <code>long</code> data type has the condition <strong>Greater Than</strong>, whereas a <code>string</code> data type does not.</li>
        </ul>
      </li>
      <li>If your filtering condition requires a value, enter that value in the blank value field. If your filtering condition does not require a value (for example, if you choose <strong>Is Null</strong>), the value field disappears.</li>
      <li>When your filter rule is complete, its background changes from red to white.</li>
    </ol>

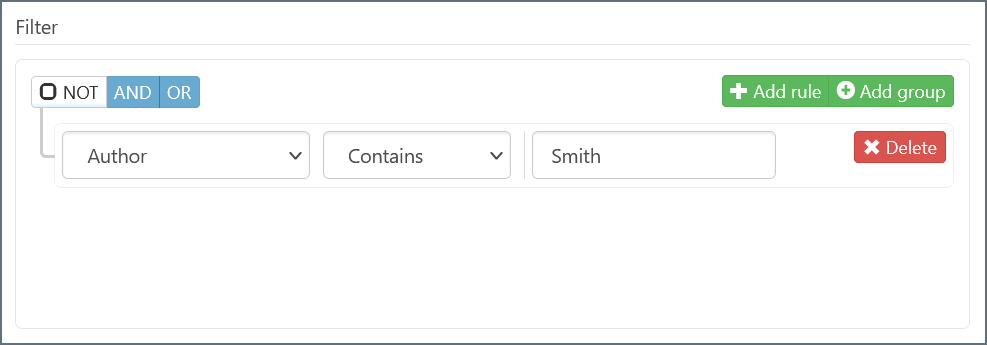
    <p>The image below shows an example of a filter rule on a column named <strong>Author</strong>. With this filter rule in place, the connector only selects values in the <strong>Author</strong> column that contain <strong>Smith</strong>.</p>

    <img src="/public/images/dbsa_filter_single.png" width="600" />
  </>;

export const DbasaSelectFilters = () => <>
    <p>After you select a table, you can optionally use the <strong>Filter</strong> pane to filter the data that the connector selects. The connector translates your filter rules into query syntax, and the syntax appears in the <strong>Query</strong> pane at the bottom of the connector configuration page.</p>

    <Note>You do not need to apply a filter to your data if it does not suit your use case.</Note>
  </>;

export const DbasaSelectTablesAndColumns = ({datasource = "the data source", connectorSlug}) => <>
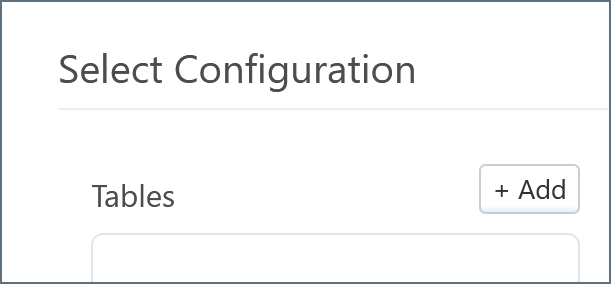
    <p>If you choose Select for the {datasource} connector, you must select a target table (or tables) from {datasource}. Click the <strong>Add</strong> button above the <strong>Tables</strong> pane.</p>

    <img src="/public/images/dbsa_select_tableadd.png" width="250" />

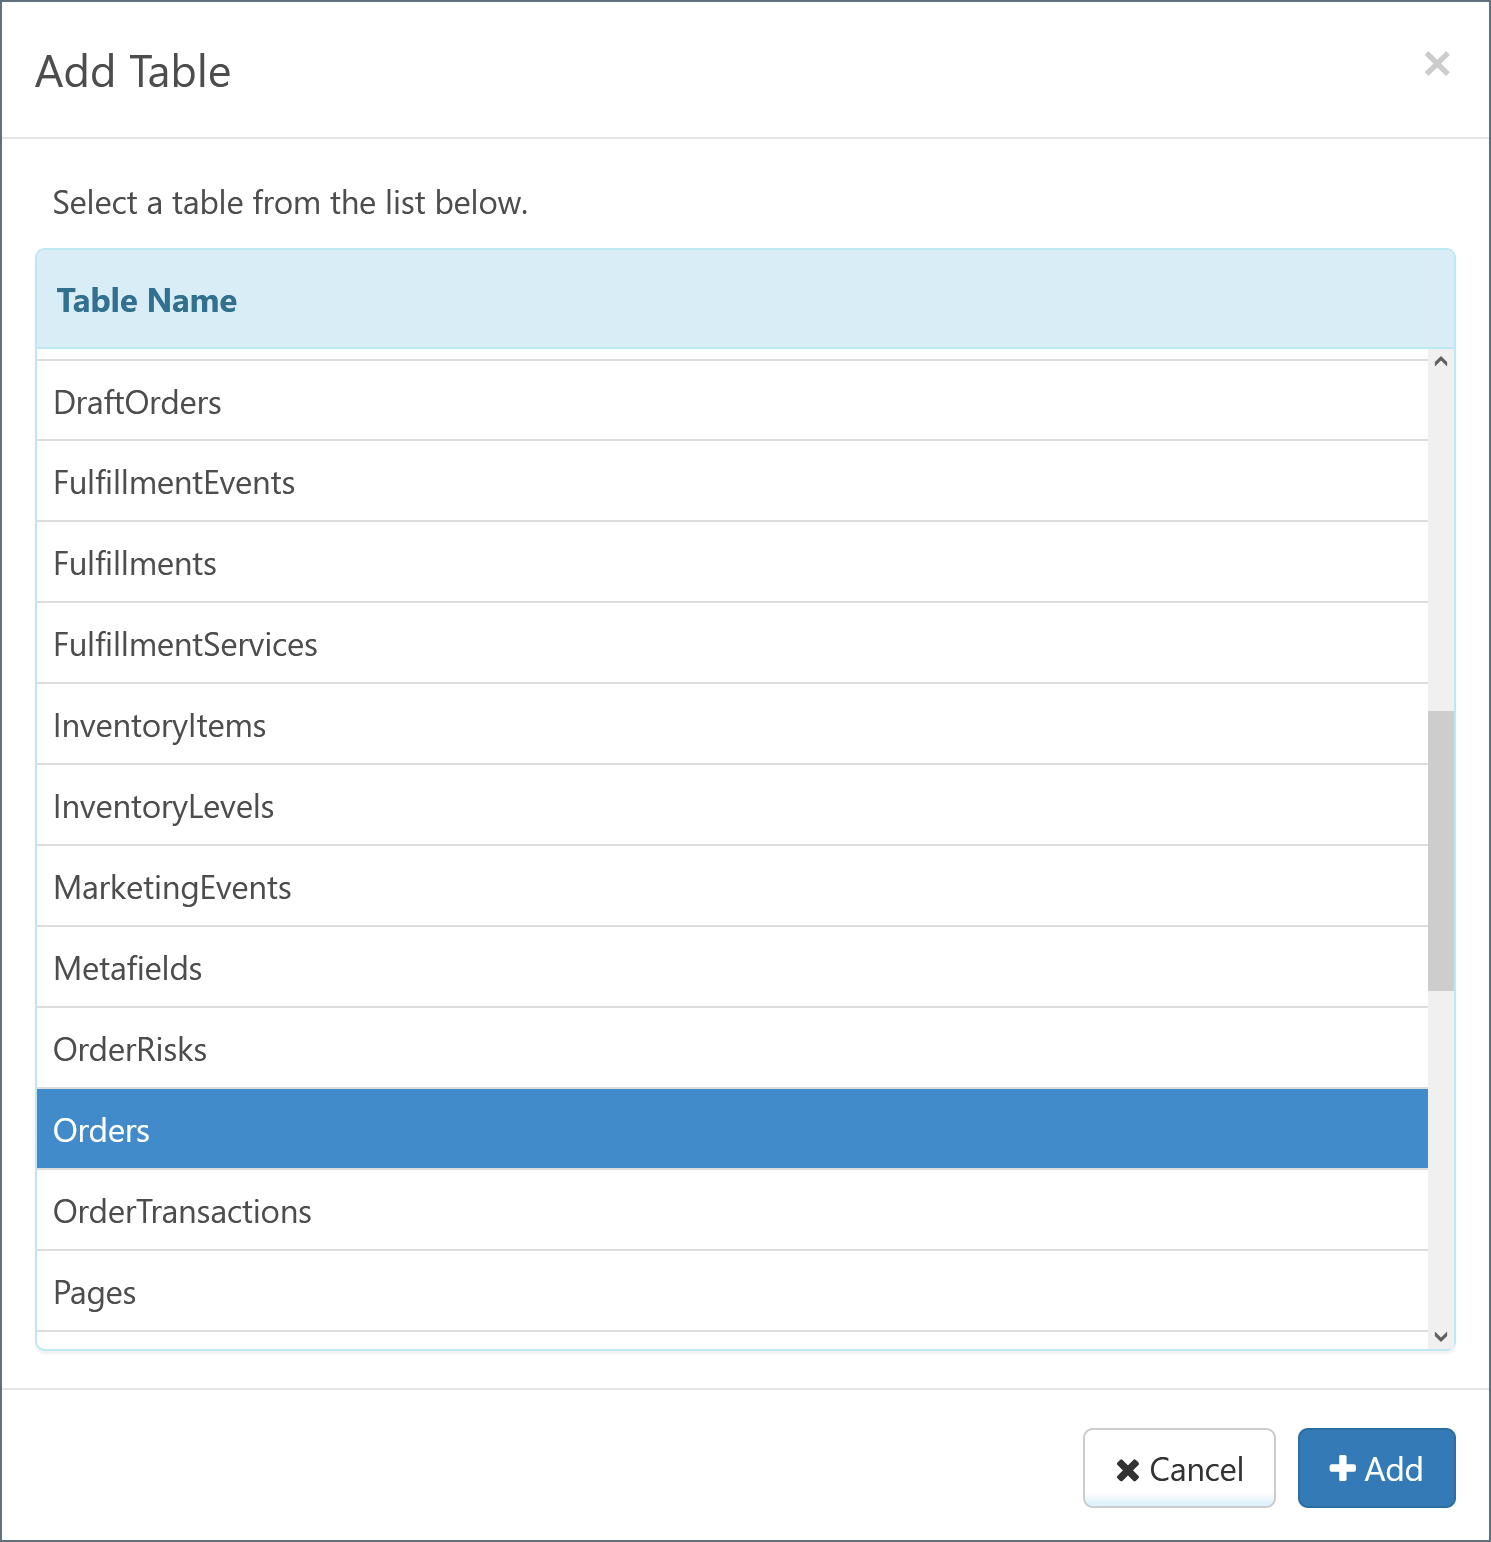
    <p>A modal appears and lists all available tables. Select the desired table and click <strong>Add</strong>.</p>

    <img src="/public/images/dbsa_tablelist.png" width="500" />

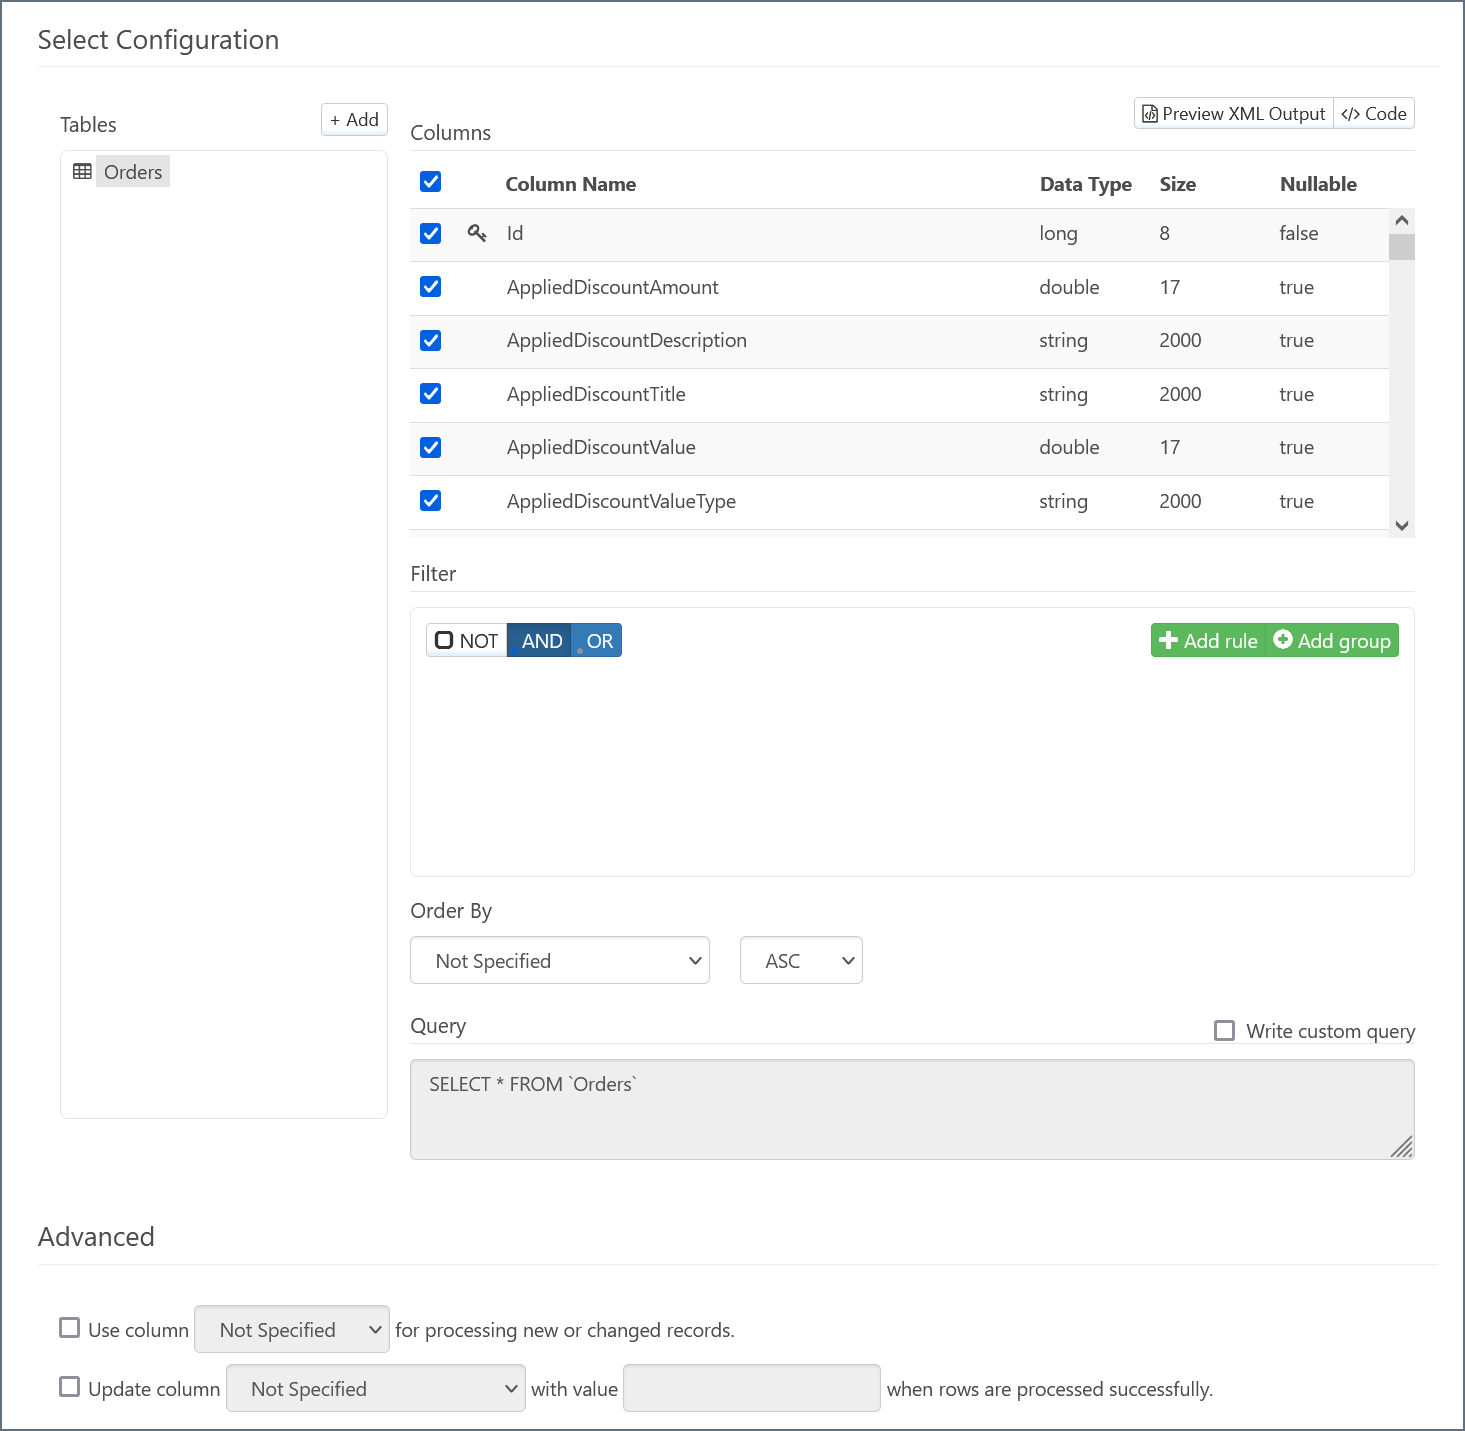
    <p>The chosen table appears under the <strong>Tables</strong> pane, and the columns in the table appear under the <strong>Columns</strong> pane. The connector automatically detects values that have special relevance (such as the primary key, foreign keys, etc.) and labels them accordingly.</p>

    <img src="/public/images/dbsa_select_columns.png" width="800" />

    <p>By default, all columns are selected for inclusion in the action for the {datasource} connector. Exclude individual columns by unchecking them.</p>

    <Note>You can select more tables by clicking <strong>Add</strong> and repeating this process. See <a href={connectorSlug ? `/26.2/self-hosted/en/connectors/${connectorSlug}/${connectorSlug}-ac#child-tables` : "#child-tables"}>Child Tables</a> for more information.</Note>
  </>;

export const DbasaSelectIntro = ({datasource = "the data source", siteName = "CData Arc"}) => <p>The Select action retrieves data from {datasource} and brings it into {siteName}.</p>;

<DbasaSelectIntro datasource="Shopify" />

## Tables and Columns

<DbasaSelectTablesAndColumns datasource="Shopify" connectorSlug="shopify" />

### Filters

<DbasaSelectFilters />

#### Creating a Filter Rule

<DbasaSelectFilterRule />

#### Filter Groups

<DbasaSelectFilterGroups />

### Advanced Settings

<DbasaSelectAdvancedSettings />

### Selecting from Multiple Tables

<DbasaSelectMultipleTables datasource="Shopify" connectorSlug="shopify" />

## Example Arc Flow

<DbasaSelectExampleFlow datasource="Shopify" />