> ## Documentation Index
> Fetch the complete documentation index at: https://docs.arc.cdata.com/llms.txt
> Use this file to discover all available pages before exploring further.
# Using the Condition Editor
> How to use the Condition Editor in CData Arc to add conditional logic to destination nodes in mappings.
export const siteNameShort = "Arc";
The **Condition Mapping Editor** supports adding conditions to destination nodes so that they are only included in the output document if the condition is true. The editor also enables you to set the value of a destination node based on values from the source. You can build complex conditions by adding individual rules and/or groups of rules, then specifying what action the mapping should take when the condition is satisfied.
To open the editor, hover over a node in the destination document and click the filter  icon.
icon.
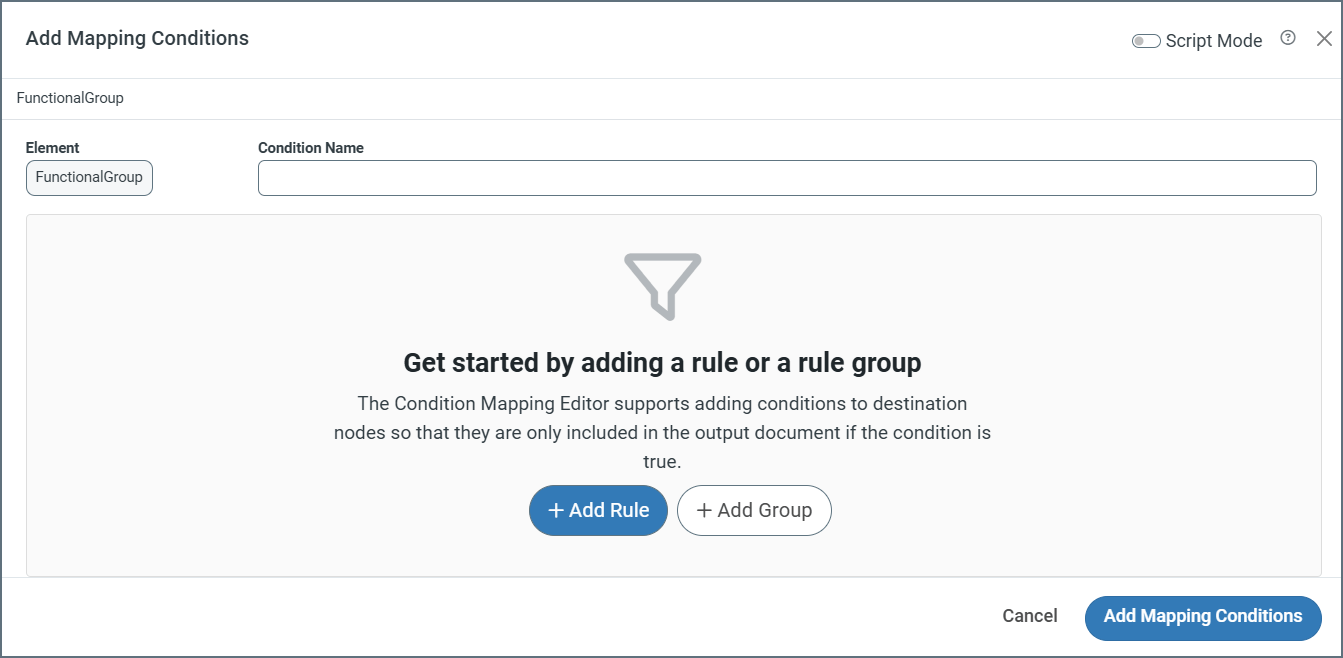 Give the condition a name, then click **Add Rule** or **Add Group**.
When you build your rules, use the dropdowns to make your selections. You can choose from the following:
* Input XML
* Value: The value at the XPath being evaluated
* Data Type: The data type of the value (String, Number, DateTime)
* Message Header
* Value: The value of the message header being evaluated
* Data Type: The data type of the value (String, Number, DateTime)
* Occurrences: The number of times the XPath occurs in the document
* Index: The index representing the current iteration of the Foreach loop that is being evaluated
* Variable
* Value: The value of the variable being evaluated
* Data Type: The data type of the value (String, Number, DateTime)
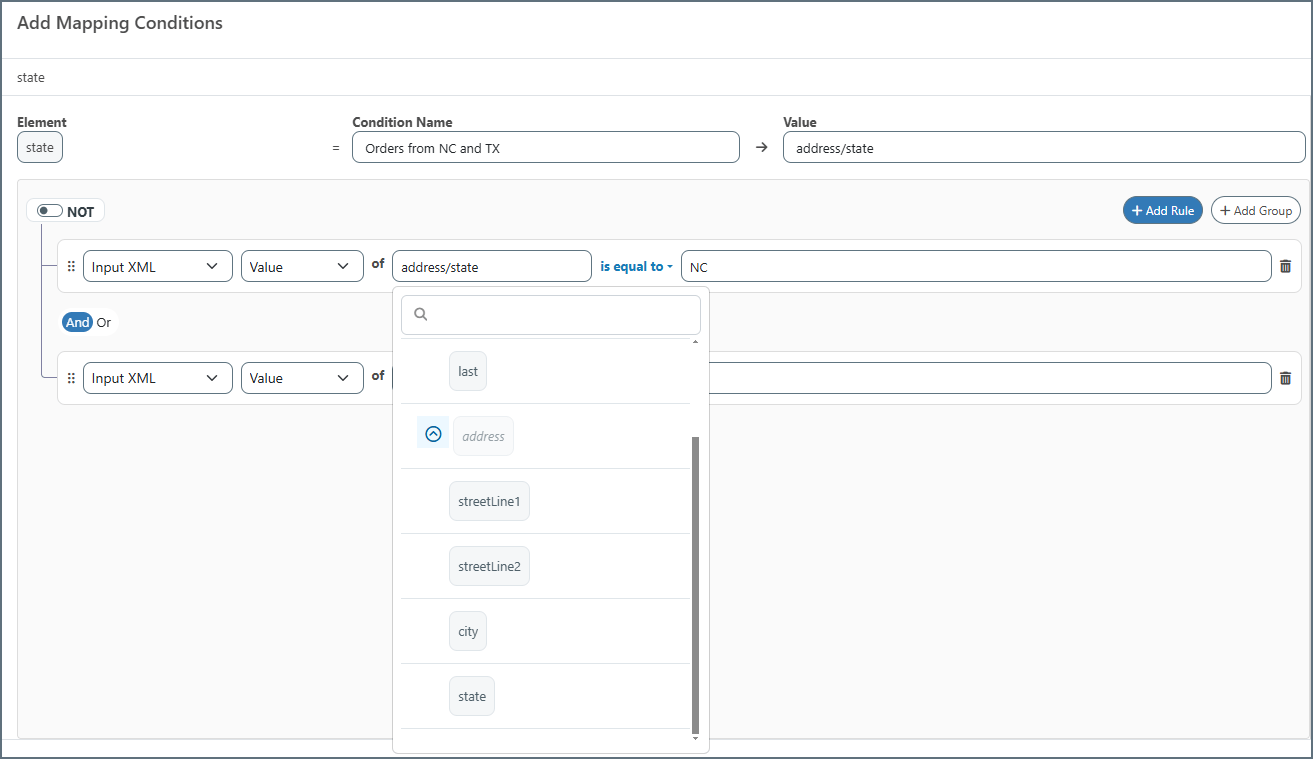
When you select an XPath for a condition, the editor displays a tree representation of the document so you can easily find the XPath you need, as shown in the image below.
Give the condition a name, then click **Add Rule** or **Add Group**.
When you build your rules, use the dropdowns to make your selections. You can choose from the following:
* Input XML
* Value: The value at the XPath being evaluated
* Data Type: The data type of the value (String, Number, DateTime)
* Message Header
* Value: The value of the message header being evaluated
* Data Type: The data type of the value (String, Number, DateTime)
* Occurrences: The number of times the XPath occurs in the document
* Index: The index representing the current iteration of the Foreach loop that is being evaluated
* Variable
* Value: The value of the variable being evaluated
* Data Type: The data type of the value (String, Number, DateTime)
When you select an XPath for a condition, the editor displays a tree representation of the document so you can easily find the XPath you need, as shown in the image below.
 You can reorder rules and groups. Click the handle
  and drag the object to a new location.
When you have completed defining the condition, use the text box to the right of the operator to specify what should happen when the condition is satisfied.
Choose a status of:
* Success
* Warning
* Error
Check **Send a Notification** and complete the **To** and **Subject** fields to send an email about the status of the condition.
Click **Configure Alerts** to open a new browser tab where you can set the **Email Settings** on the **Alerts** tab of the **Settings** page. If these have not been configured correctly, email notification fails.
Finally, use the **Else** section of the text box to specify what should happen when the condition isn't satisfied.
and drag the object to a new location.
When you have completed defining the condition, use the text box to the right of the operator to specify what should happen when the condition is satisfied.
Choose a status of:
* Success
* Warning
* Error
Check **Send a Notification** and complete the **To** and **Subject** fields to send an email about the status of the condition.
Click **Configure Alerts** to open a new browser tab where you can set the **Email Settings** on the **Alerts** tab of the **Settings** page. If these have not been configured correctly, email notification fails.
Finally, use the **Else** section of the text box to specify what should happen when the condition isn't satisfied.
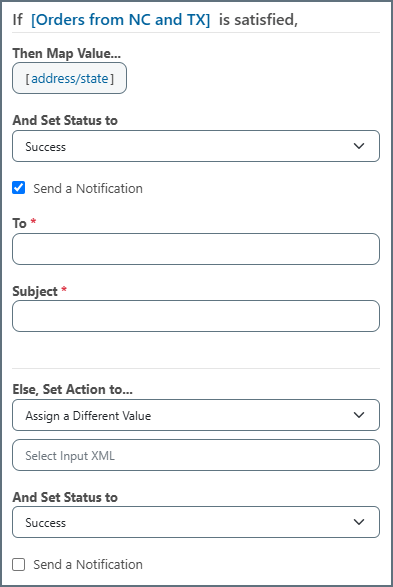 Use the **Else, Set Action to** dropdown to choose whether to:
* **Exclude Element** from the mapping altogether
* **Map Value** to map the value anyway
* **Assign a Different Value** to assign a different value (defined as an expression or custom script once you save the condition)
The status and notification options work in the same way as the top section.
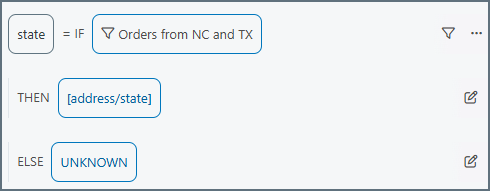
When you save the condition, it appears in the mapping editor and behaves in the same way as any other leaf node in the mapping. You can drag-and-drop an element from the source side, write expressions or custom scripts for it, etc.
Use the **Else, Set Action to** dropdown to choose whether to:
* **Exclude Element** from the mapping altogether
* **Map Value** to map the value anyway
* **Assign a Different Value** to assign a different value (defined as an expression or custom script once you save the condition)
The status and notification options work in the same way as the top section.
When you save the condition, it appears in the mapping editor and behaves in the same way as any other leaf node in the mapping. You can drag-and-drop an element from the source side, write expressions or custom scripts for it, etc.
 Conditional logic can also be accomplished using lookahead syntax. Parent elements are often qualified by a child element that provides context to the values inside the parent. In these cases it might be easier to use lookahead syntax rather than create multiple conditions to exclude unwanted values. See [Lookahead](./mapping-node-value-editor#lookahead) for more details on using lookahead syntax.
## Script Mode
You can use {siteNameShort}Script syntax to specify custom conditions by toggling on the Script Mode toggle in the upper right corner.
### Script Mode in Mapping Conditions
Once you toggle script mode on, use the window to write your custom conditions, then use the right side of the page in the same way as described above to:
* Set the status of the message
* Send notifications
* Add *Else* conditions to your mapping, including excluding elements from the mapping if the condition is not met
Conditional logic can also be accomplished using lookahead syntax. Parent elements are often qualified by a child element that provides context to the values inside the parent. In these cases it might be easier to use lookahead syntax rather than create multiple conditions to exclude unwanted values. See [Lookahead](./mapping-node-value-editor#lookahead) for more details on using lookahead syntax.
## Script Mode
You can use {siteNameShort}Script syntax to specify custom conditions by toggling on the Script Mode toggle in the upper right corner.
### Script Mode in Mapping Conditions
Once you toggle script mode on, use the window to write your custom conditions, then use the right side of the page in the same way as described above to:
* Set the status of the message
* Send notifications
* Add *Else* conditions to your mapping, including excluding elements from the mapping if the condition is not met
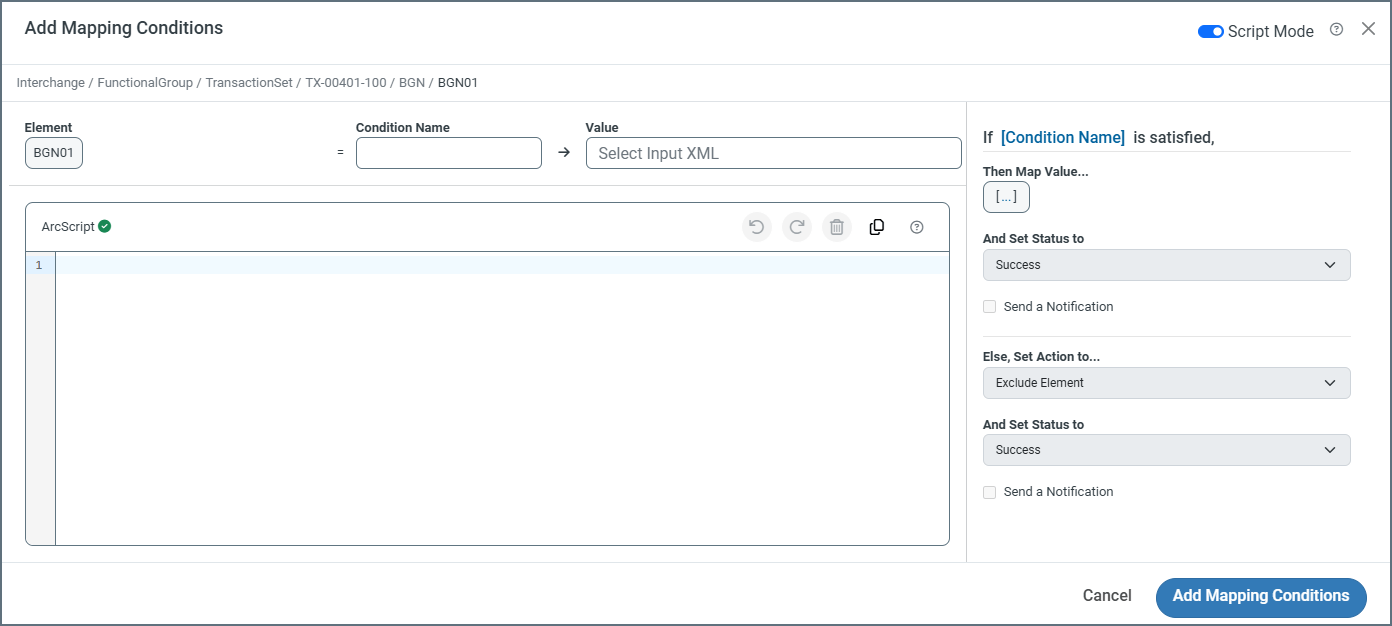 * The editor validates your condition as you type. If you see an **Invalid Condition** message, you have some sort of syntax issue that must be resolved.
* If you create an {siteNameShort}Script condition that cannot be rendered in the designer, when you switch back to designer mode you are warned that {siteNameShort} cannot render this configuration in designer mode. If you switch to the designer mode you lose all changes to the existing configuration.
One common use of the custom condition editor is to compare two dynamic values from the source document (instead of comparing a single dynamic value against a static value).
For example, you could use the following custom condition to see whether two values in the source XML are equal:
`'[xpath(element1)]' == '[xpath(data/element2)]'`
The single quotes in the example above are required.
You can also perform boolean logic in custom conditions by using {siteNameShort}Script formatters, as in the following example:
`[xpath(element1) | equals([xpath(data/element2])])]`
Notice that this syntax does not require single quotes.
See [Formatters](../scripting/value-formatters/formatters) for details on all of the {siteNameShort}Script's formatters.
* The editor validates your condition as you type. If you see an **Invalid Condition** message, you have some sort of syntax issue that must be resolved.
* If you create an {siteNameShort}Script condition that cannot be rendered in the designer, when you switch back to designer mode you are warned that {siteNameShort} cannot render this configuration in designer mode. If you switch to the designer mode you lose all changes to the existing configuration.
One common use of the custom condition editor is to compare two dynamic values from the source document (instead of comparing a single dynamic value against a static value).
For example, you could use the following custom condition to see whether two values in the source XML are equal:
`'[xpath(element1)]' == '[xpath(data/element2)]'`
The single quotes in the example above are required.
You can also perform boolean logic in custom conditions by using {siteNameShort}Script formatters, as in the following example:
`[xpath(element1) | equals([xpath(data/element2])])]`
Notice that this syntax does not require single quotes.
See [Formatters](../scripting/value-formatters/formatters) for details on all of the {siteNameShort}Script's formatters.